Setting Up First Kubernetes Cluster

Highlights
- Creating and deploying the simplest Kubernetes cluster
- Easiest way to deploy a cluster
- Learn basic terminology and how things work in Kubernetes.
Hey everyone, I have started 100 days of Kubernetes and recently switched writing to Hashnode. I am following along with anais urlich
So let's get started. Since this is our first deployment, let's start simple and easy. Now what is the simplest and easiest way to create and deploy a cluster?
It can have just one master node and one worker node, and that too within the same server or machine. This can be done through minikube or microk8s Both of these are easy to install; just click on the above link and you'll find official documentation for installing them.
Now where to install ???
I have tried installing them on both Windows and Linux through virtual platforms, but the easiest way I found was through WSL on Windows. This is just my opinion; you can try it on a virtual platform with a linux machine, but I'll be using Ubuntu on WSL. Installing WSL is also a breeze; I'll provide a link to install them, and you'll be up and running in seconds.
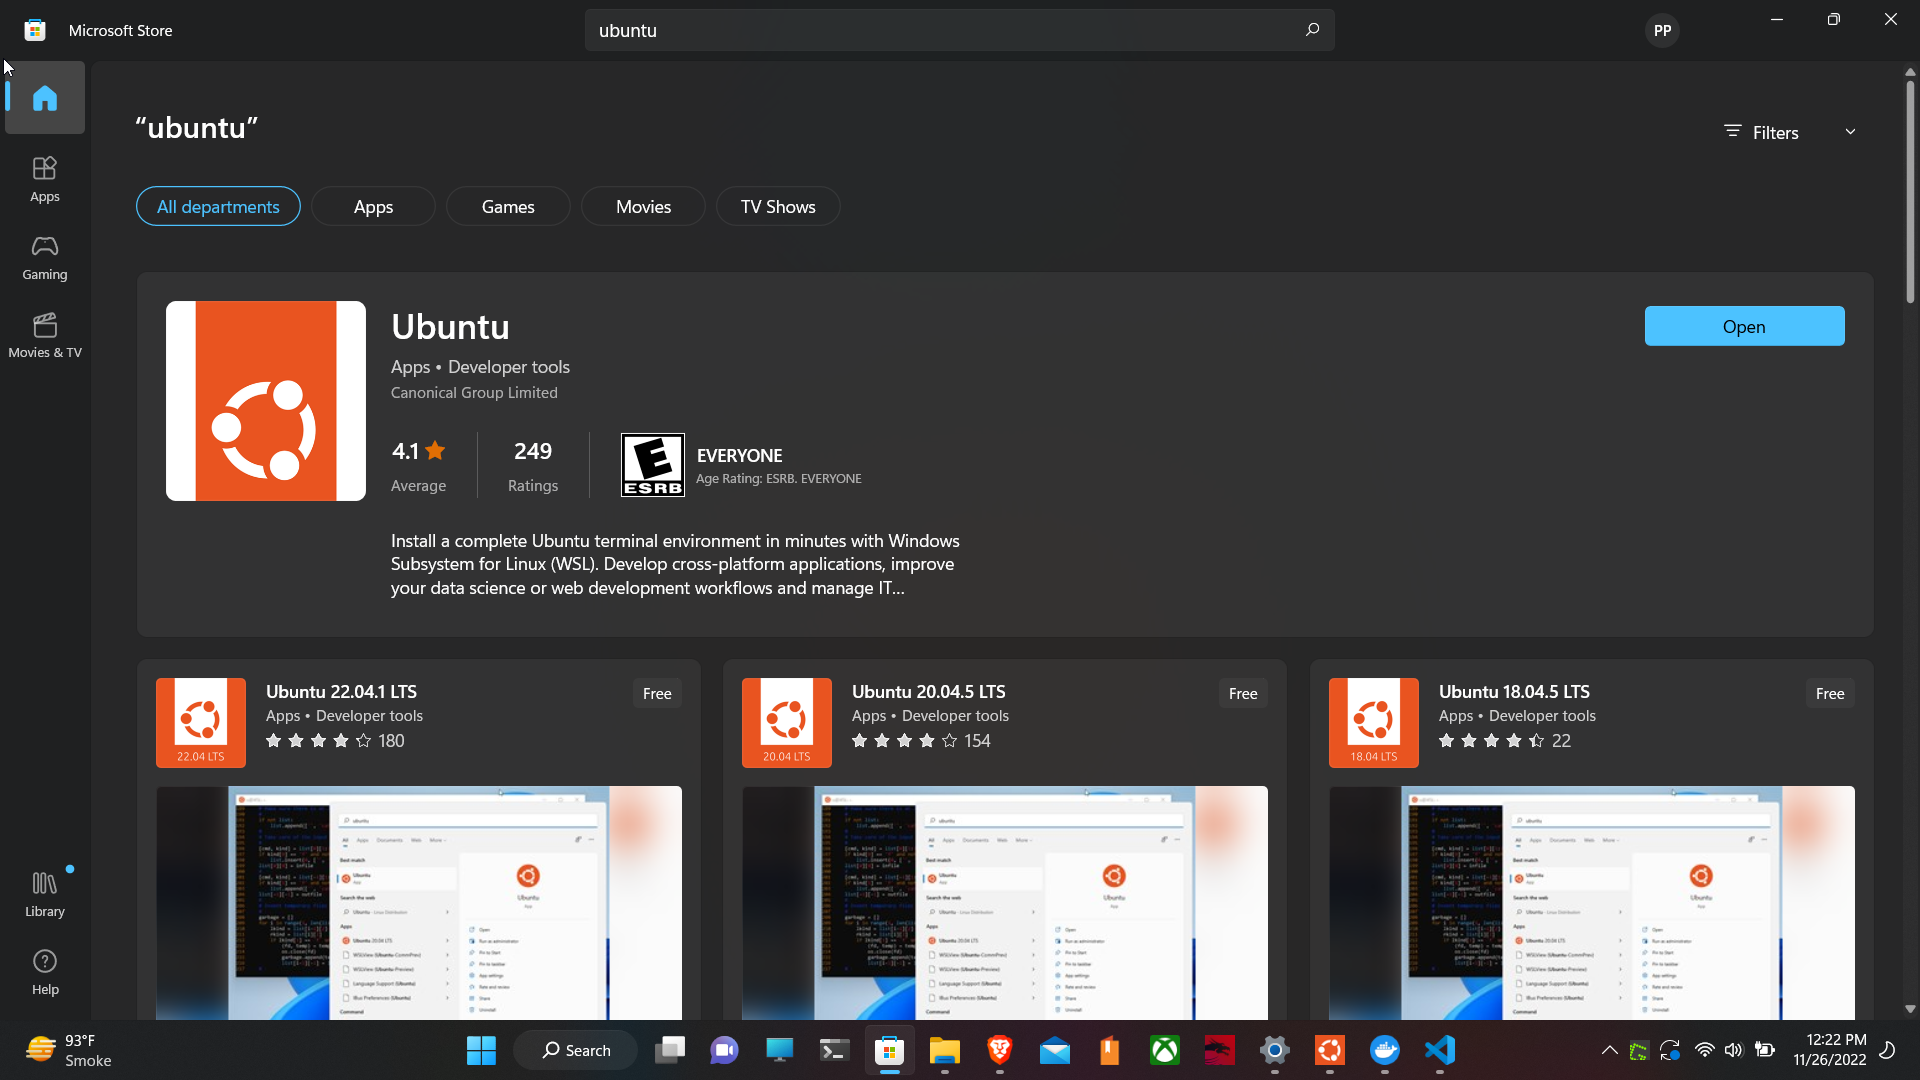
After installation, just go to the Microsoft Store and search for Ubuntu.
 Just give an update to your newly installed Ubuntu by
sudo apt update
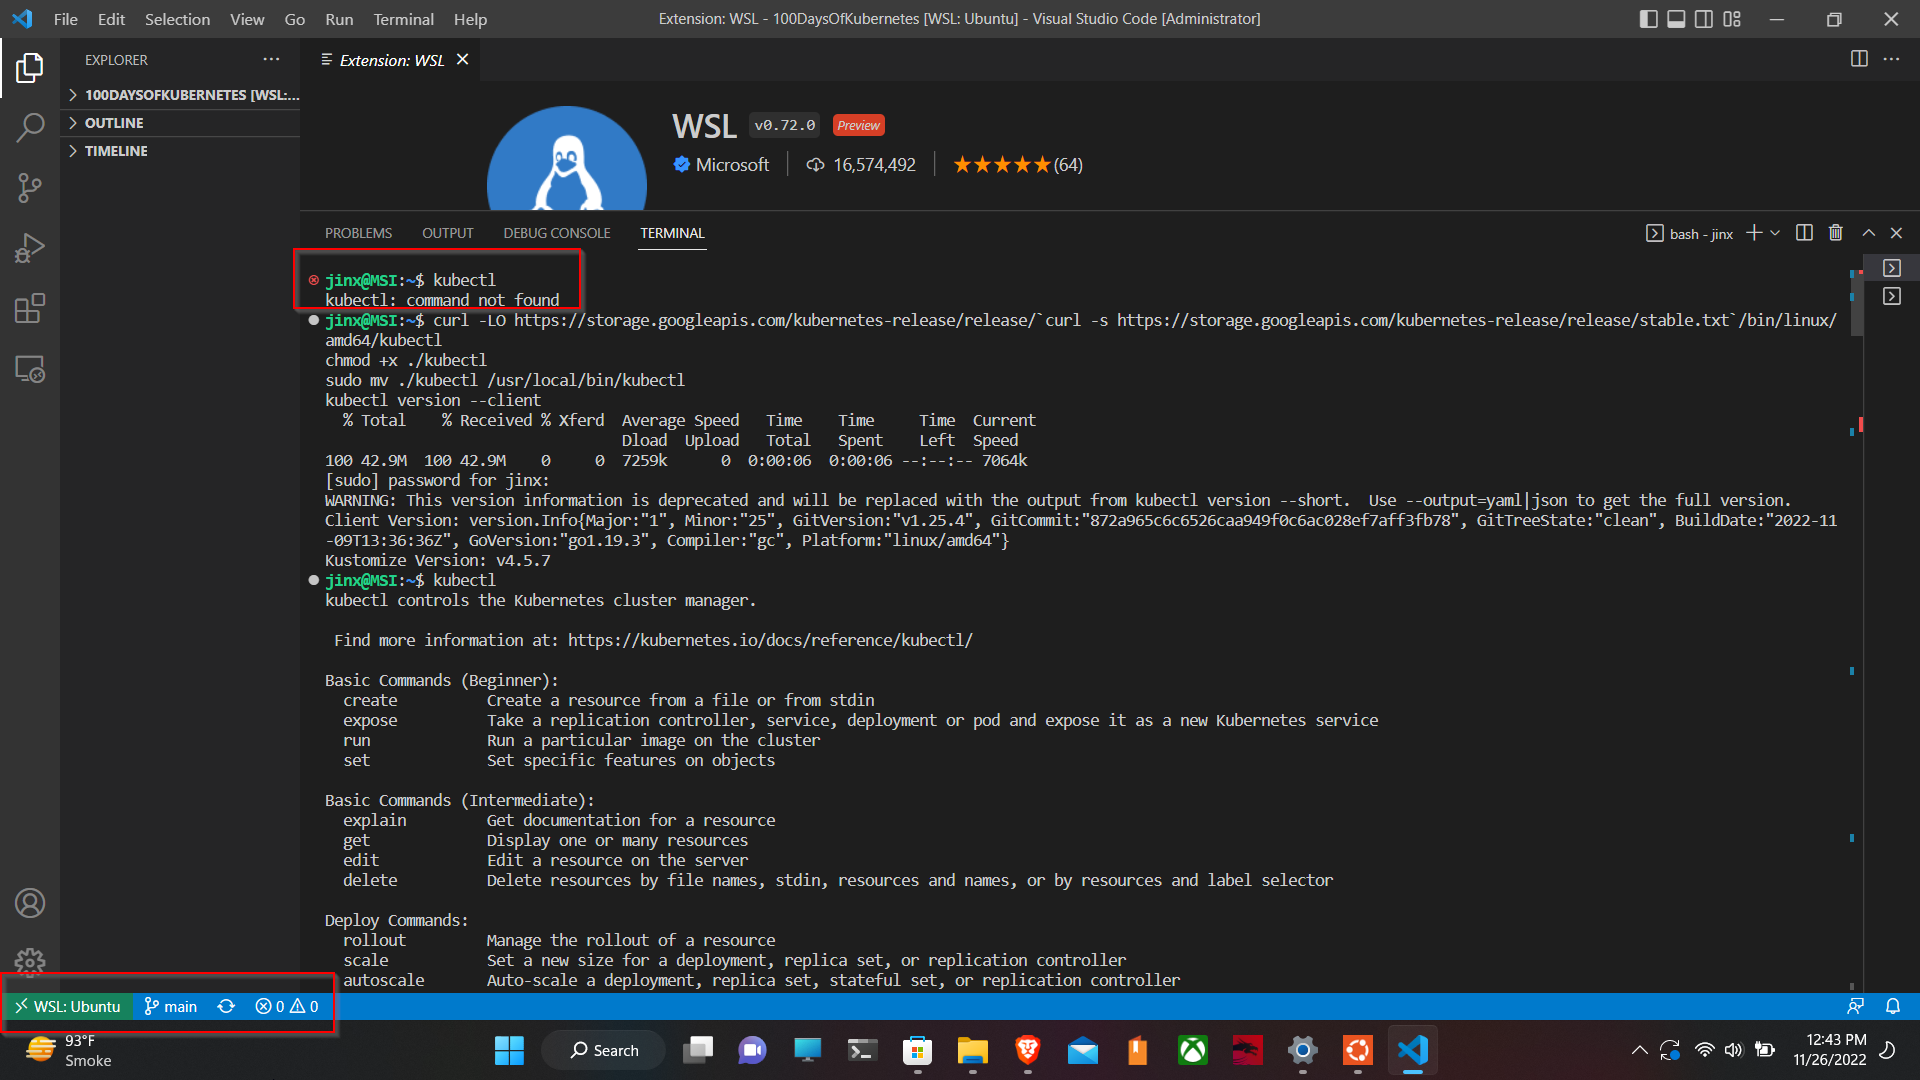
Now install Docker and the Kubernetes CLI, which is kubectl on Ubuntu. I found an easy guide for installing Kubectl on WSL. Install kubectl on wsl Do the following to install the Kubernetes cli, kubectl.
curl -LO https://storage.googleapis.com/kubernetes-release/release/`curl -s https://storage.googleapis.com/kubernetes-release/release/stable.txt`/bin/linux/amd64/kubectl
chmod +x ./kubectl
sudo mv ./kubectl /usr/local/bin/kubectl
kubectl version --client
Now if you want your visual studio code to automatically detect a WSDL platform and you want to run commands in Ubuntu through the visual studio code present in Windows, just go to the extensions in visual studio code and search WSDL.
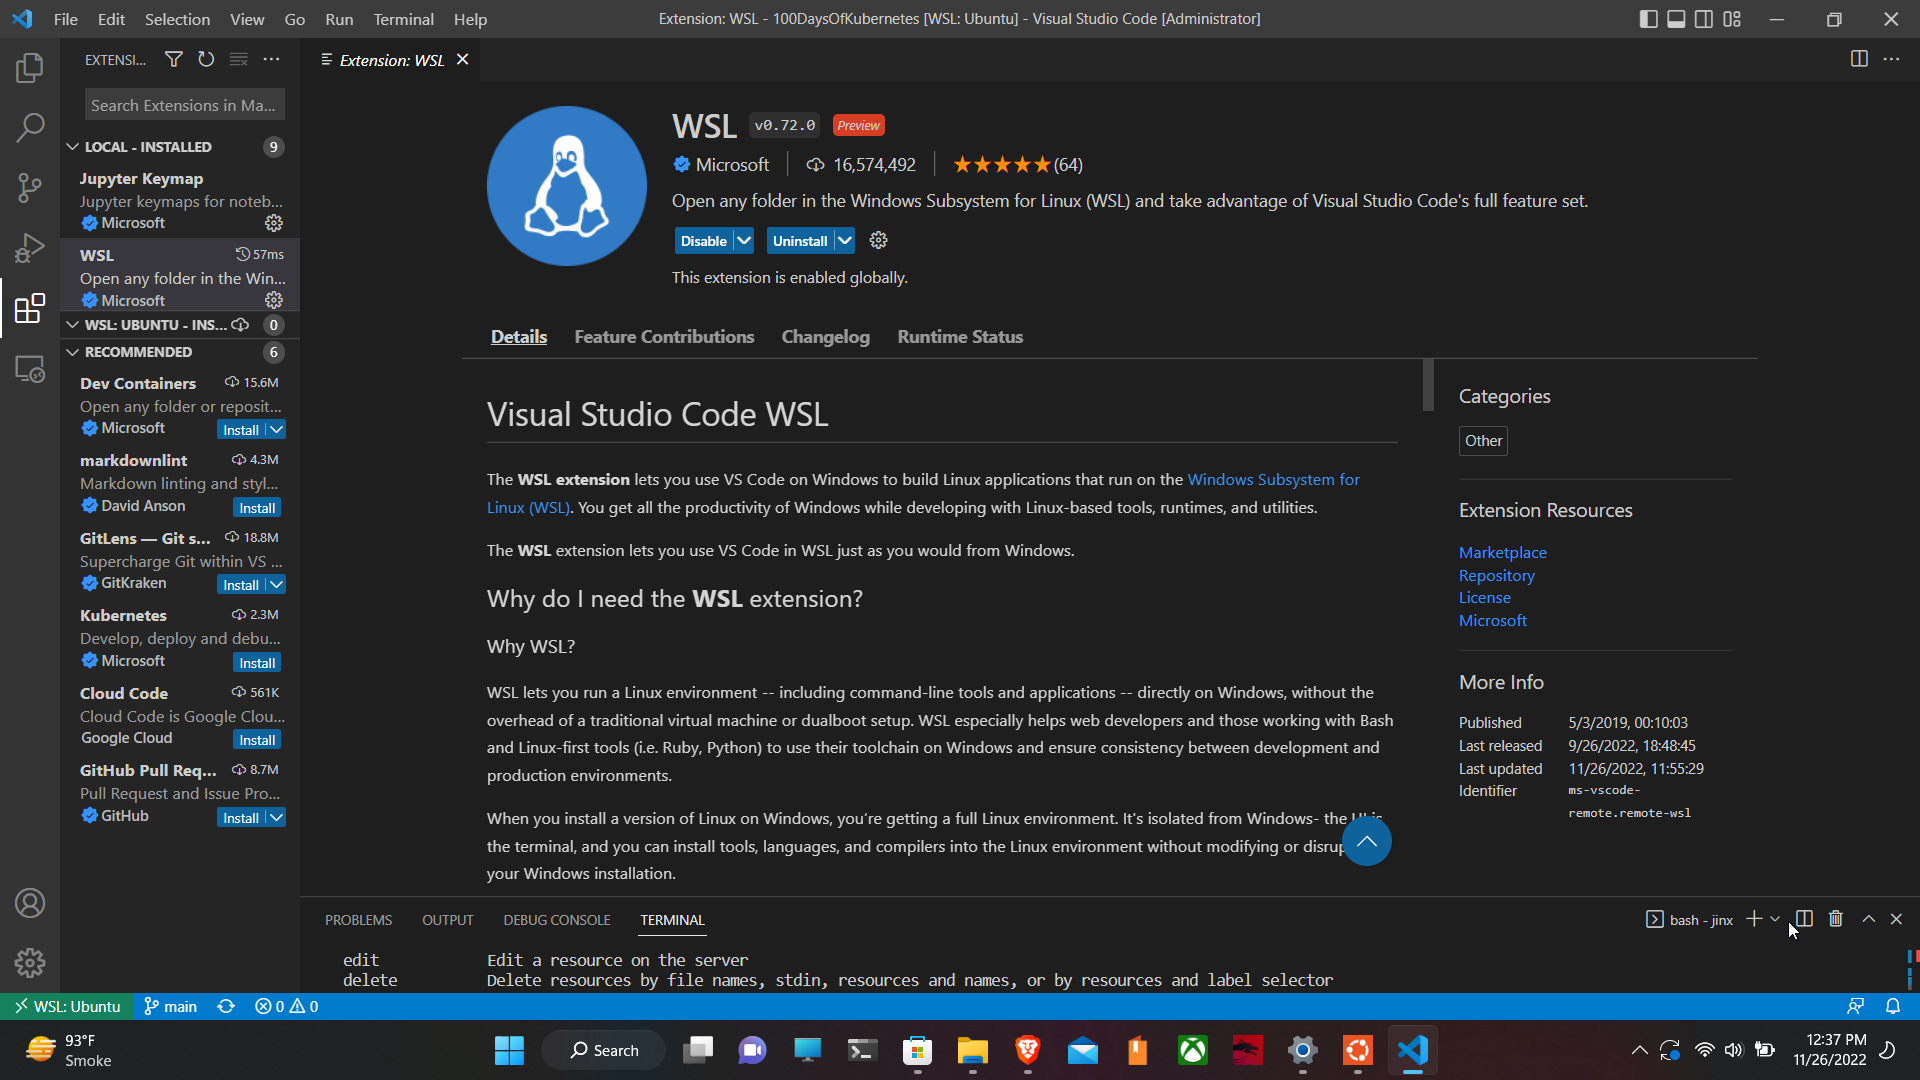
To confirm if Visual Studio has detected WSL,
Check out this image:
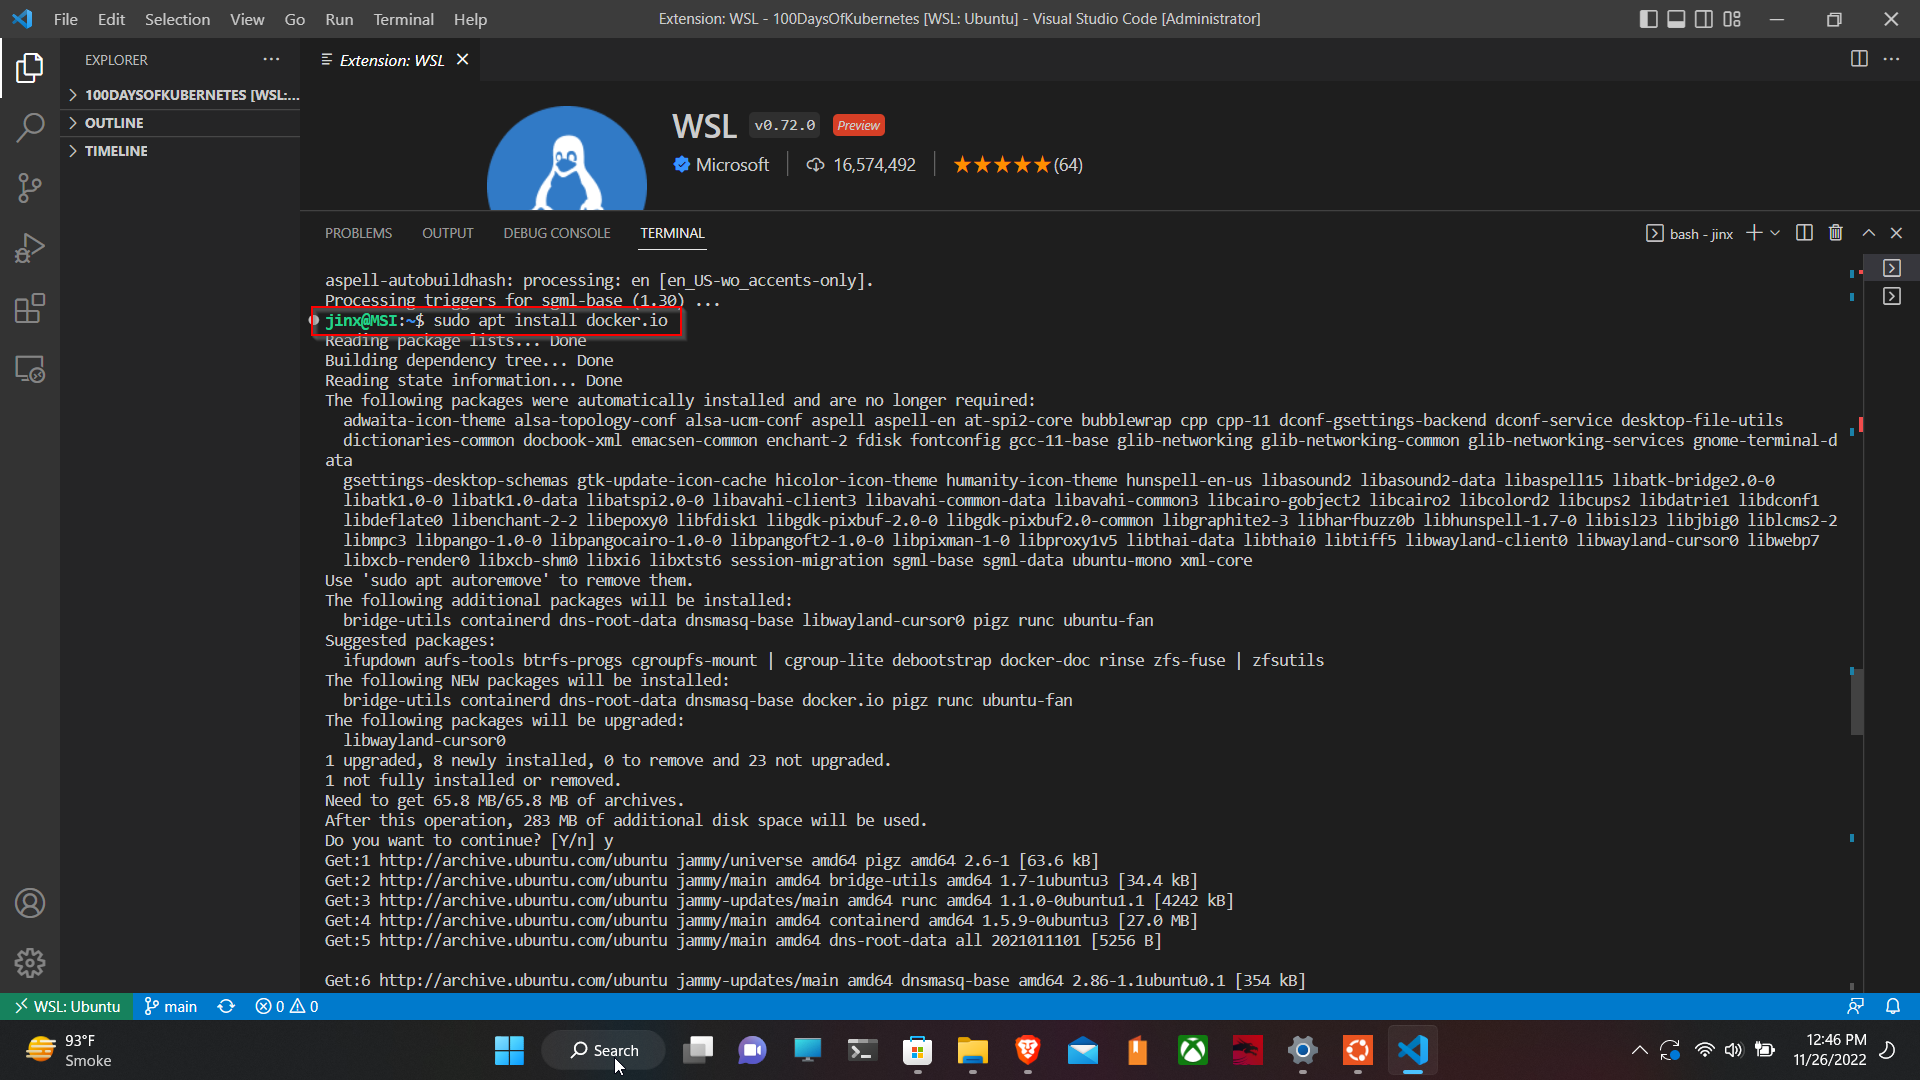
 Docker must now be installed on WSL.
sudo apt install docker.io
I will be using Minikube. You can install Minikube for Linux through the following snippet or through the official minikube installation page.
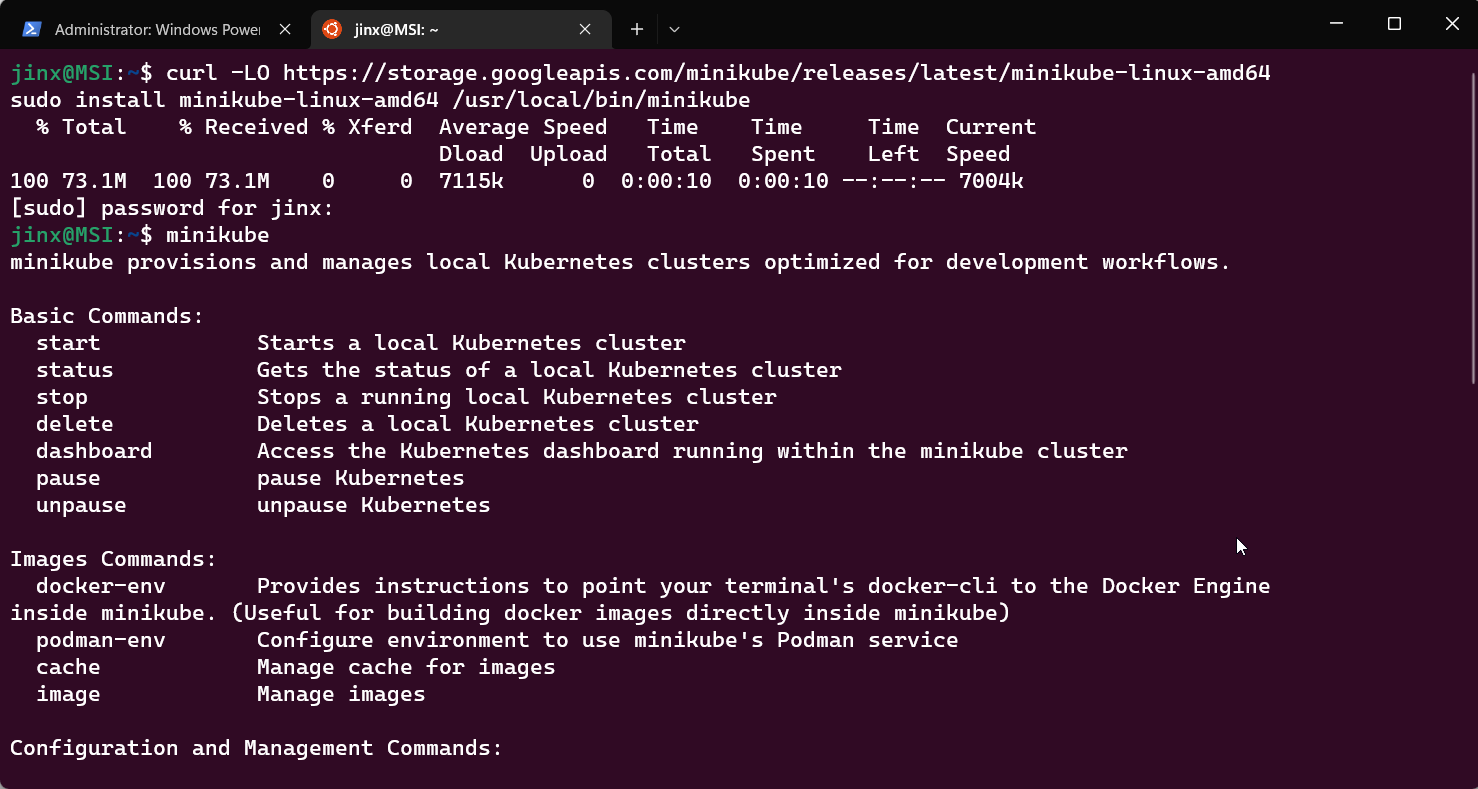
curl -LO https://storage.googleapis.com/minikube/releases/latest/minikube-linux-amd64
sudo install minikube-linux-amd64 /usr/local/bin/minikube
After installing Minikube, to start the cluster, just give the command
minikube start
But we get an error :(
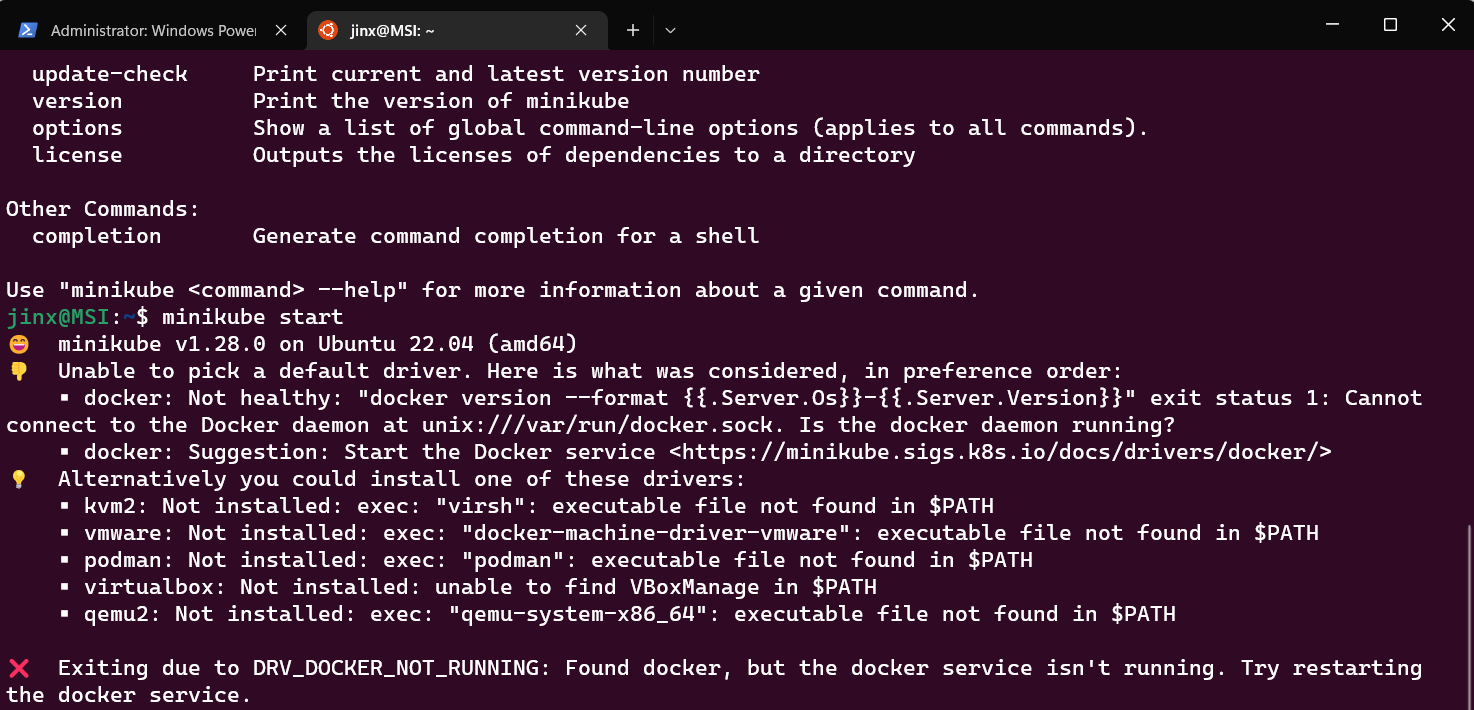 It says the docker service is not running
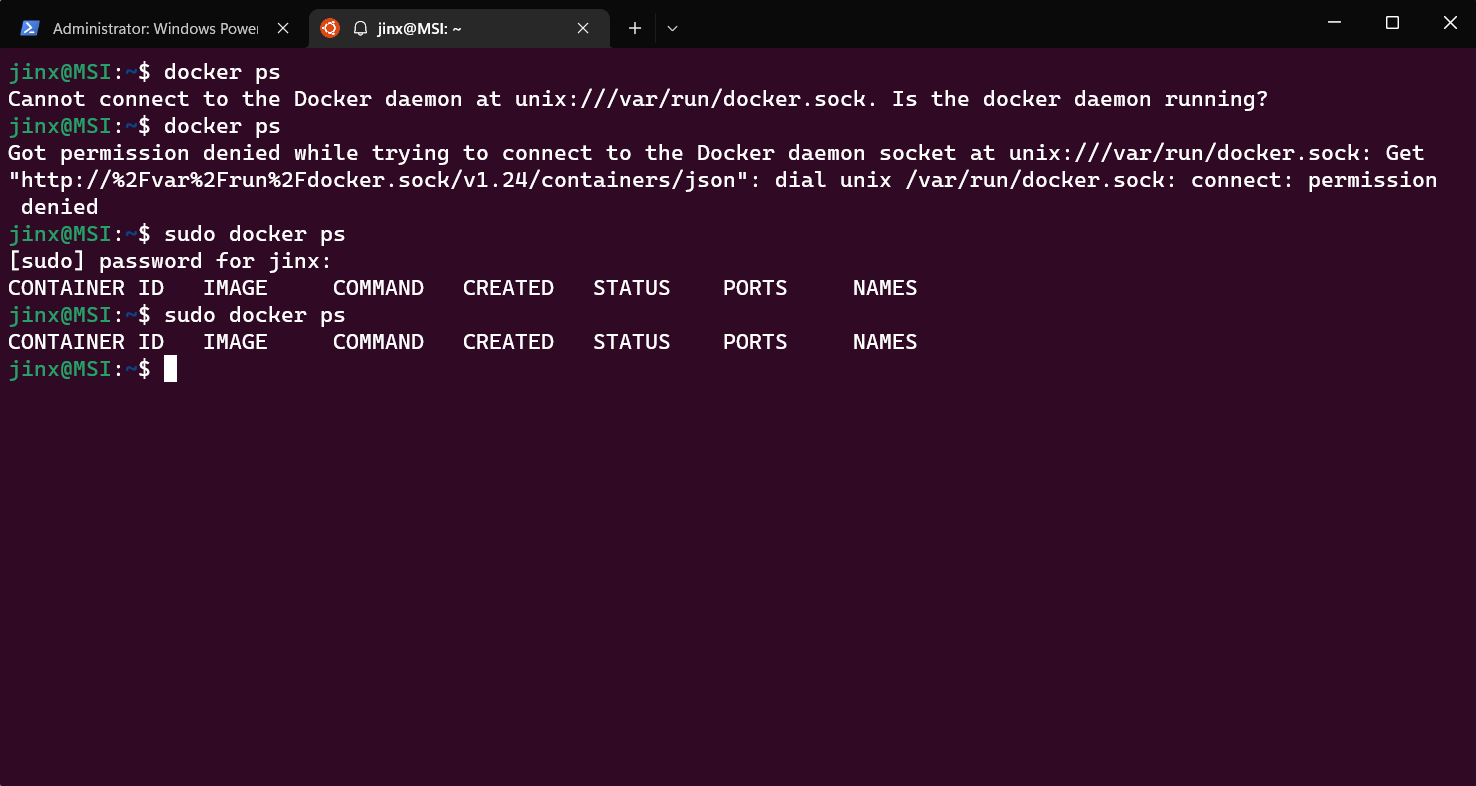
 So let's quickly fix this.
I tried restarting the Docker service, but it still didn't work; finally, I started Docker desktop on the main Windows machine, and when I switched back to the Ubuntu terminal, it worked perfectly.
So let's quickly fix this.
I tried restarting the Docker service, but it still didn't work; finally, I started Docker desktop on the main Windows machine, and when I switched back to the Ubuntu terminal, it worked perfectly.
I then attempted to start our Minikube cluster with a simple command.
minikube start
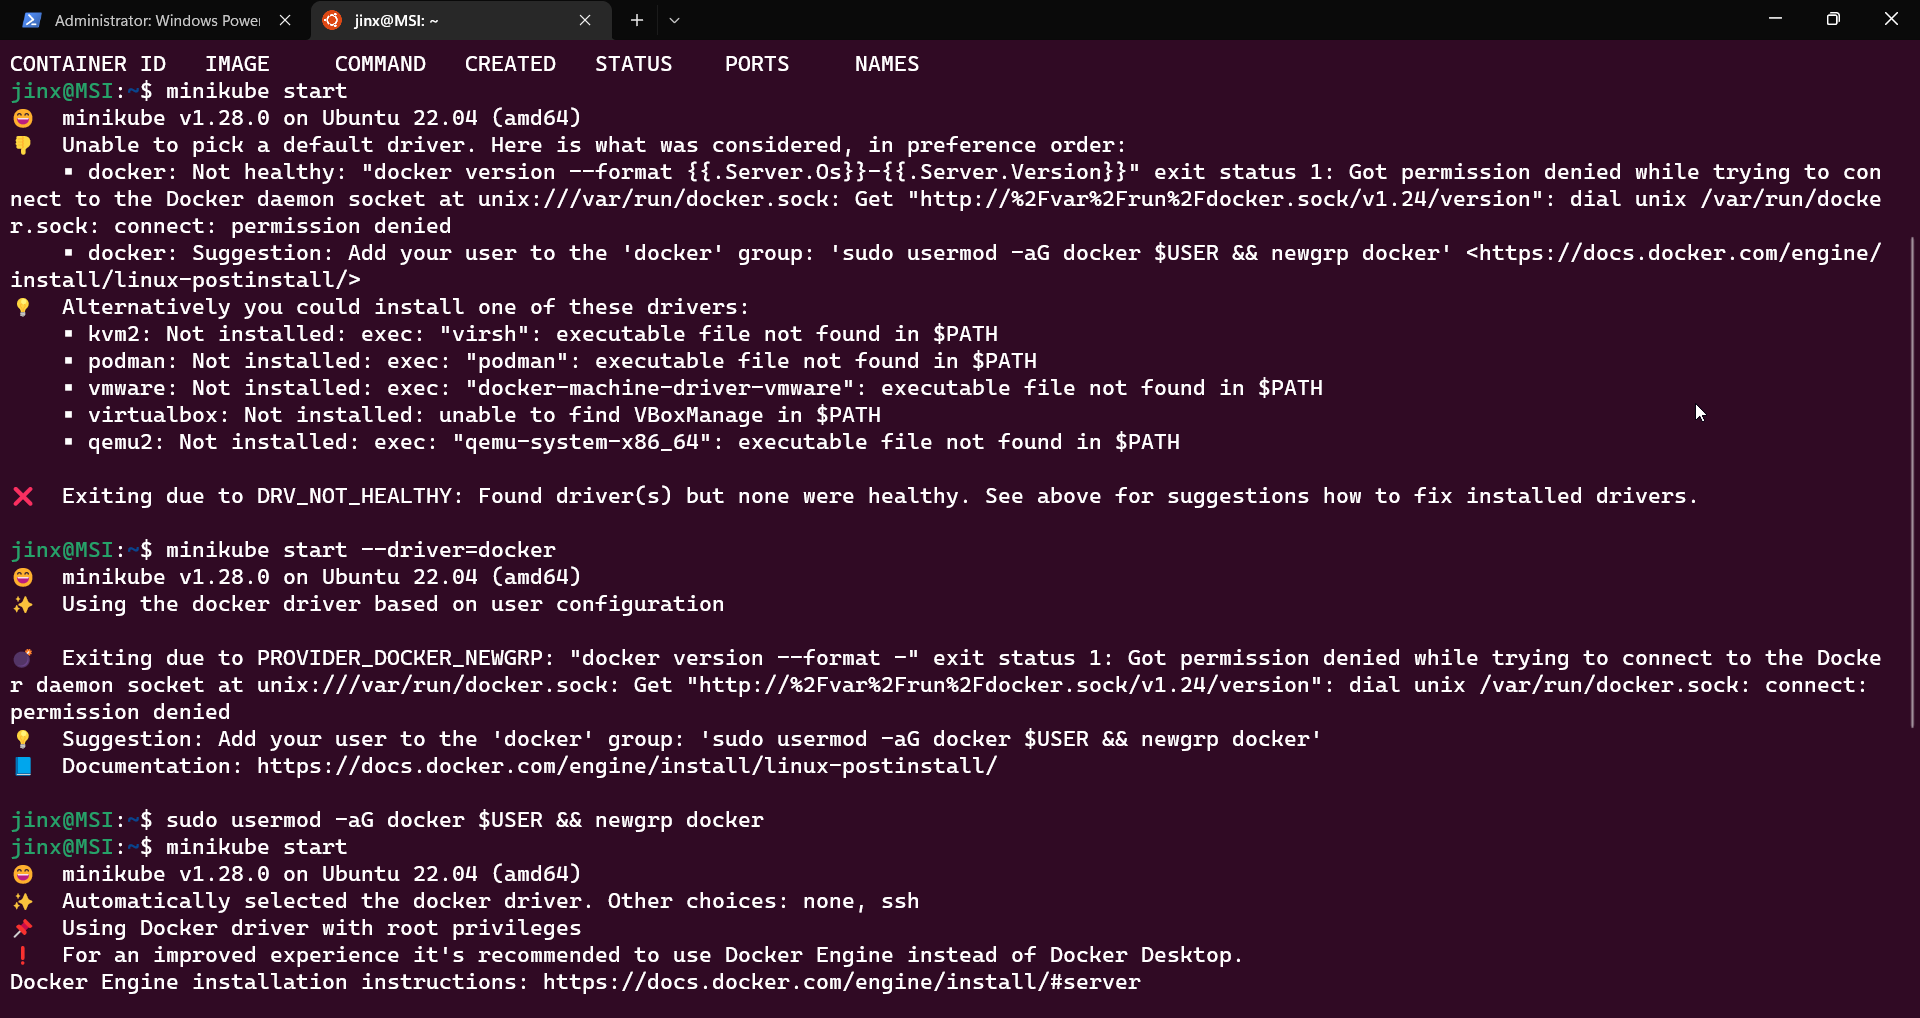 But I still got the error, so just follow the commands in the image and you'll be fine.
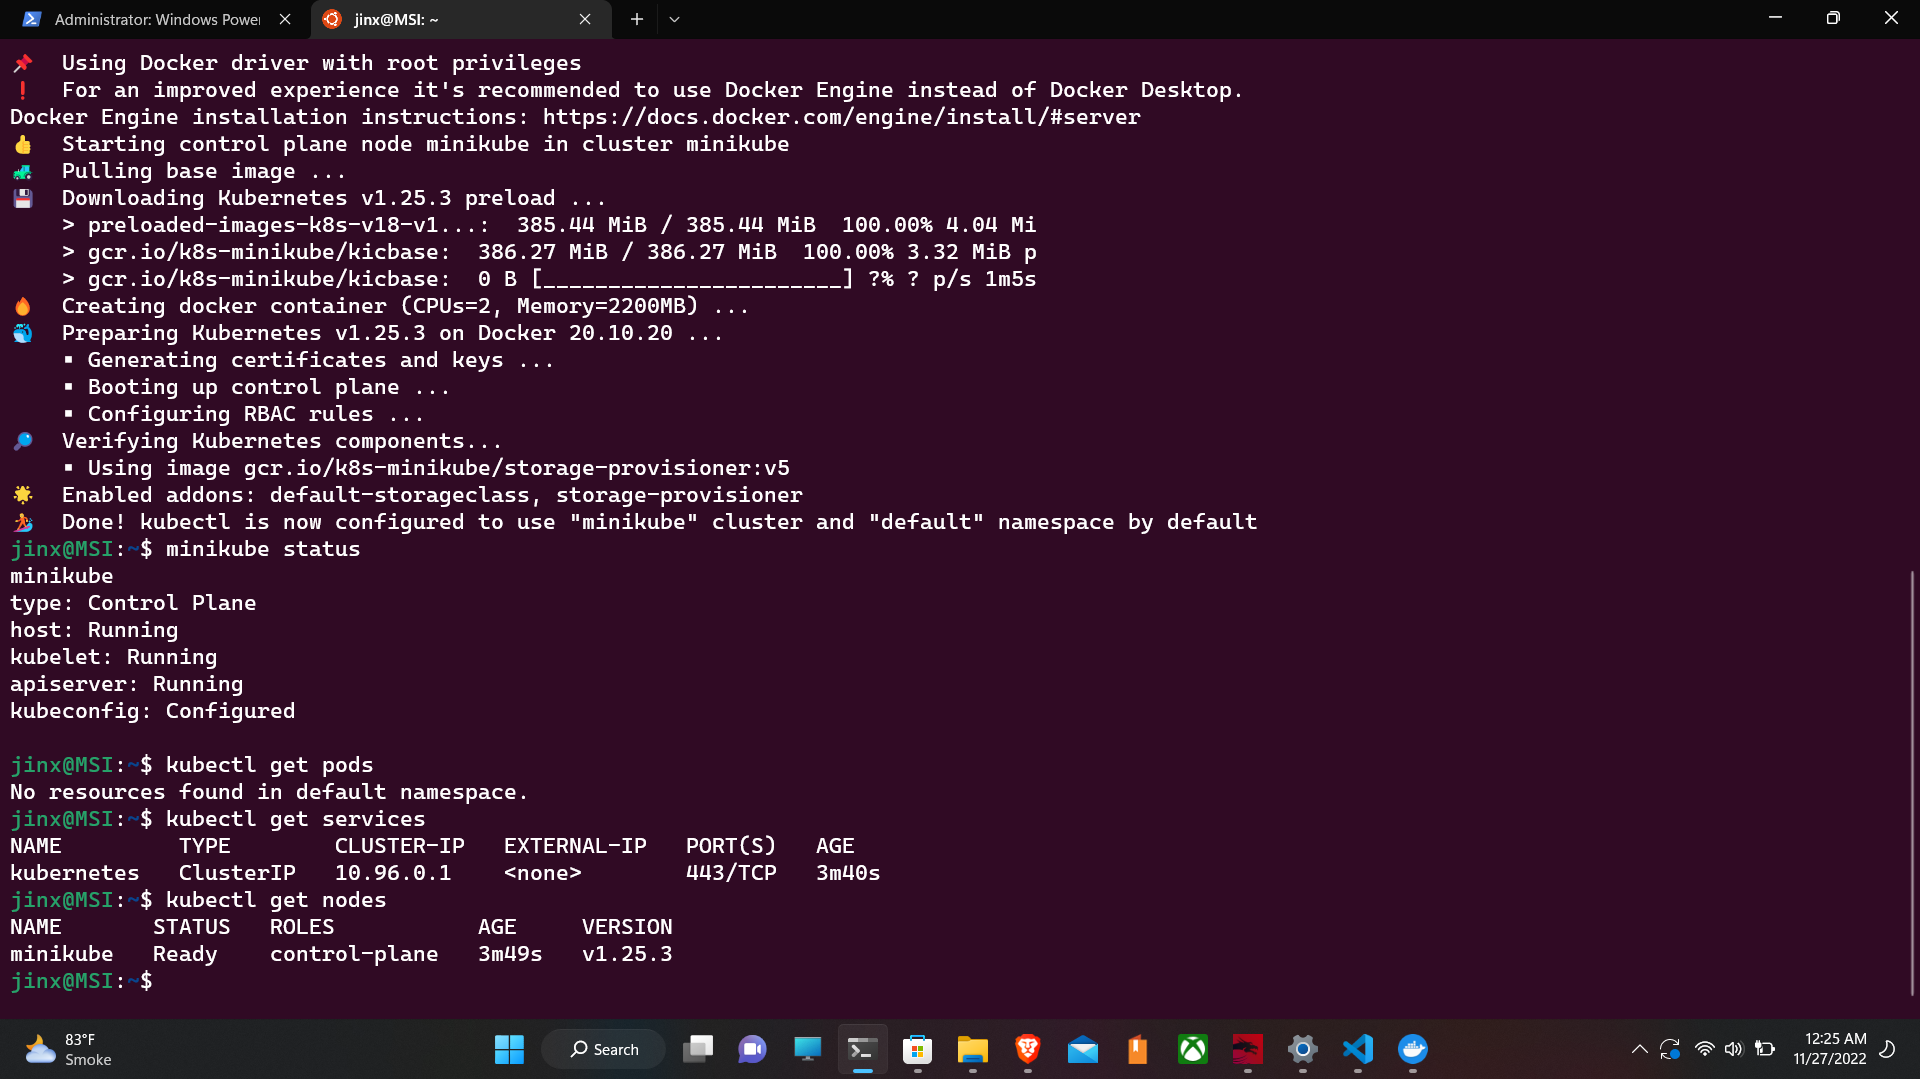
We finally started our minikube cluster.
But I still got the error, so just follow the commands in the image and you'll be fine.
We finally started our minikube cluster.

Now let's just play along with a few commands that will give us a picture of our Kubernetes cluster.
Next interesting thing to do would be to install k9s . This is a really cool tool to get a proper and easy view of our cluster. For me, the easiest way to install was through homebrew. You can find the command to install homebrew on the official page HomeBrew or you can just trust me and run following commands
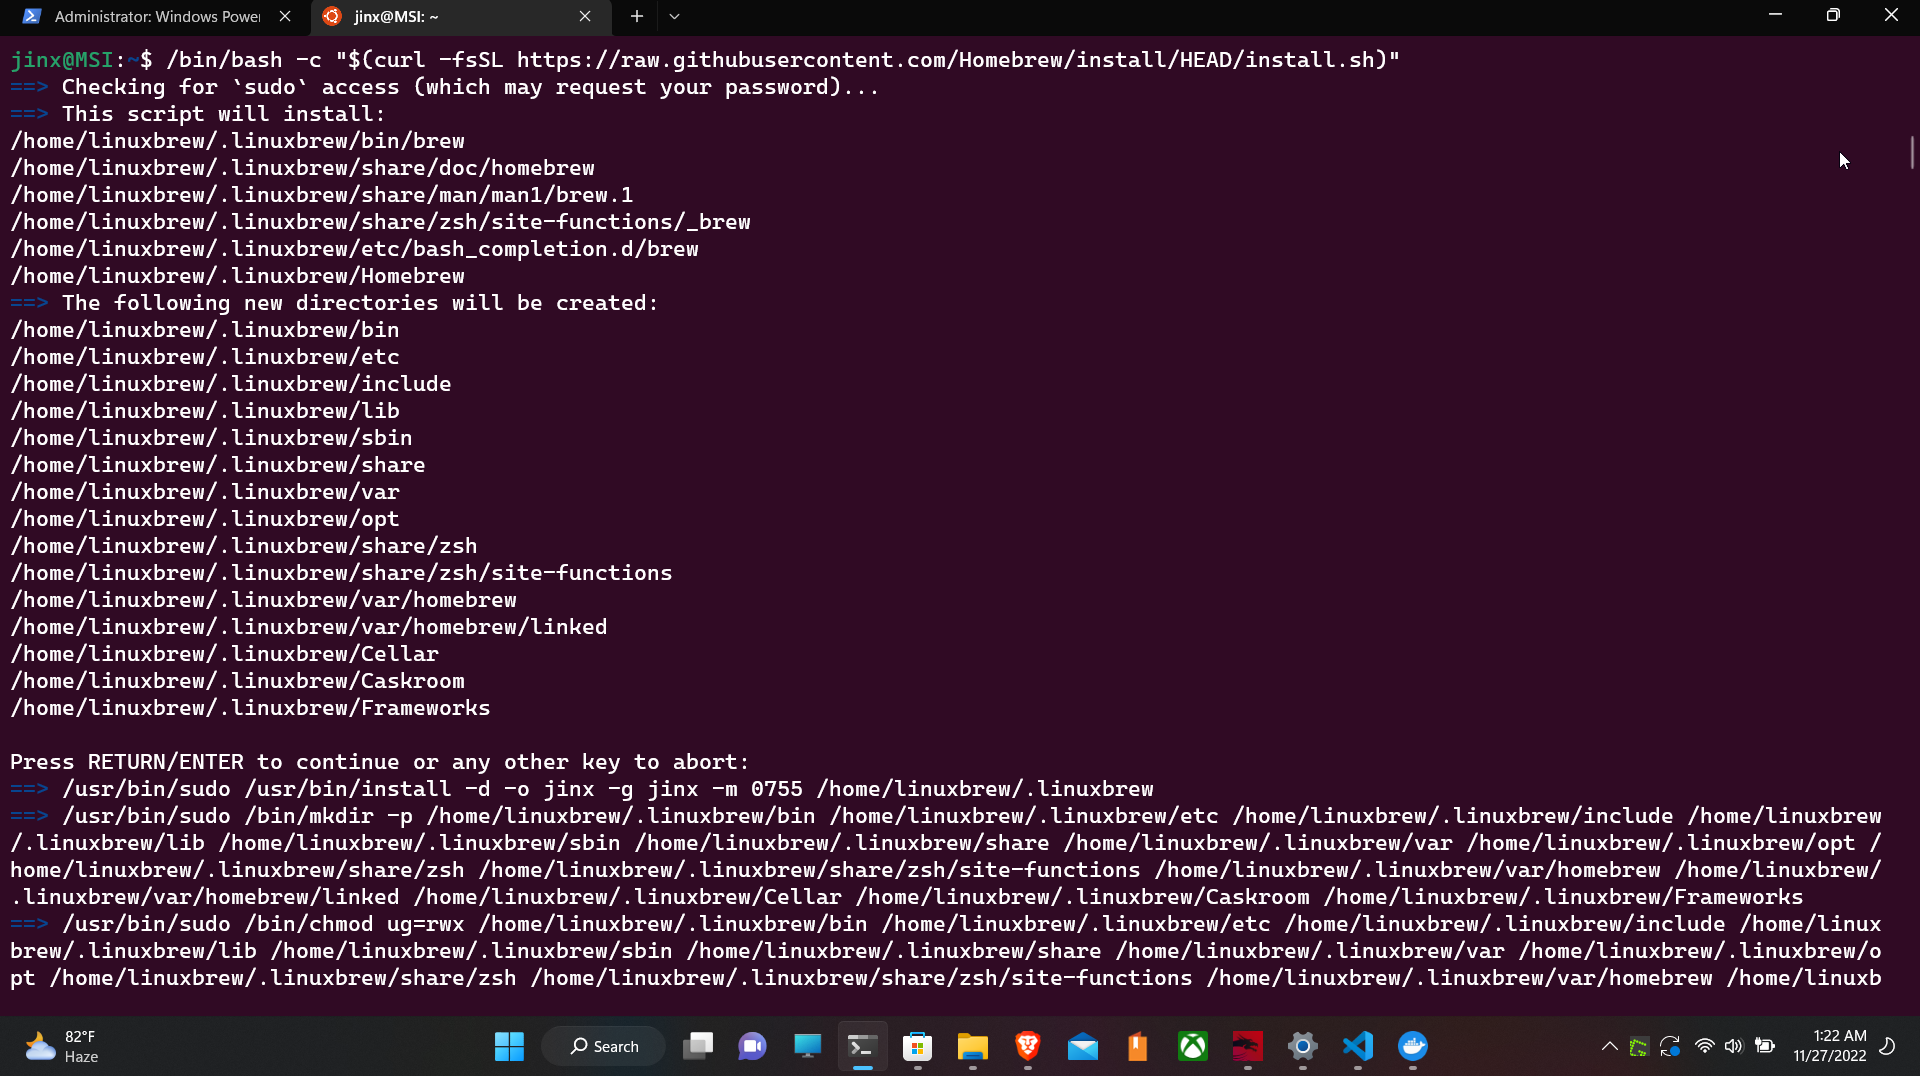
/bin/bash -c "$(curl -fsSL https://raw.githubusercontent.com/Homebrew/install/HEAD/install.sh)"
this will do its magic and install homebrew
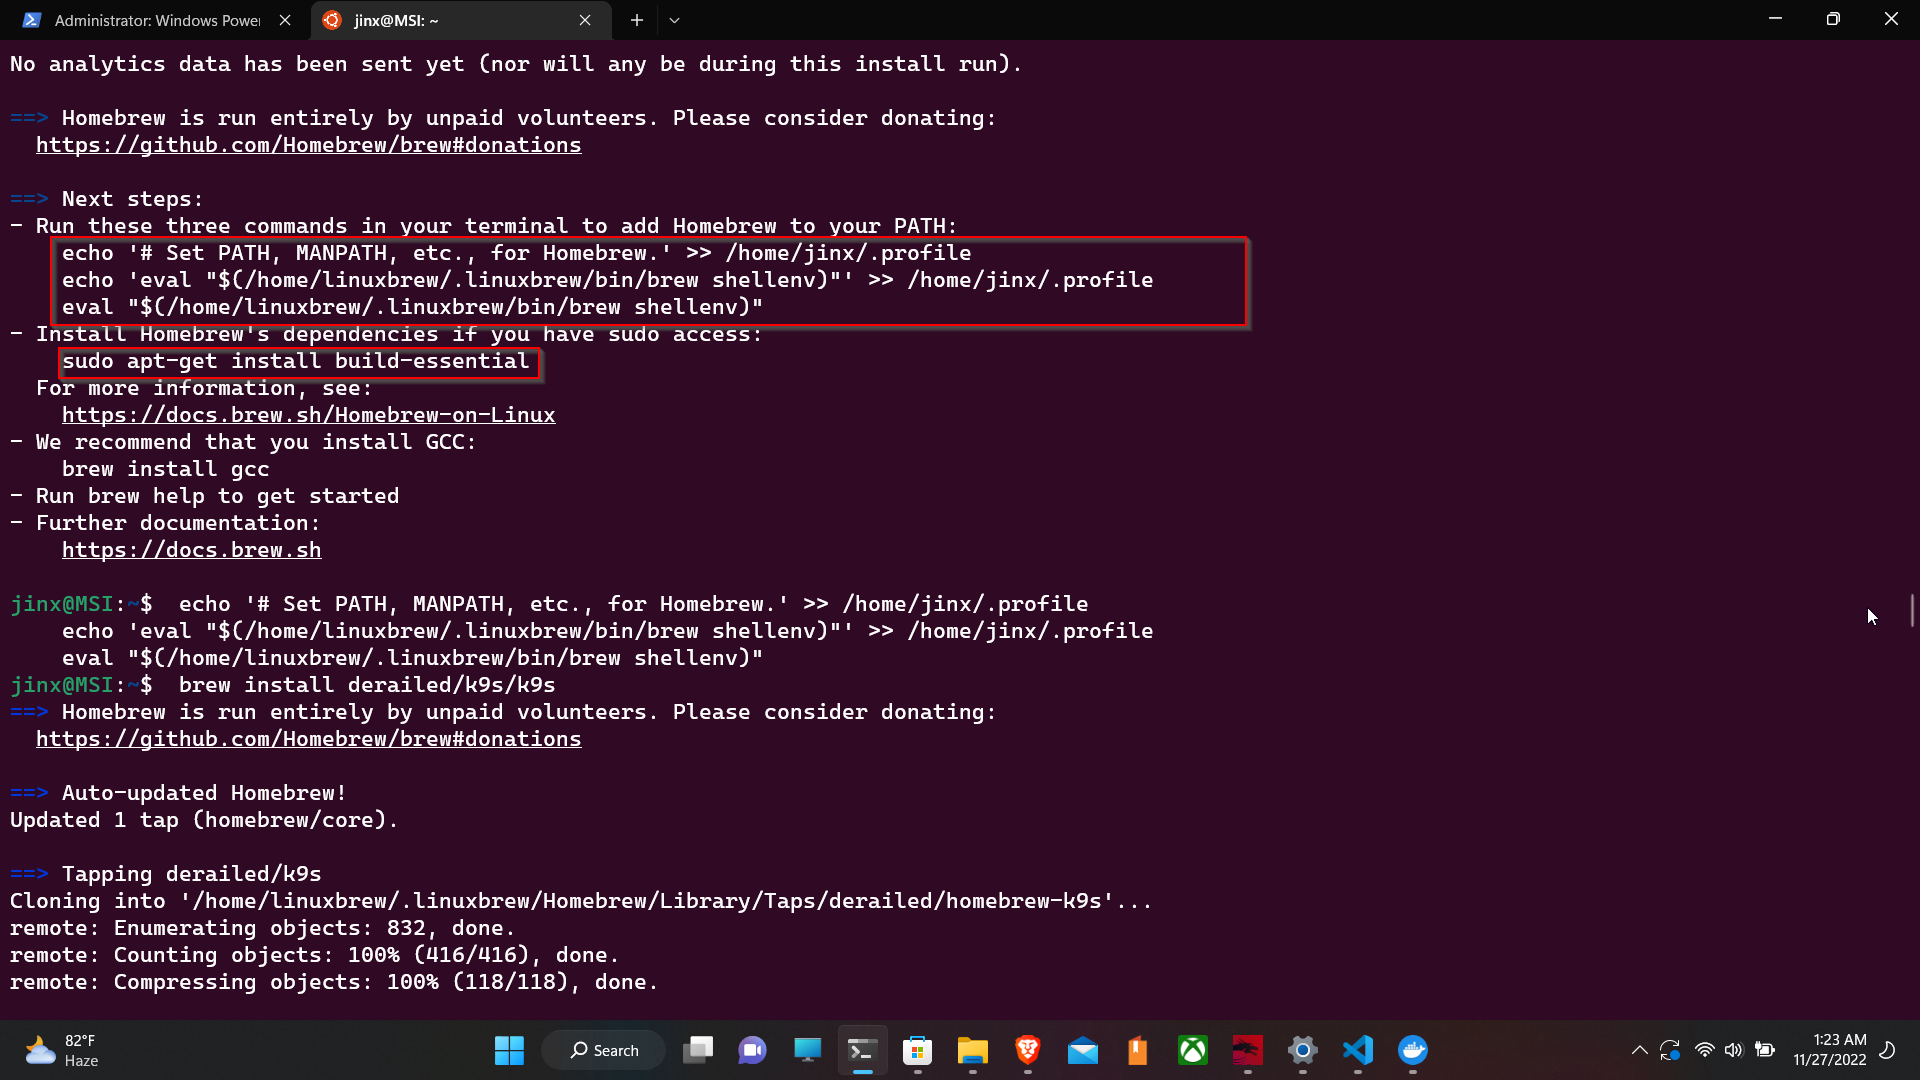
After homebrew is installed, in the last line of installation, it will tell you to do certain things.
 Just follow along and this will make your life easy later.
Note that in the below commands, your username will change. I had my hostname in Ubuntu as "Jinx," so change this accordingly.
echo '# Set PATH, MANPATH, etc., for Homebrew.' >> /home/jinx/.profile
echo 'eval "$(/home/linuxbrew/.linuxbrew/bin/brew shellenv)"' >> /home/jinx/.profile
eval "$(/home/linuxbrew/.linuxbrew/bin/brew shellenv)"
finally install all the homebrew dependencies
sudo apt-get install build-essential
Now that we can finally install K9s via Homebrew, believe me, all of this work will be worthwhile.
brew install derailed/k9s/k9s
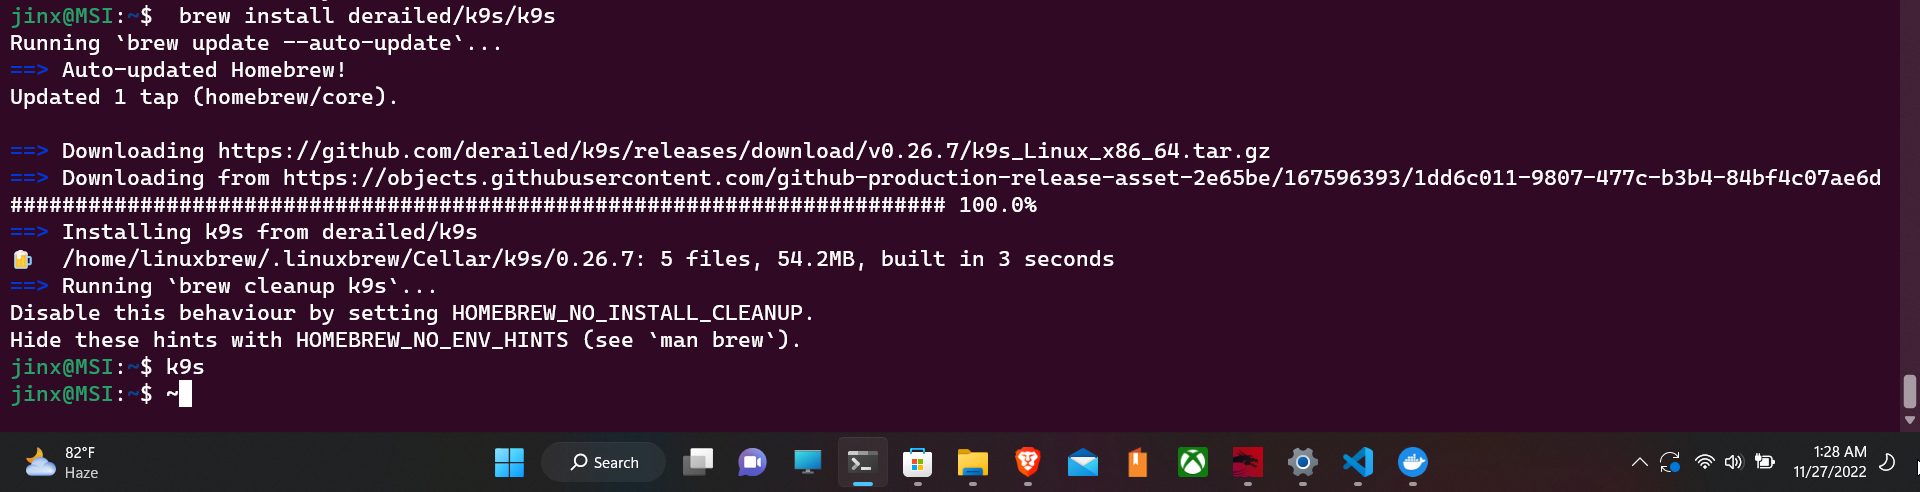
Now just run the following command
k9s
and see the magic. We get the GUI for the Kubernetes cluster.
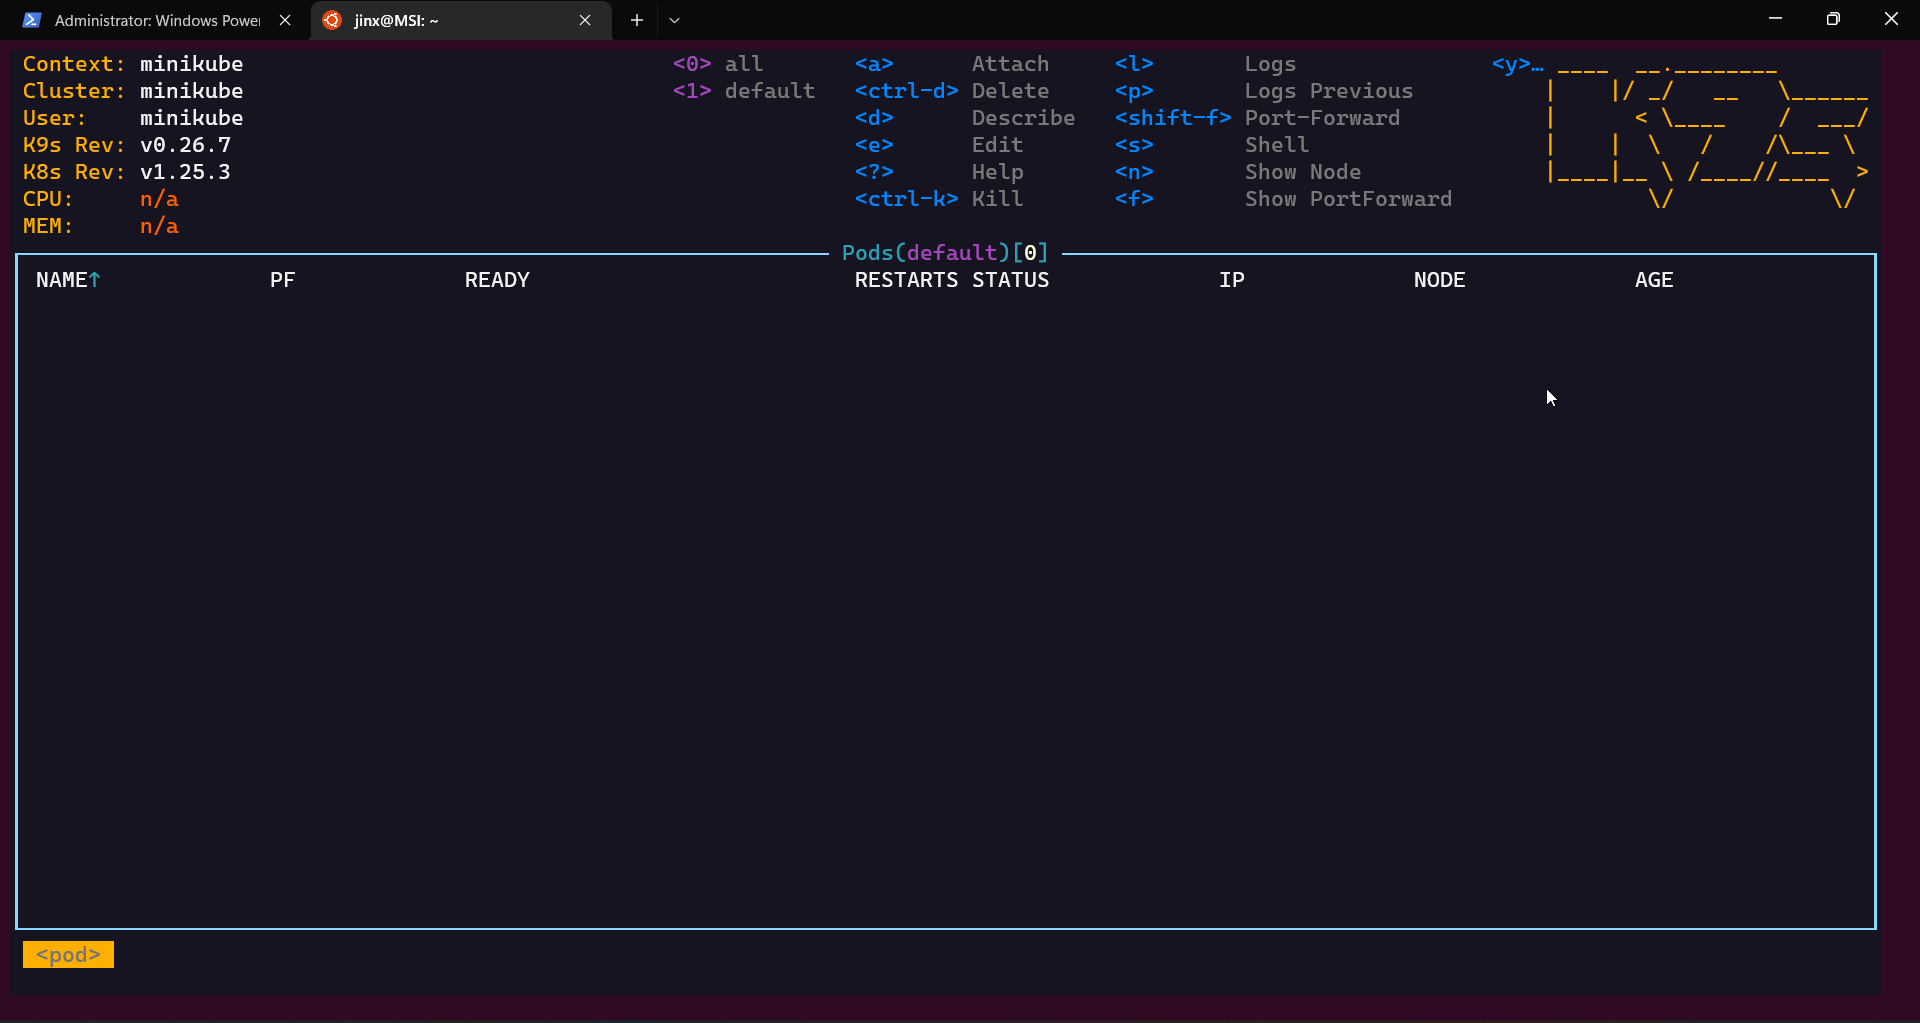
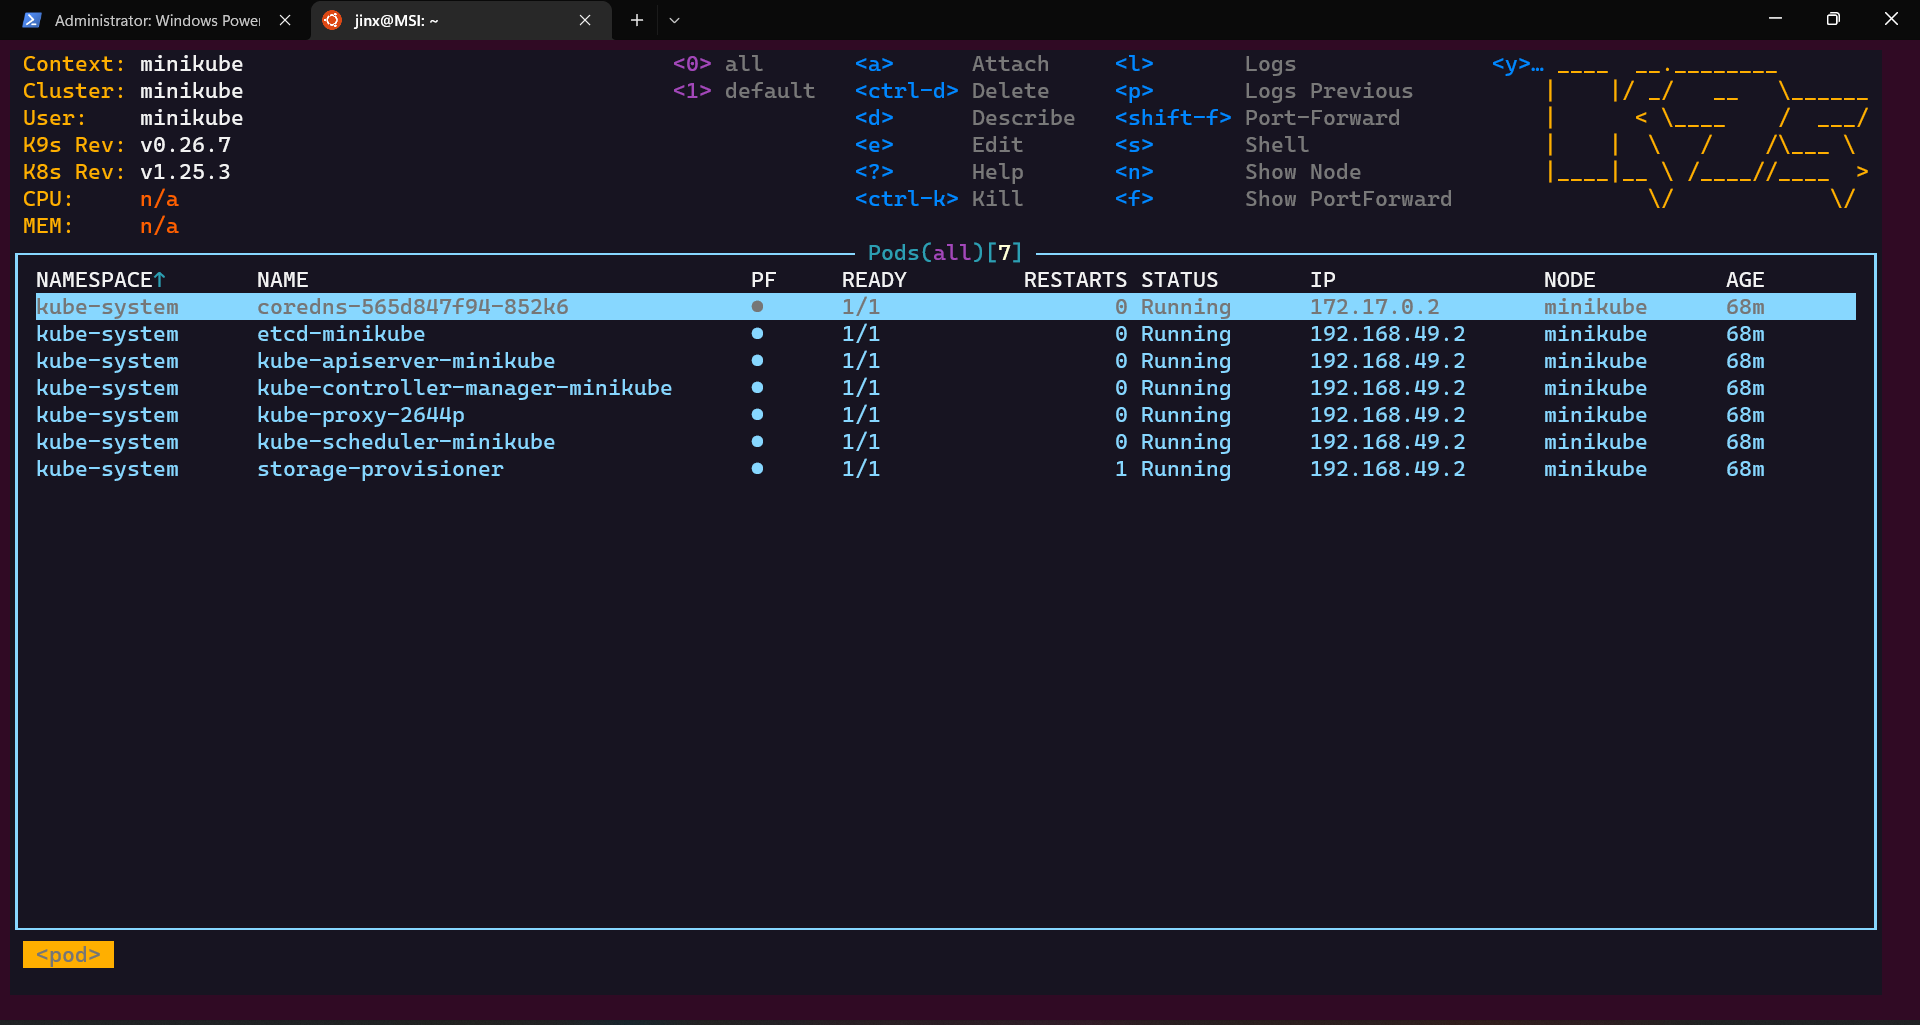
Now that we have more visibility, we can navigate through each component of Kubernetes' cluster, get logs, and do more stuff.
Thank you everyone for reading my blog
References:
https://devops.anaisurl.com/kubernetes
https://www.youtube.com/watch?v=W6J6UipVNGA&list=PLWnens-FYbIpUpmiiNYfkqTZQUYppGMFV


