Design and Implement Gateway VPC Endpoints for backups

Hey everyone, welcome back to another AWS project. So as the title says, our goal will be to create a gateway VPC endpoint for uploading backup files securely and making sure data can't be changed.
Problem Statement
There is an application that will be hosting the sensitive data in a private subnet and regularly communicates with the AWS S3 service for backup-related operations. If the NAT Gateway is removed from the subnet, all the necessary communication to S3 will be blocked, which can hamper the BCP and DR processes. We want to create a POC using gateway endpoints, allowing an EC2 instance to backup data to an S3 bucket even if the internet connectivity (inbound and outbound) is blocked.
The Gateway VPC Endpoint should only allow backup-related (upload) operations to a specific S3 bucket. No other operations should be allowed. The S3 bucket should also have an appropriate policy that will only allow connections to it from the gateway endpoint. No other communications should be allowed. For the POC, we can use the default VPC subnet to implement the new architecture.
Approach
Let us get started. First, we will try to figure out an approach to the things that we will need to create and implement.
First, we need a subnet within our VPC that will have only one route, which is from the gateway endpoint, to make this implementation secure so that no internet traffic can make any changes to the backup.
Next, let us create an S3 bucket that will store all the backup data.
Then we have to create a gateway endpoint that will directly connect with the S3 service.
We should change the gateway policies so that only backups to S3 are permitted and no other operations are permitted.
We should also modify our bucket policies so that other than the gateway endpoint, there should be no other way to upload the data.
We should now launch two EC2 instances, one public and one private. The public instance would act as a bastion host.
We can make our test cases and try uploading from a private instance and then from a public instance.
This is it; we have completed the use case required in the problem statement.
Creating a routing table for a subnet
Open the AWS console and search for VPC. Now select the route table and click on "create a new route table."
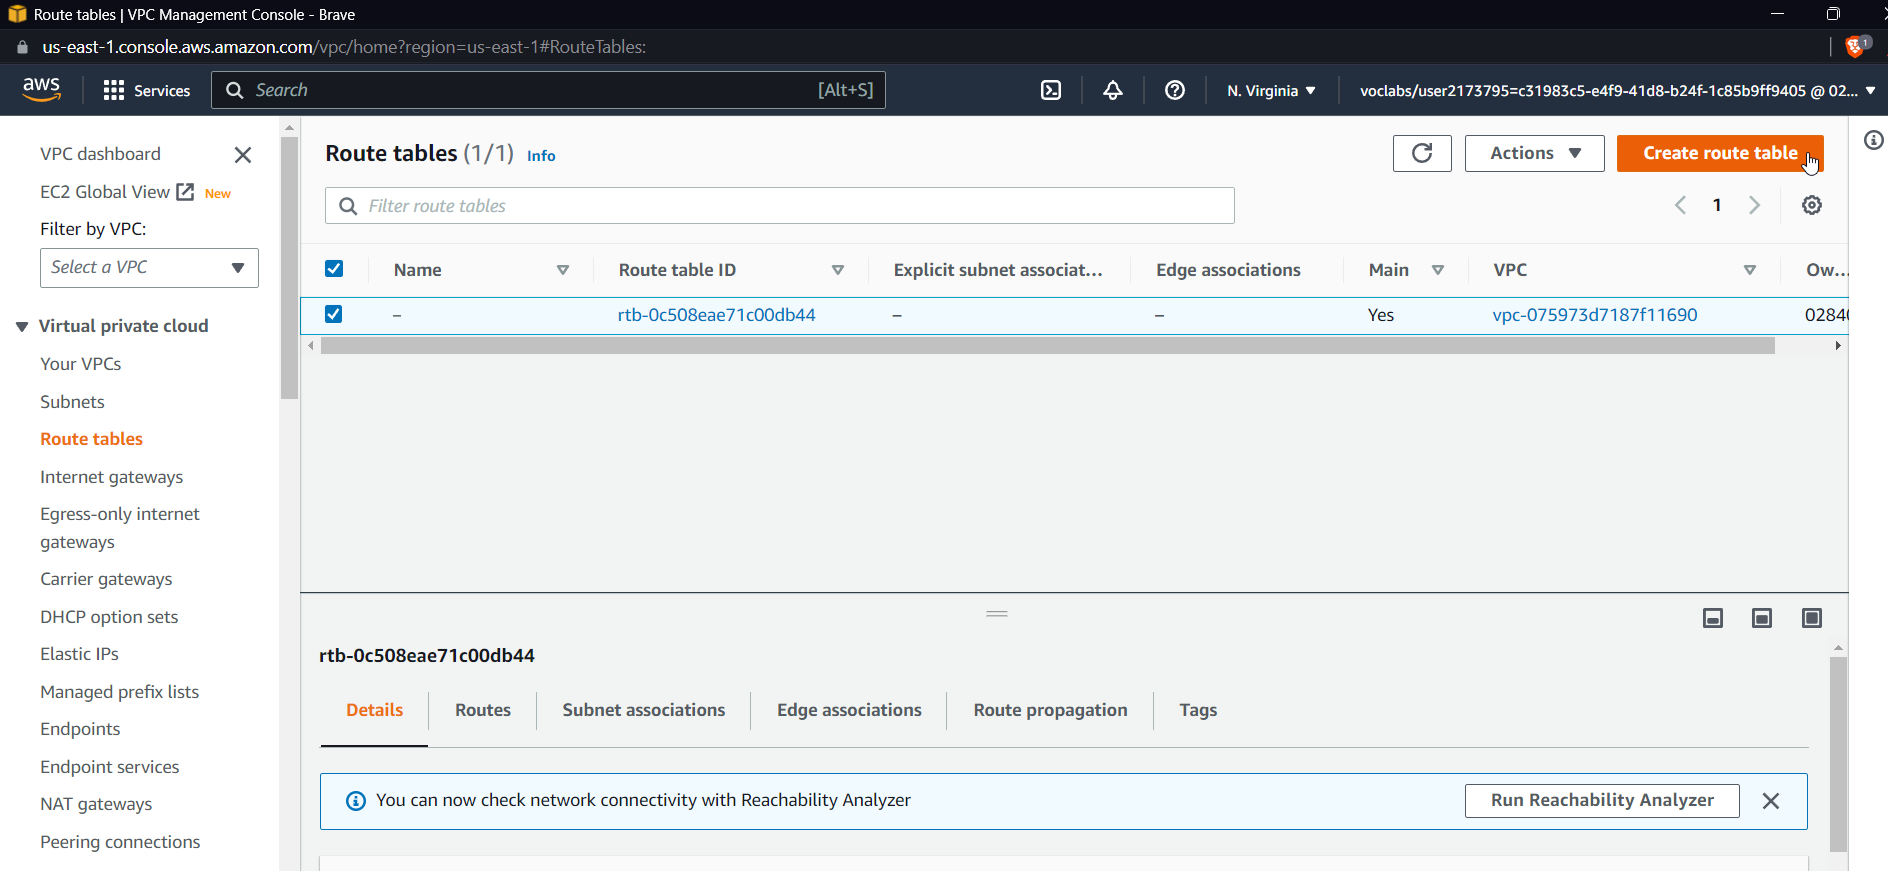
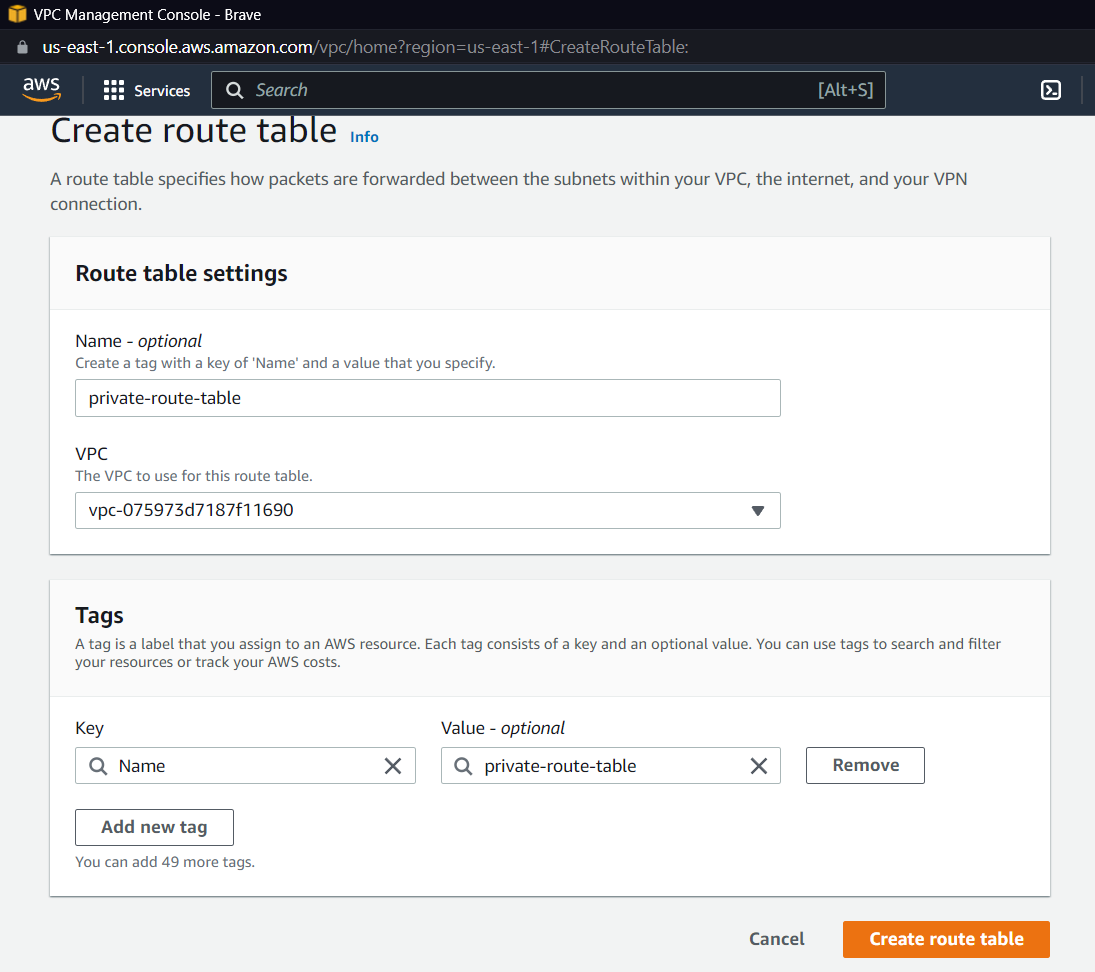
Select the default VPC and click on create a route table
Now after creating a route table, we need to associate it with a subnet, so select your route table from the column, click on the table that we just created, and click on actions and edit subnet associations.

Now inside this, you can choose any subnet
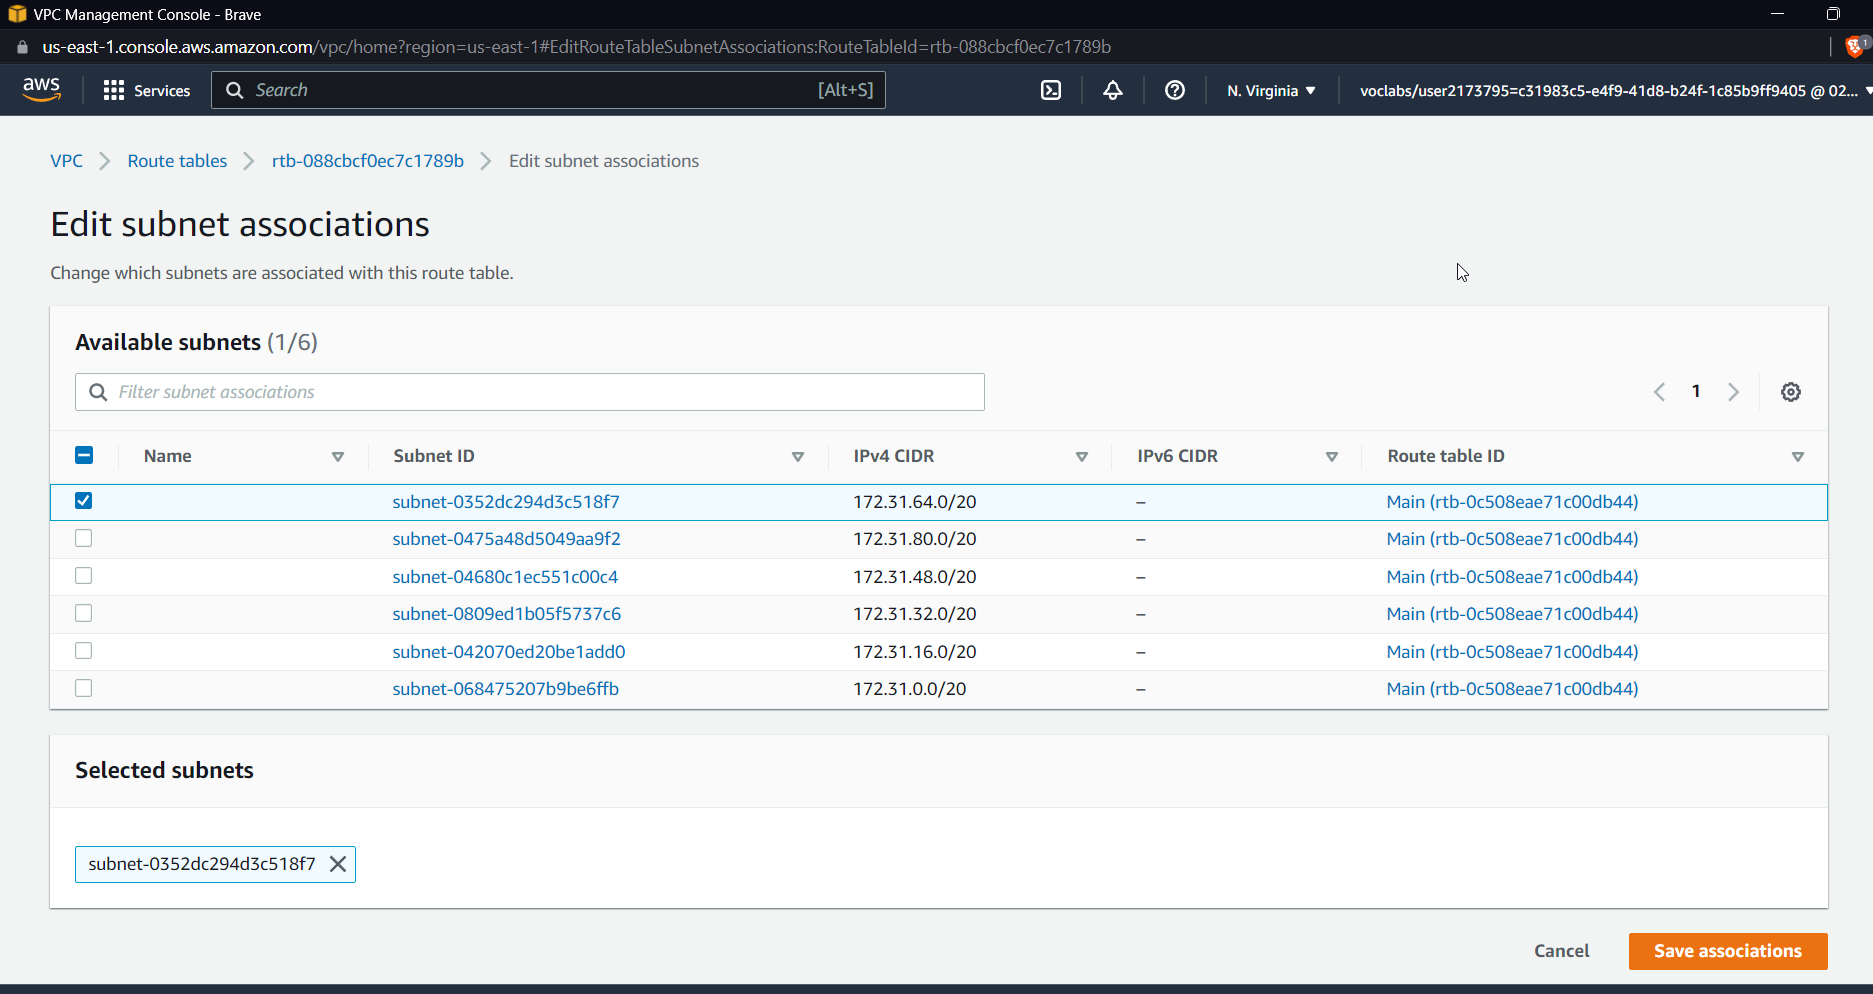
I am selecting 172.31.64.0/20 and clicking Save Associations.
The purpose of creating a route table and selecting a subnet was to define the route that the traffic will take for this subnet; we will make this private and route the traffic such that it passes through the gateway endpoint only.
For now, let us move on.
S3 Bucket for storing backups
Now let's create an S3 bucket that will only be used to store backup files.
Search for S3 bucket, then click "create bucket" and name it.

Keeping everything as default create a bucket, we will change the policies later
Gateway Endpoint connecting to S3
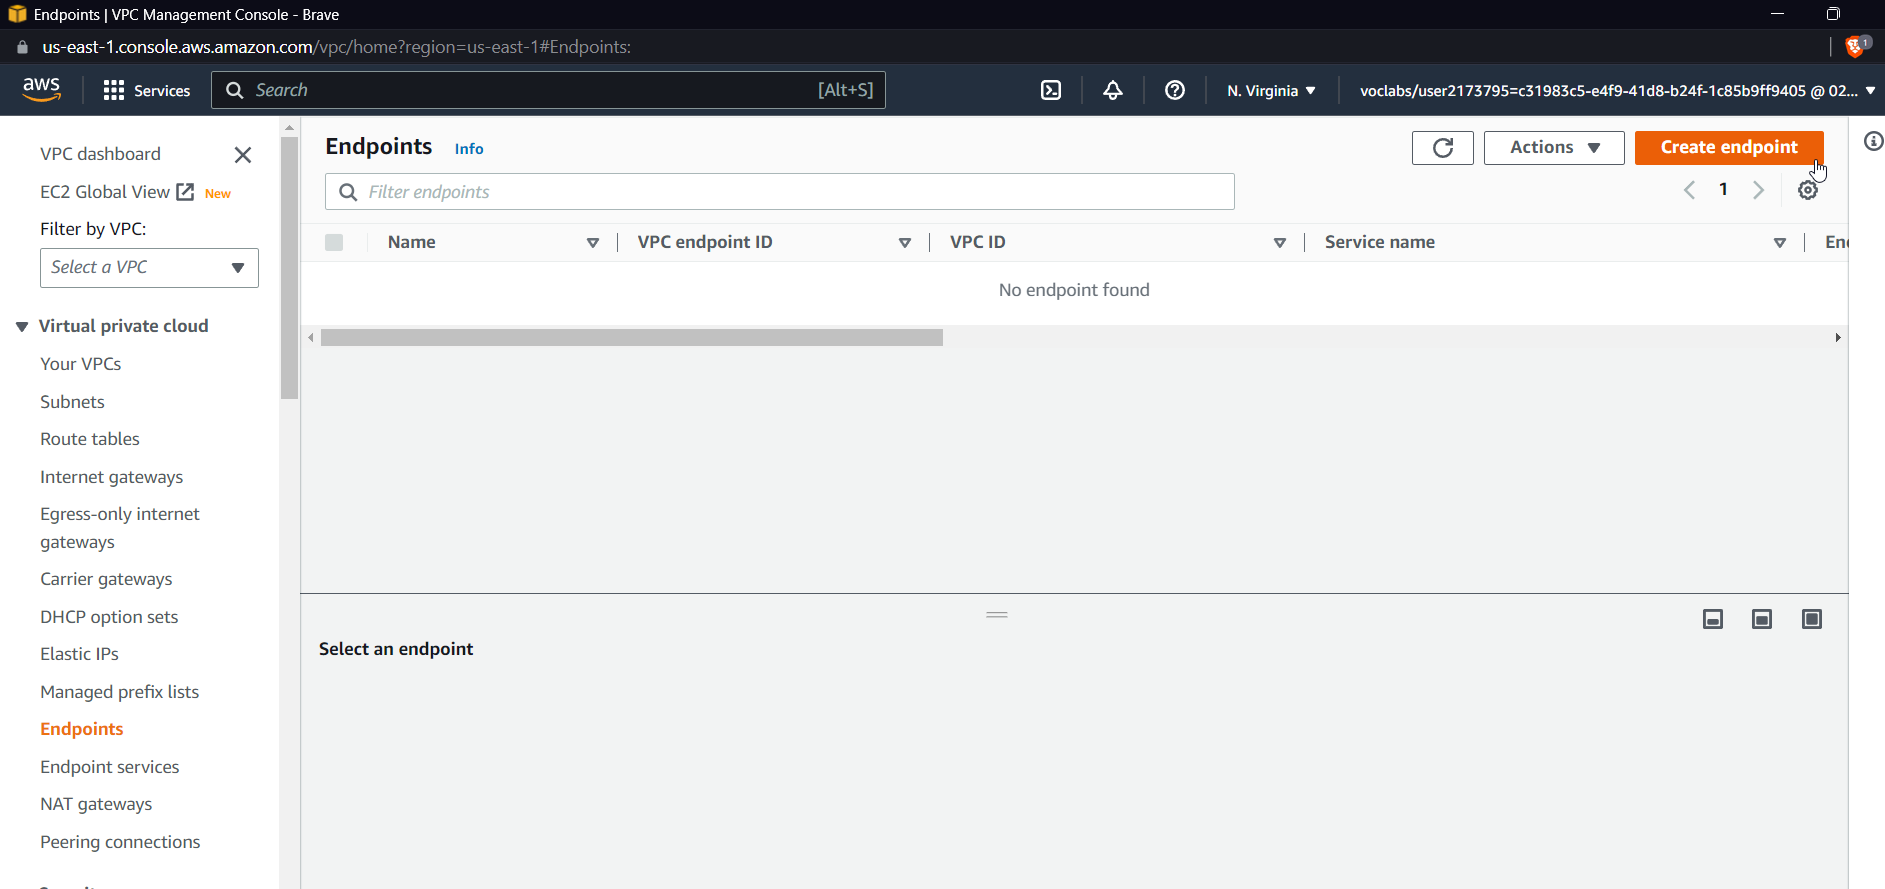
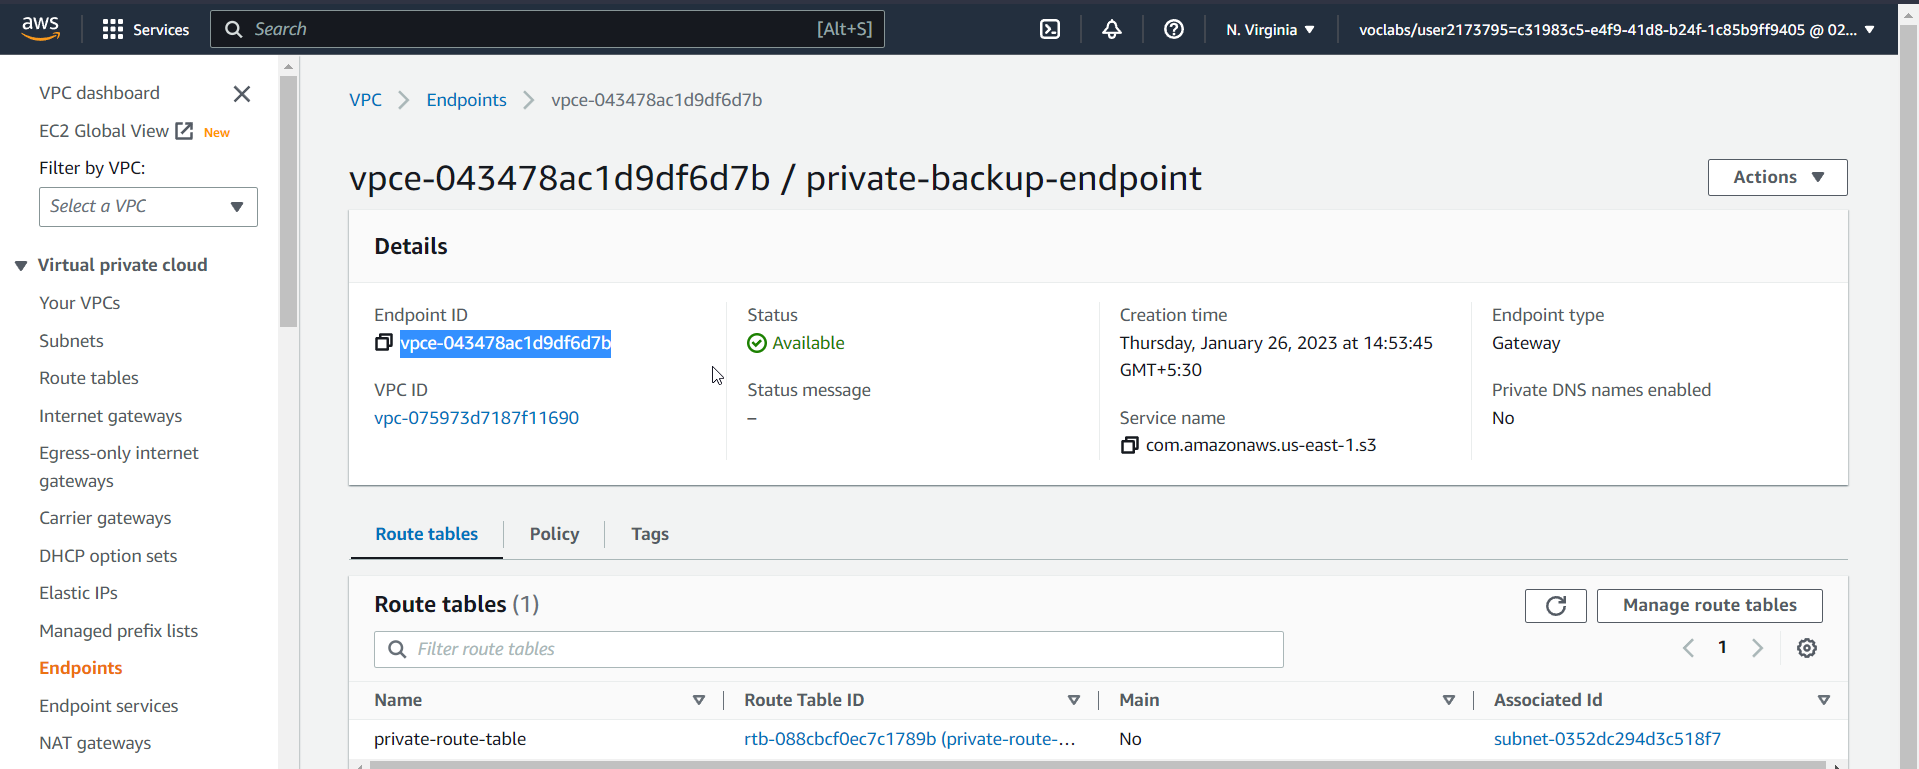
Now let us move on to creating a gateway endpoint that will directly communicate with our S3 bucket. Go to the AWS console and search for a VPC. Inside Virtual Private Cloud, click on Endpoints, and then finally click on Create an Endpoint.
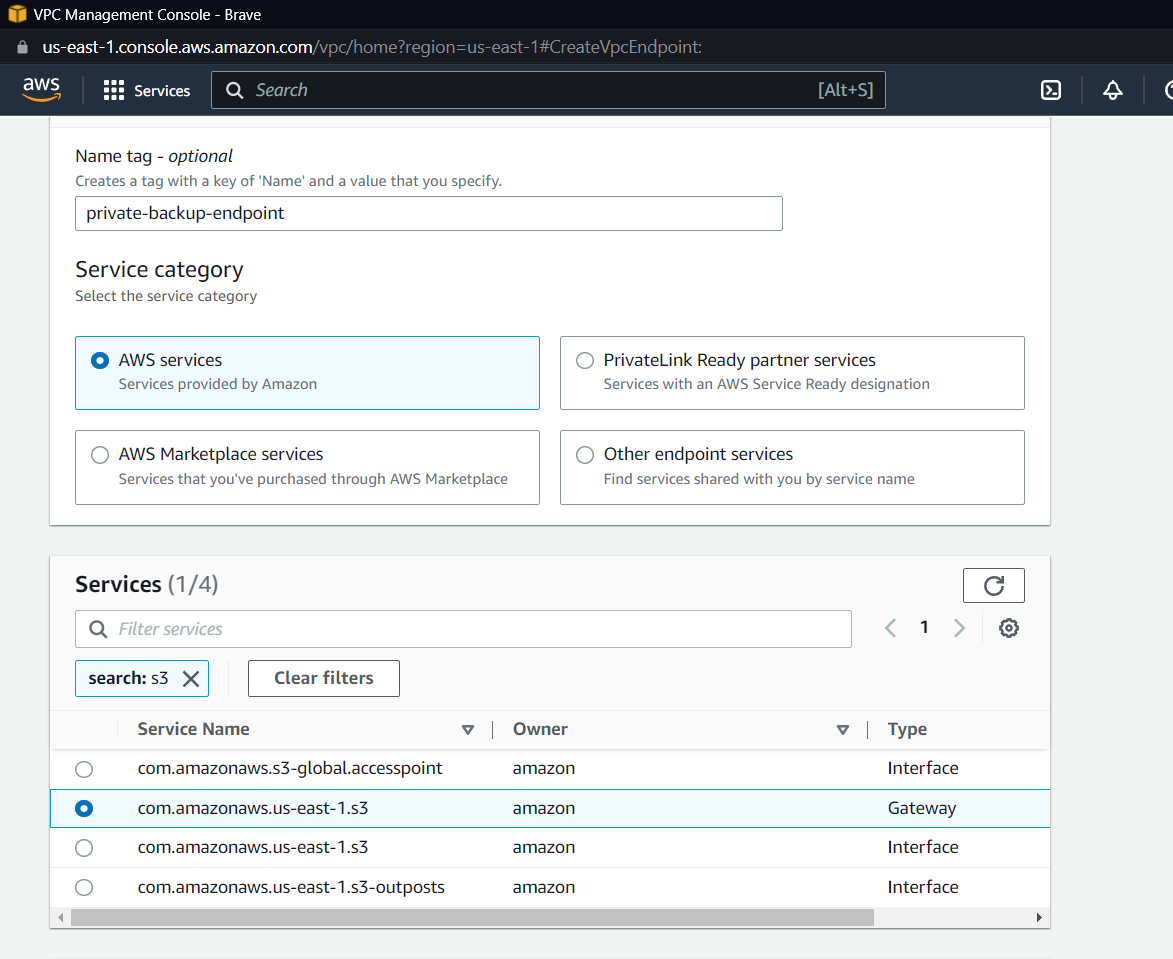
Give a name to your endpoint, and keep other things as defaults and inside services. Look for S3 and select one with the type "gateway".
Now select the default VPC, and within the default VPC, select the private route table that we created earlier. This will make sure that traffic from the private subnet will only go through the endpoint from the VPC.
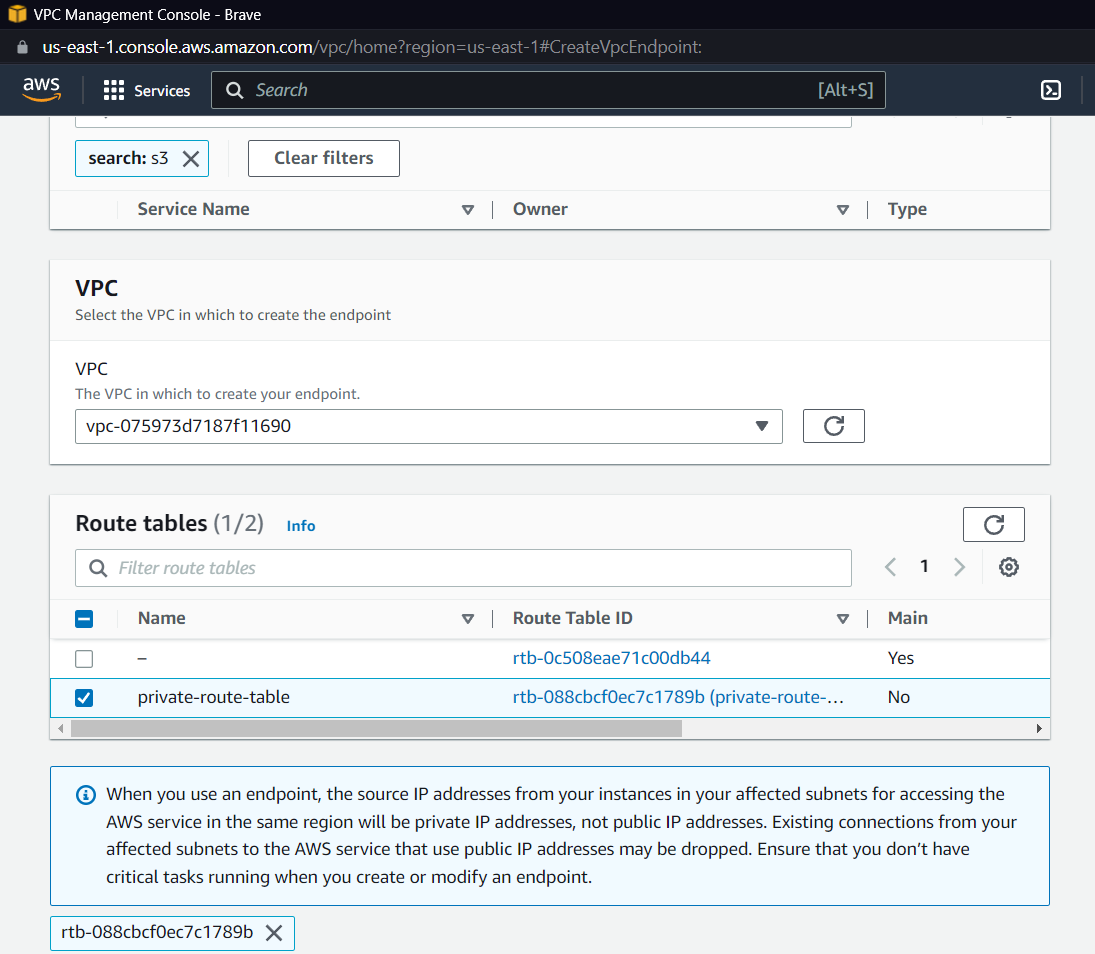
Keep the Policy as Full access for now, and create the endpoint
Modify Gateway Endpoint Policies
We will need fine-grained policies because we are building a secure architecture in which traffic from a private subnet and a private host will only move through the created gateway, and even the S3 policies must be defined such that only upload permissions are allowed, and that too from the created endpoint.
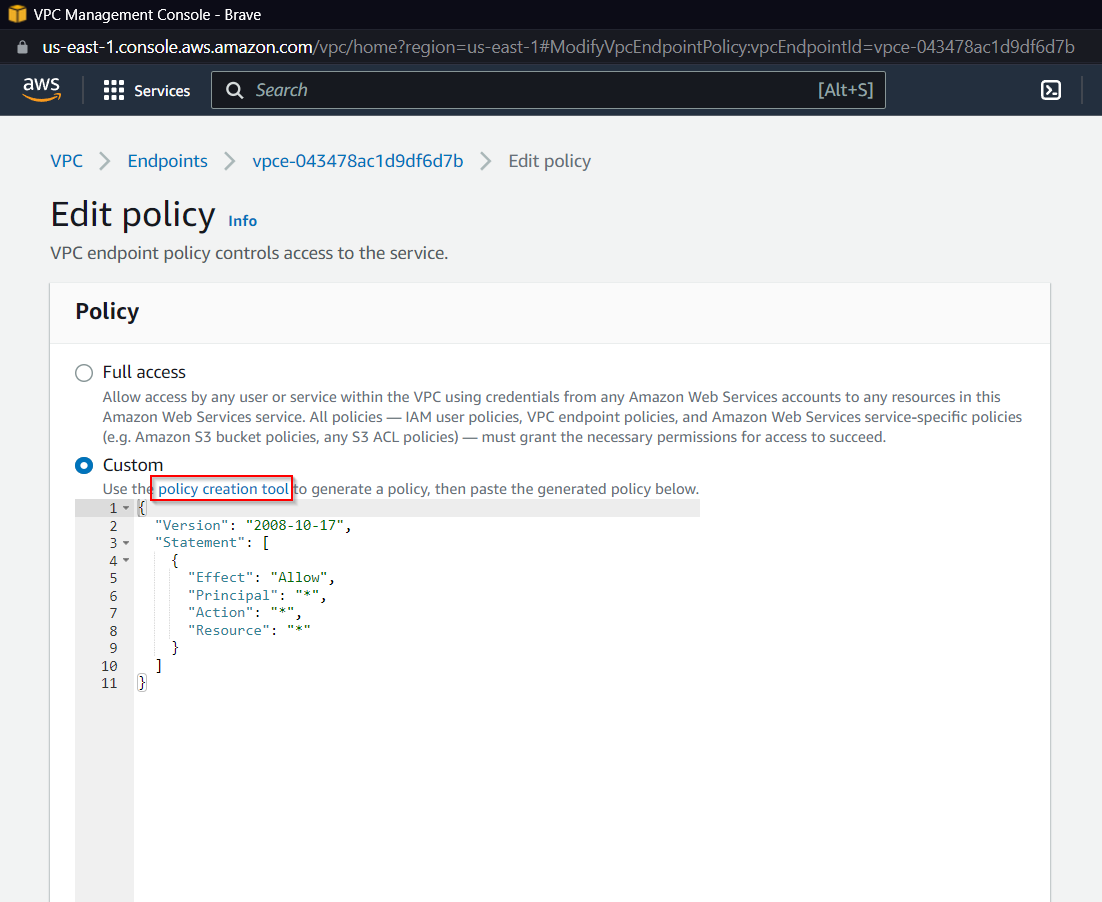
Select the endpoint created after searching for VPC in the AWS console, click on policy, edit the policy, and then select Custom.
Now we can use a policy creation tool. Click on the below-highlighted link.
https://awspolicygen.s3.us-east-1.amazonaws.com/policygen.html
You will be redirected to the following website
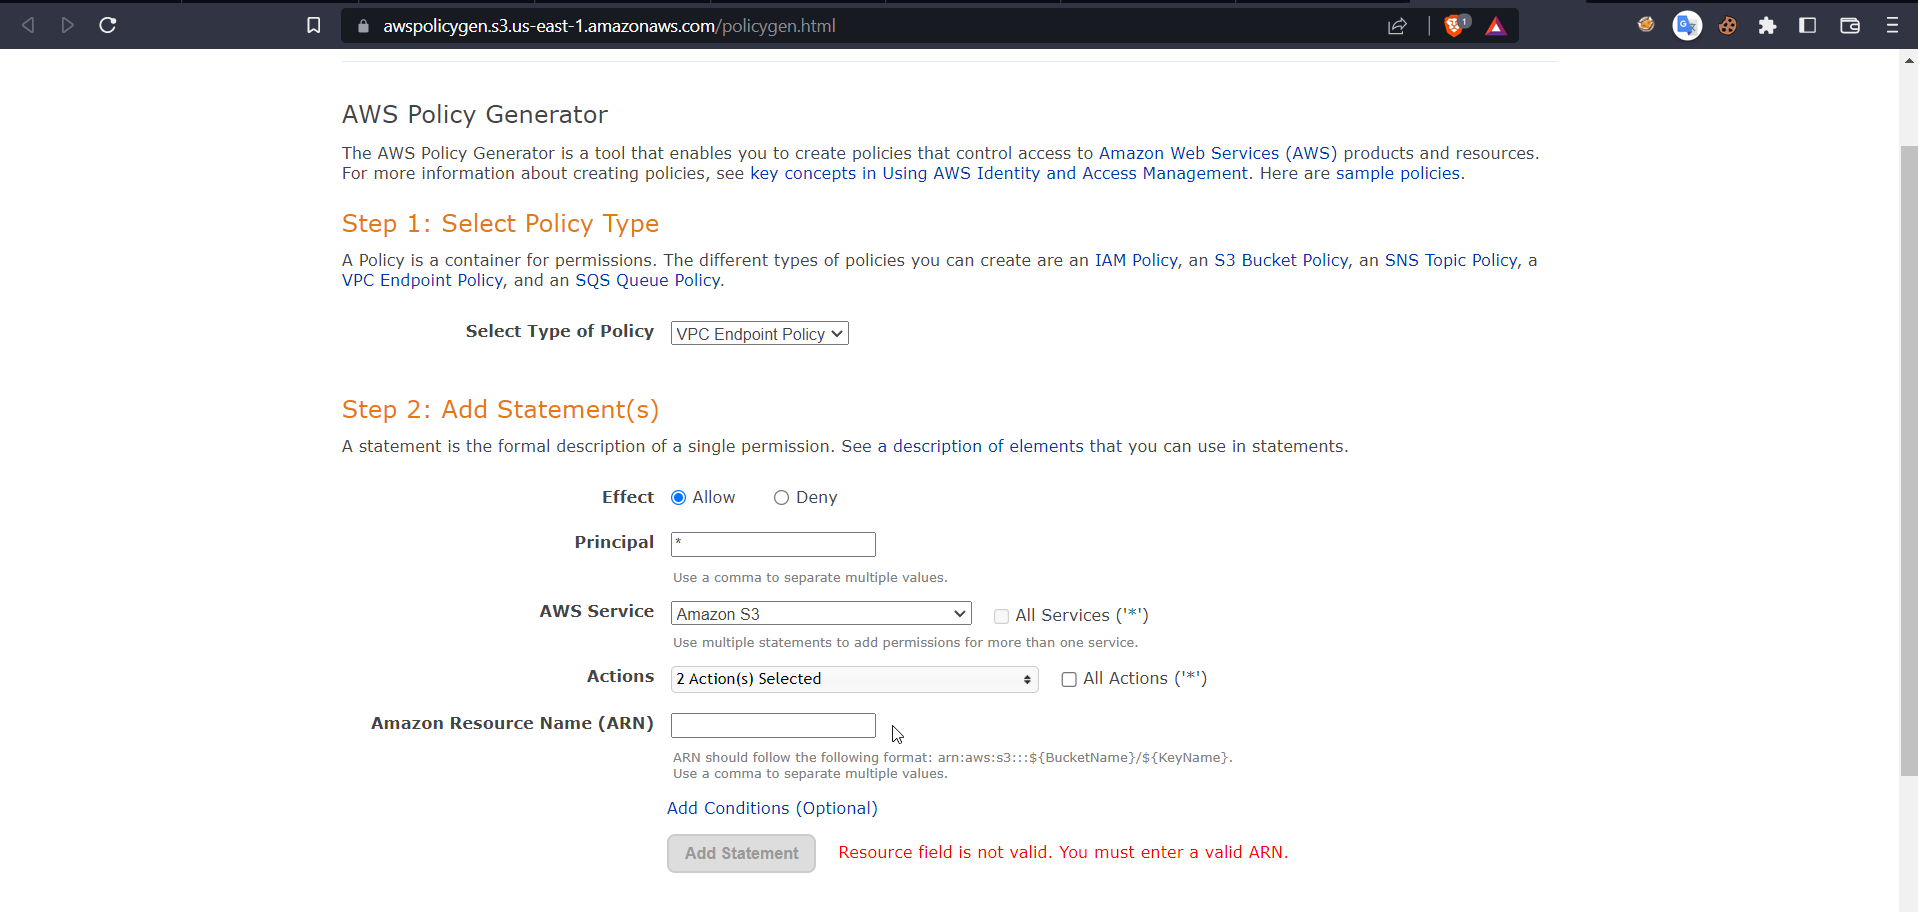
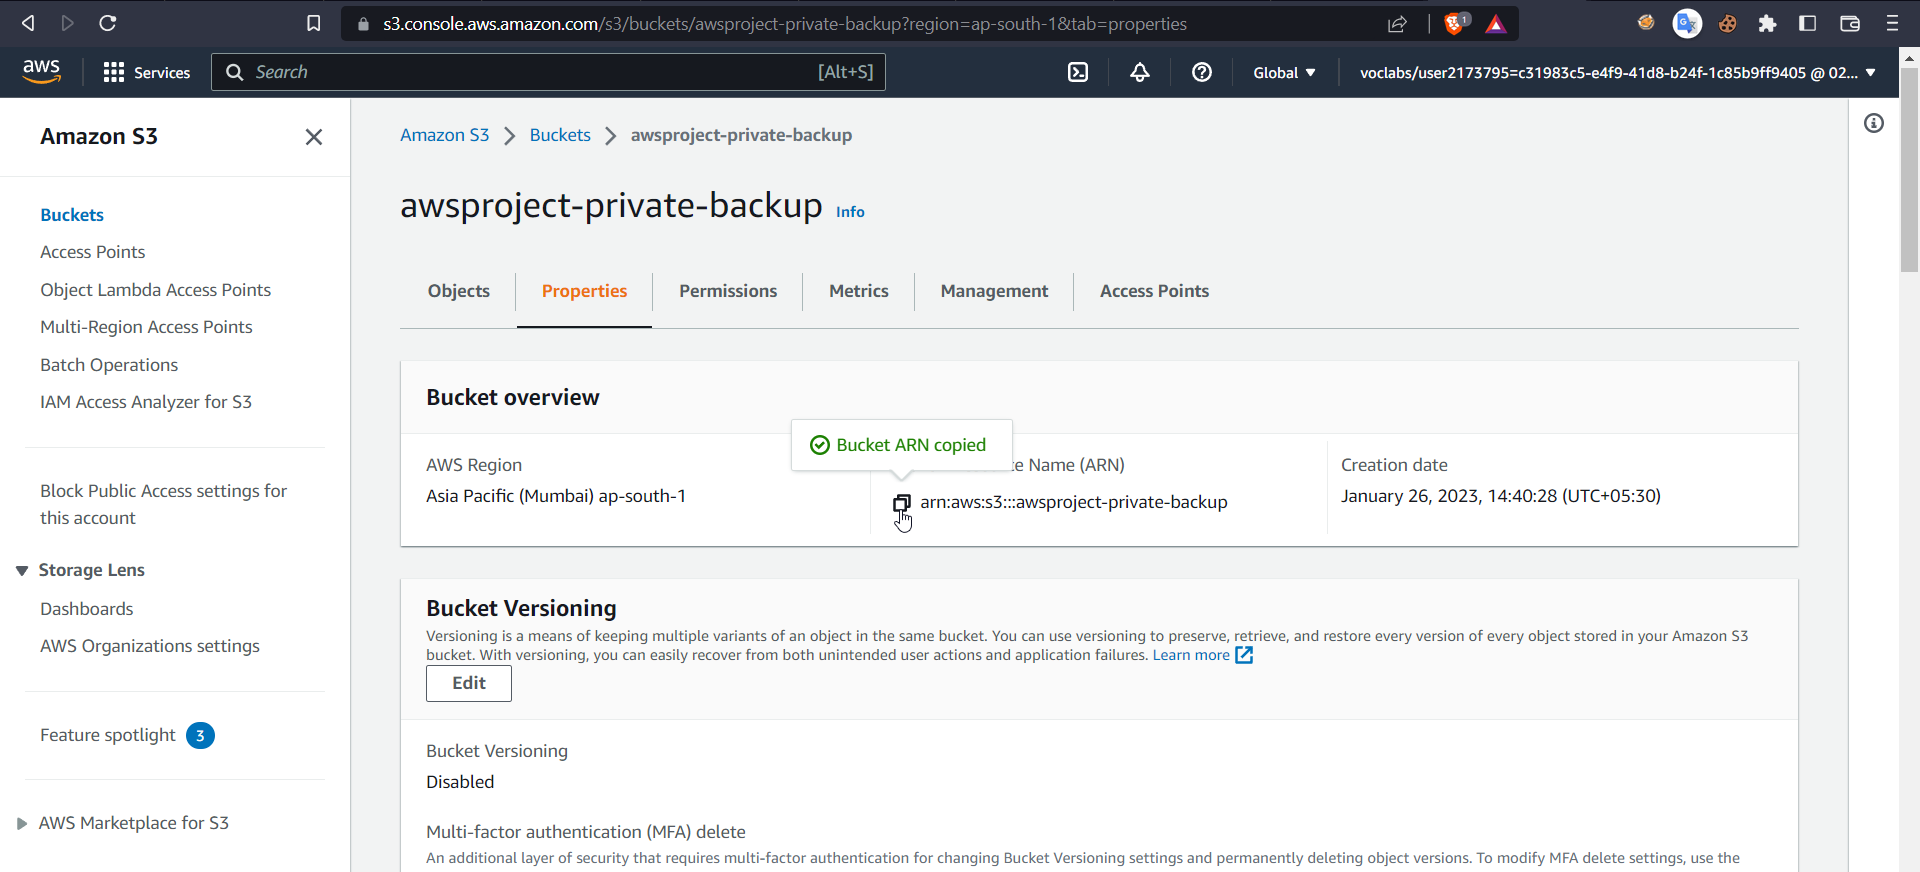
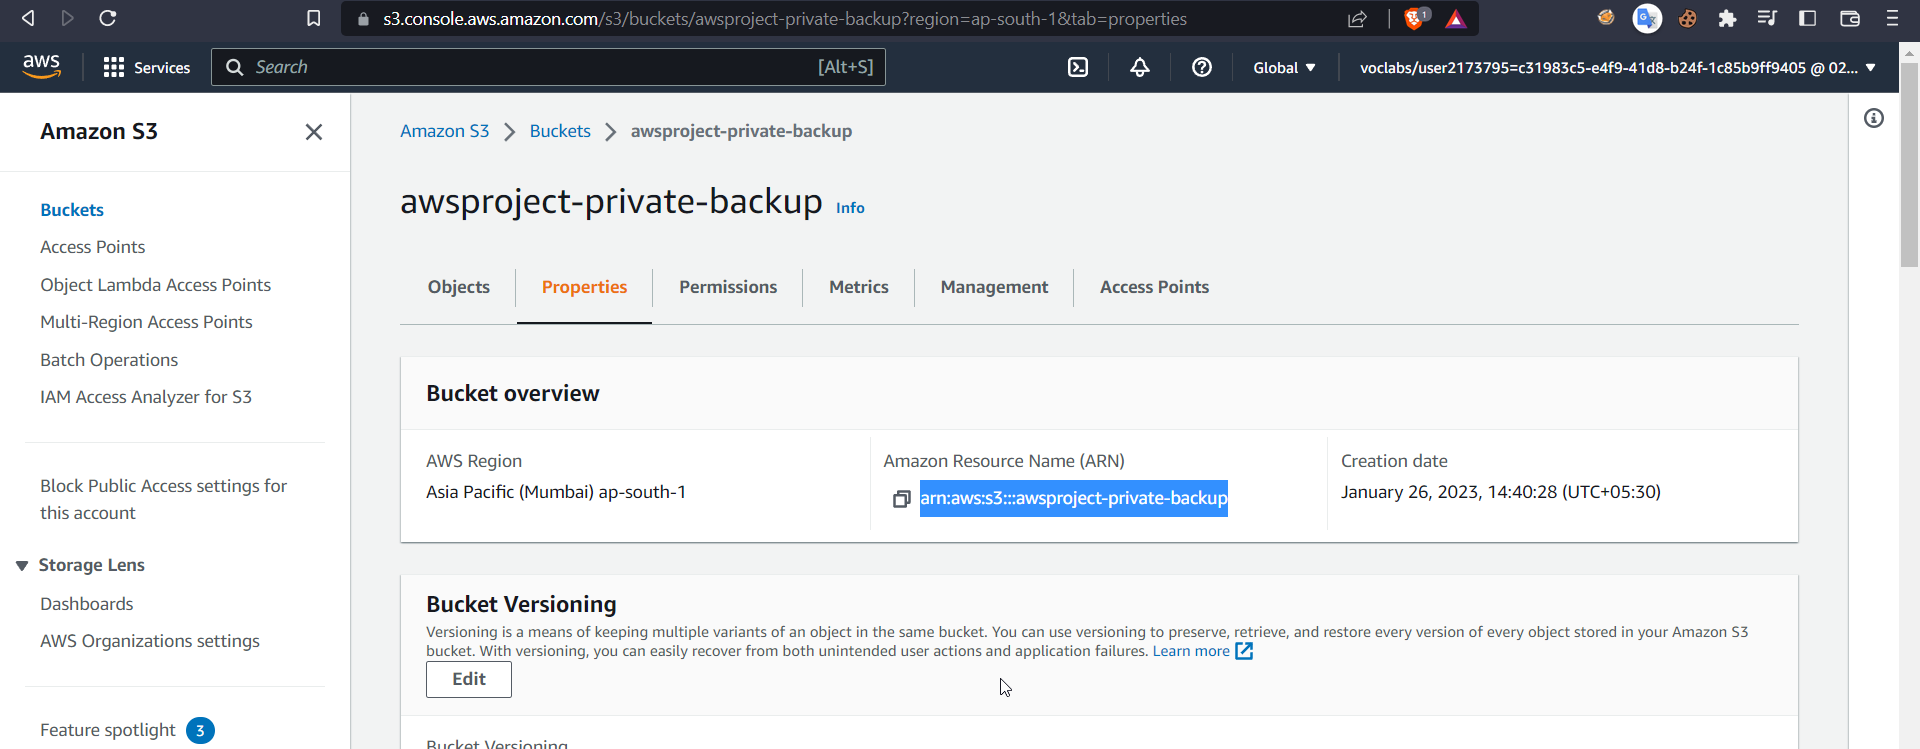
Now select type as VPC endpoint policy, effect as allow, principal as *, and for actions, select PutObject and PutObjectAcl. Now for ARN, head back to the AWS console and search for S3, select the earlier created bucket, and inside properties copy the ARN.
Now use this arn on the policy maker website and click add statement and generate policy you will get the following output
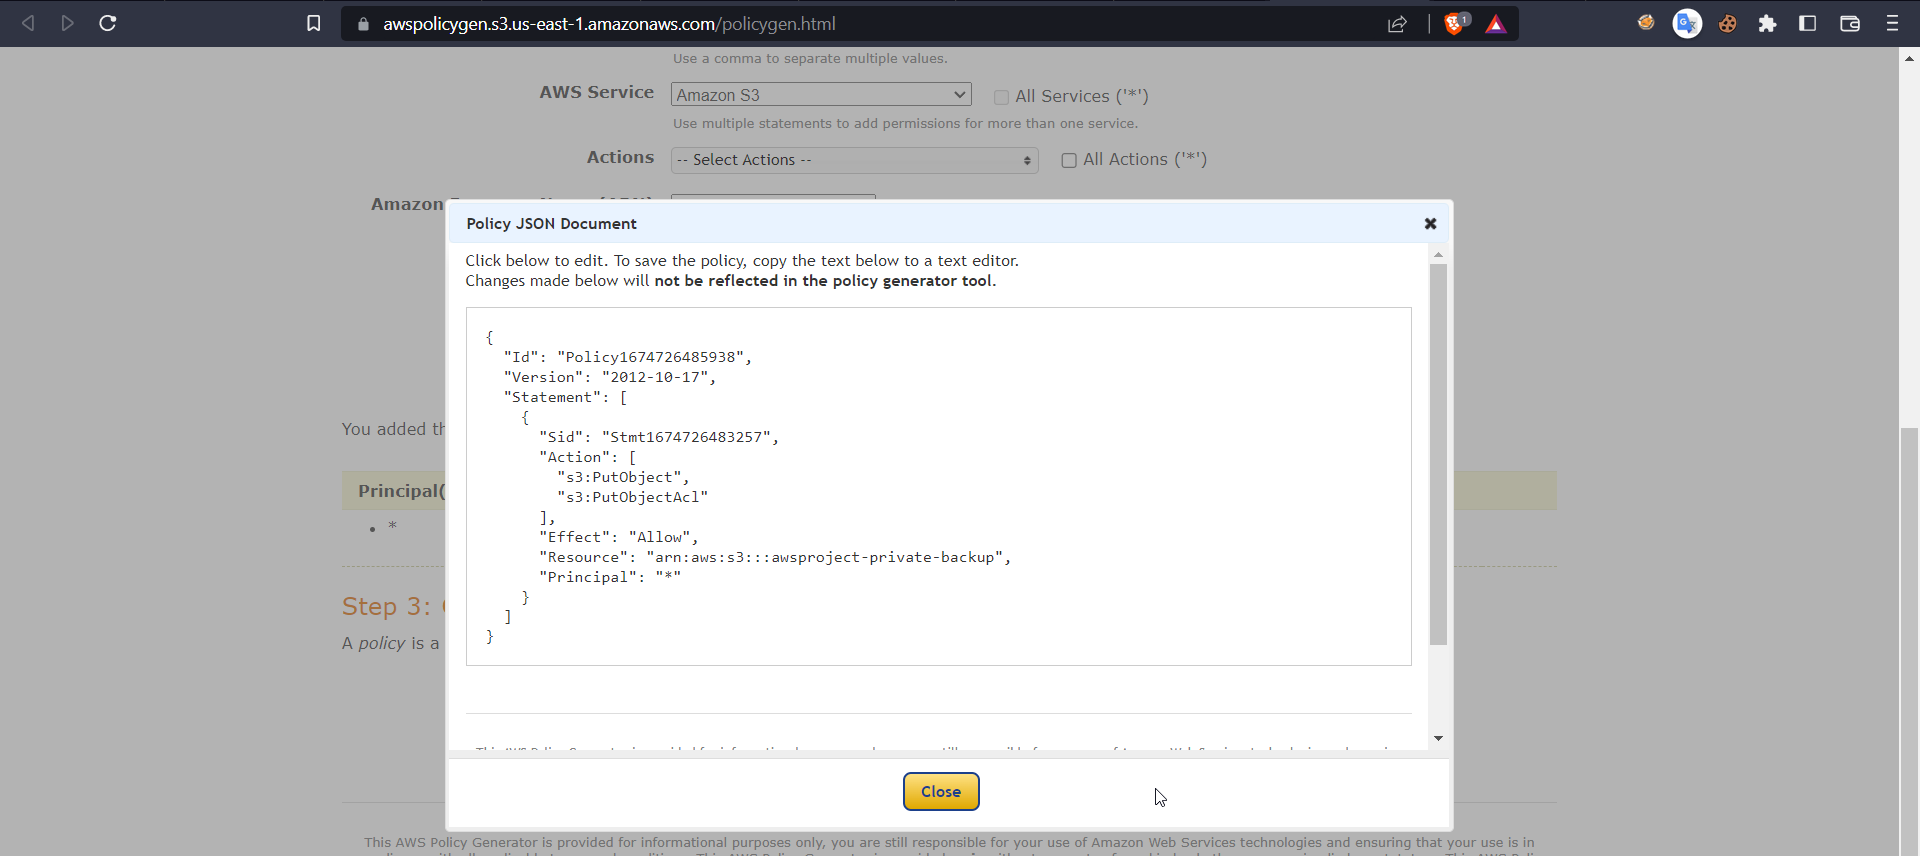
Copy this policy and use it in VPC endpoint custom policy

Before clicking save, make sure you add a /* inside the ARN resource name of the bucket.
This ensures that we can only upload data through the gateway, and only data from our backup bucket.
Modify Bucket Policies
Now coming to mofiying bucket policies, Go to the created S3 Bucket and select the permission scroll down and select edit in bucker policies
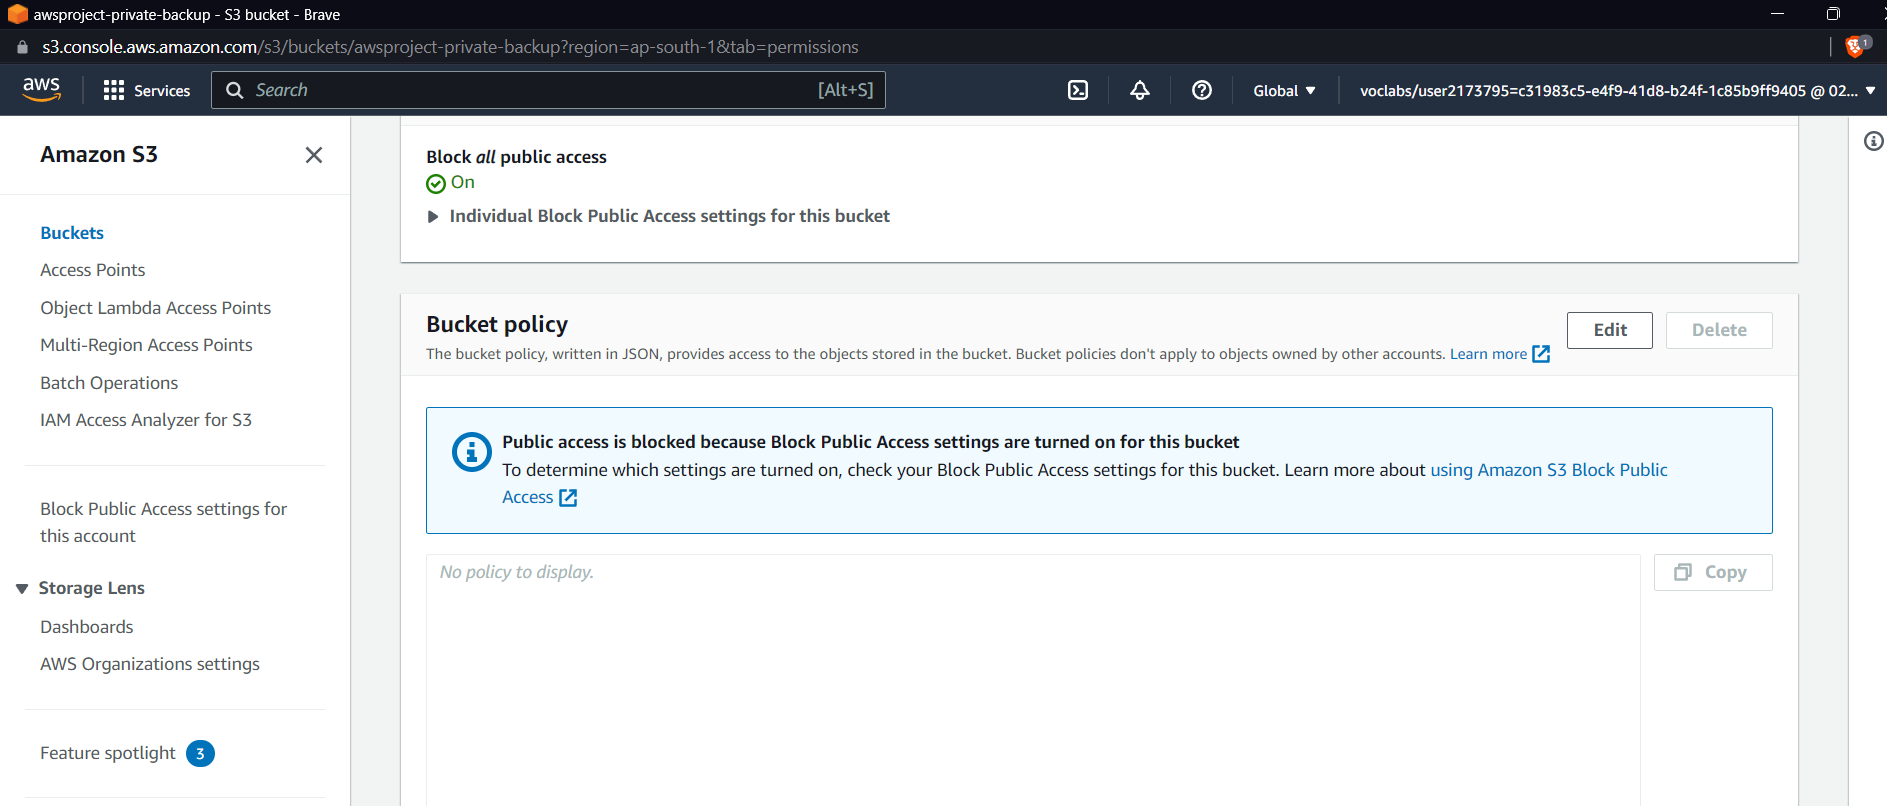
Now for S3 Bucket, we want to make the policy such that other than files, our endpoint should deny any request for any operation on S3 Bucket, and even for endpoints allowed, the policy should be upload,
Use the following URL for a detailed explanation.
https://docs.aws.amazon.com/AmazonS3/latest/userguide/example-bucket-policies-vpc-endpoint.html
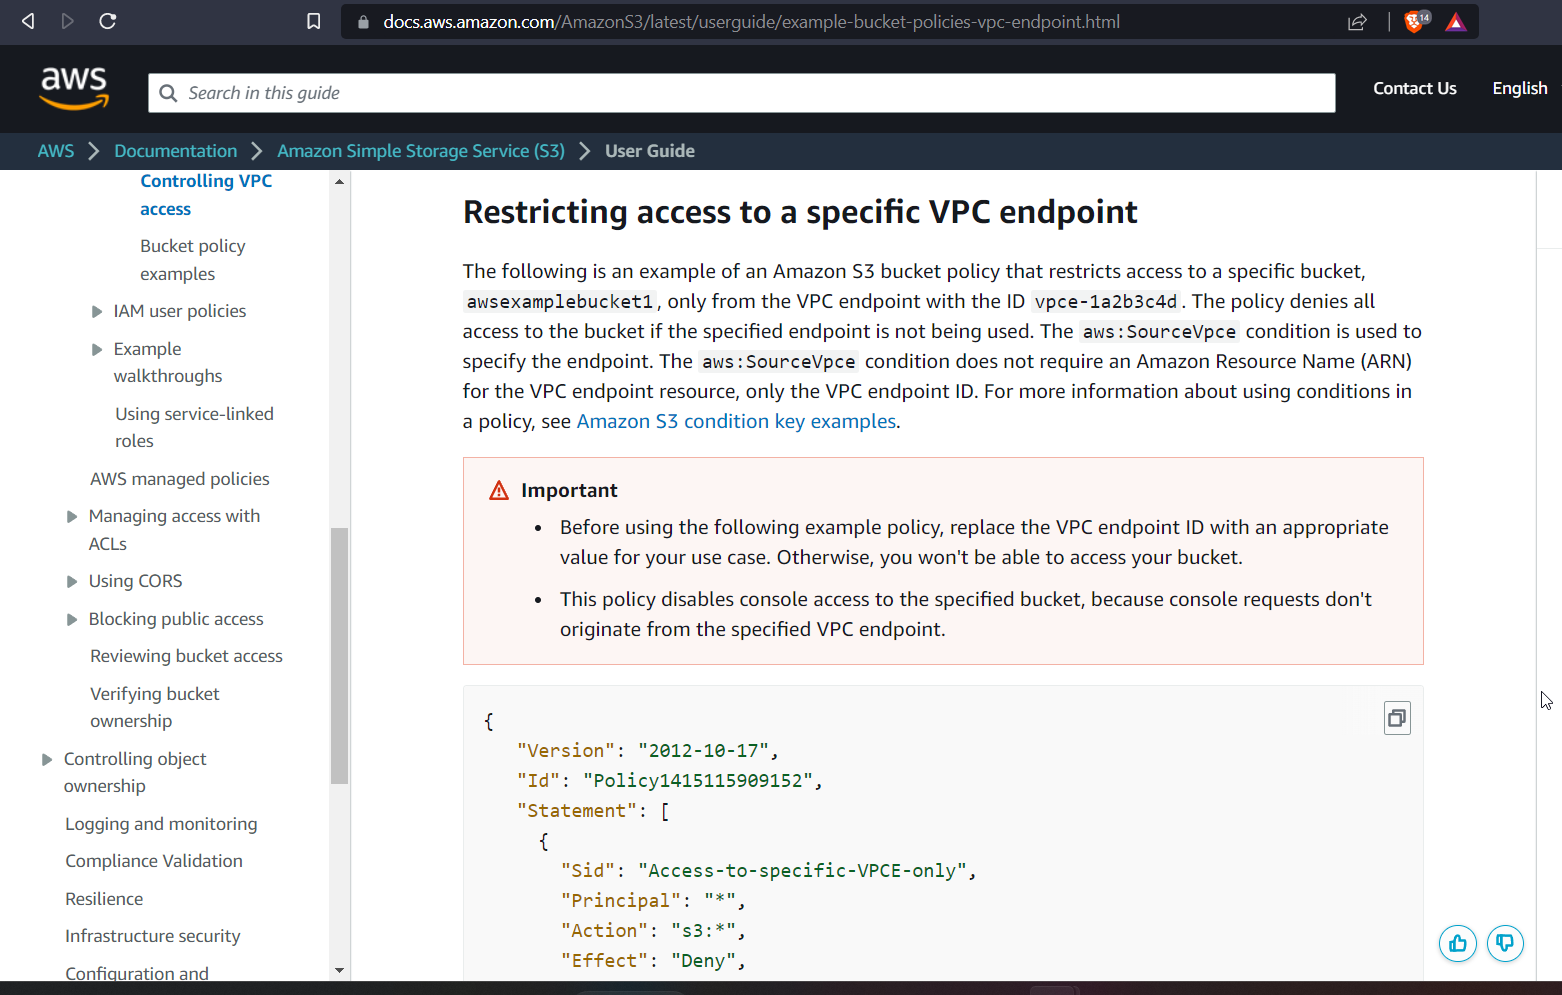
Copy the policy
{
   "Version": "2012-10-17",
   "Id": "Policy1415115909152",
   "Statement": [
     {
       "Sid": "Access-to-specific-VPCE-only",
       "Principal": "*",
       "Action": "s3:*",
       "Effect": "Deny",
       "Resource": ["arn:aws:s3:::awsexamplebucket1",
                    "arn:aws:s3:::awsexamplebucket1/*"],
       "Condition": {
         "StringNotEquals": {
           "aws:SourceVpce": "vpce-1a2b3c4d"
         }
       }
     }
   ]
}
Now we need to change the ARN of the bucket and the source VPCE, which is our endpoint ID, which can be found in the respective details of the services.
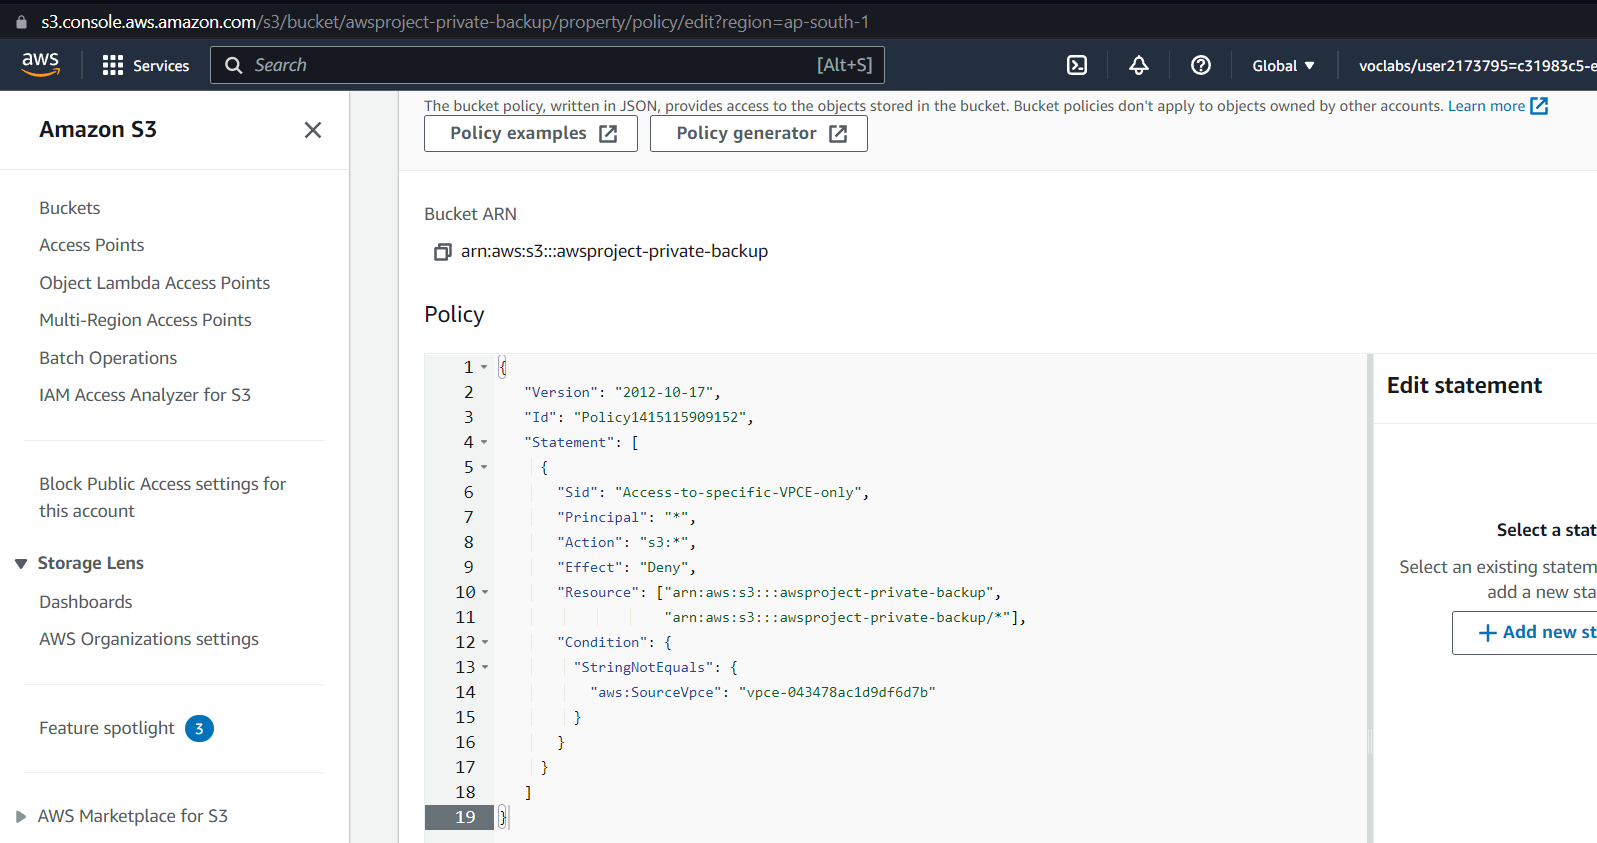
Finally, the policy should look like
{
   "Version": "2012-10-17",
   "Id": "Policy1415115909152",
   "Statement": [
     {
       "Sid": "Access-to-specific-VPCE-only",
       "Principal": "*",
       "Action": "s3:*",
       "Effect": "Deny",
       "Resource": ["arn:aws:s3:::awsproject-private-backup",
                    "arn:aws:s3:::awsproject-private-backup/*"],
       "Condition": {
         "StringNotEquals": {
           "aws:SourceVpce": "vpce-043478ac1d9df6d7b"
         }
       }
     }
   ]
}
Save this policy for S3 Bucket
After clicking save, you will see many errors, but don't worry; this is only because we are editing basic S3 policies.
Starting Public and Private Instances
Now the next requirement will be to create a public instance and a private instance, which is the one that will be in a subnet configured with a route table. The goal here would be to use the public instance as a bastion host to connect with our private instance and then move on to test cases.
Search for the EC2 service in the AWS Console. First, create a key pair of your choice, as shown below.
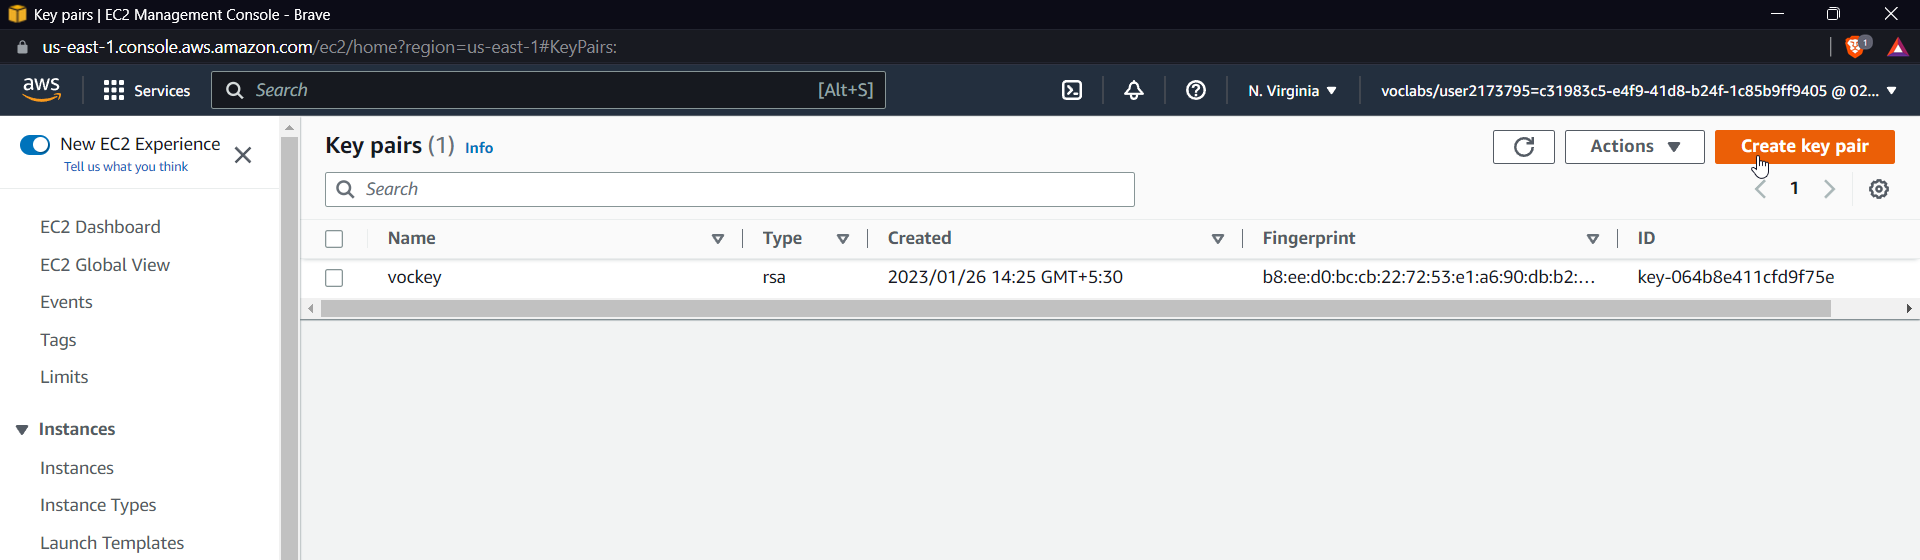
Click on create key pair
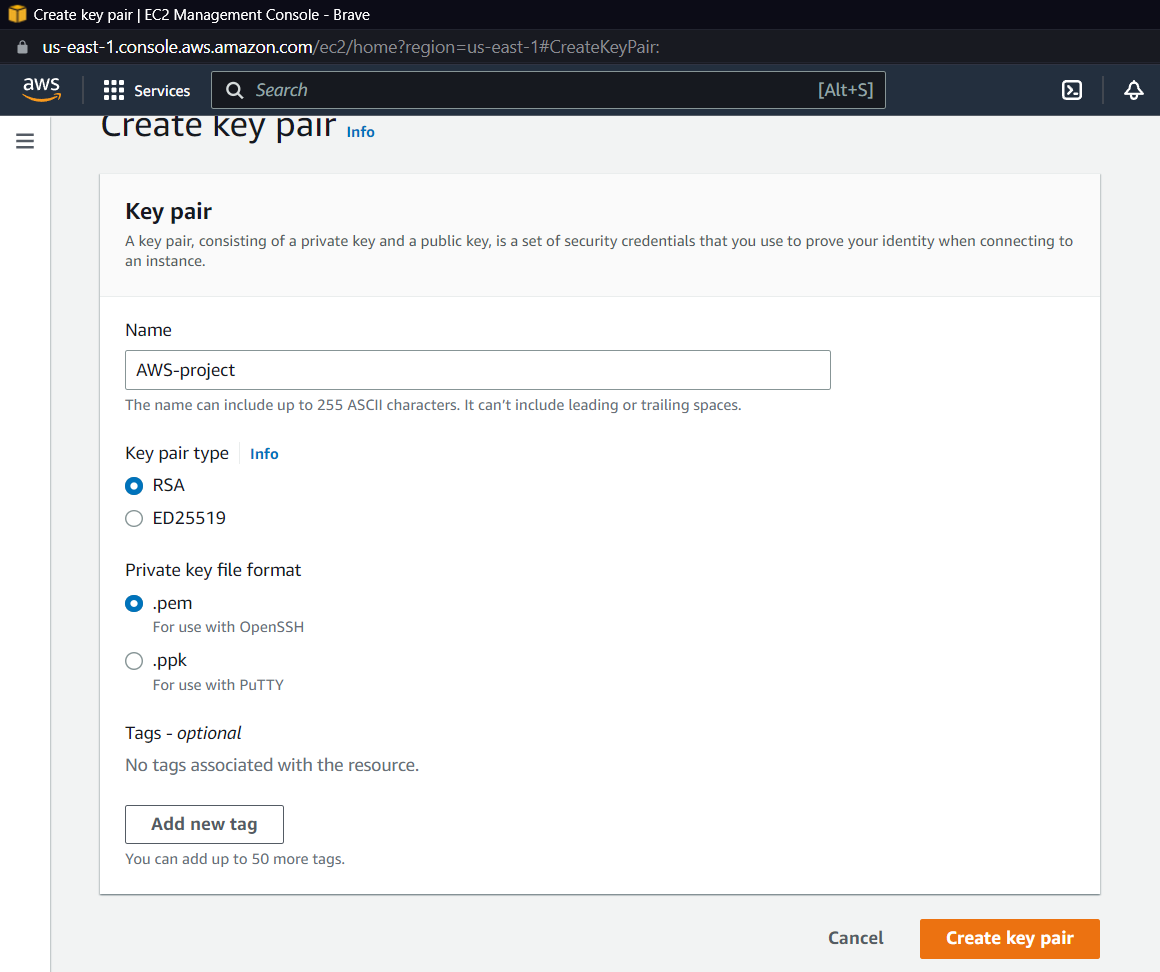
The file.pem will be downloaded.
Now let us create a public instance, select the launch instance, give it a name, keep everything default, select the key-pair created, click on edit network settings, select the default vpc, and now make sure that the subnet is not the one associated with the route table.
I had 172.31.64.0/20 in this subnet associated with my route table, so select any other subnet.
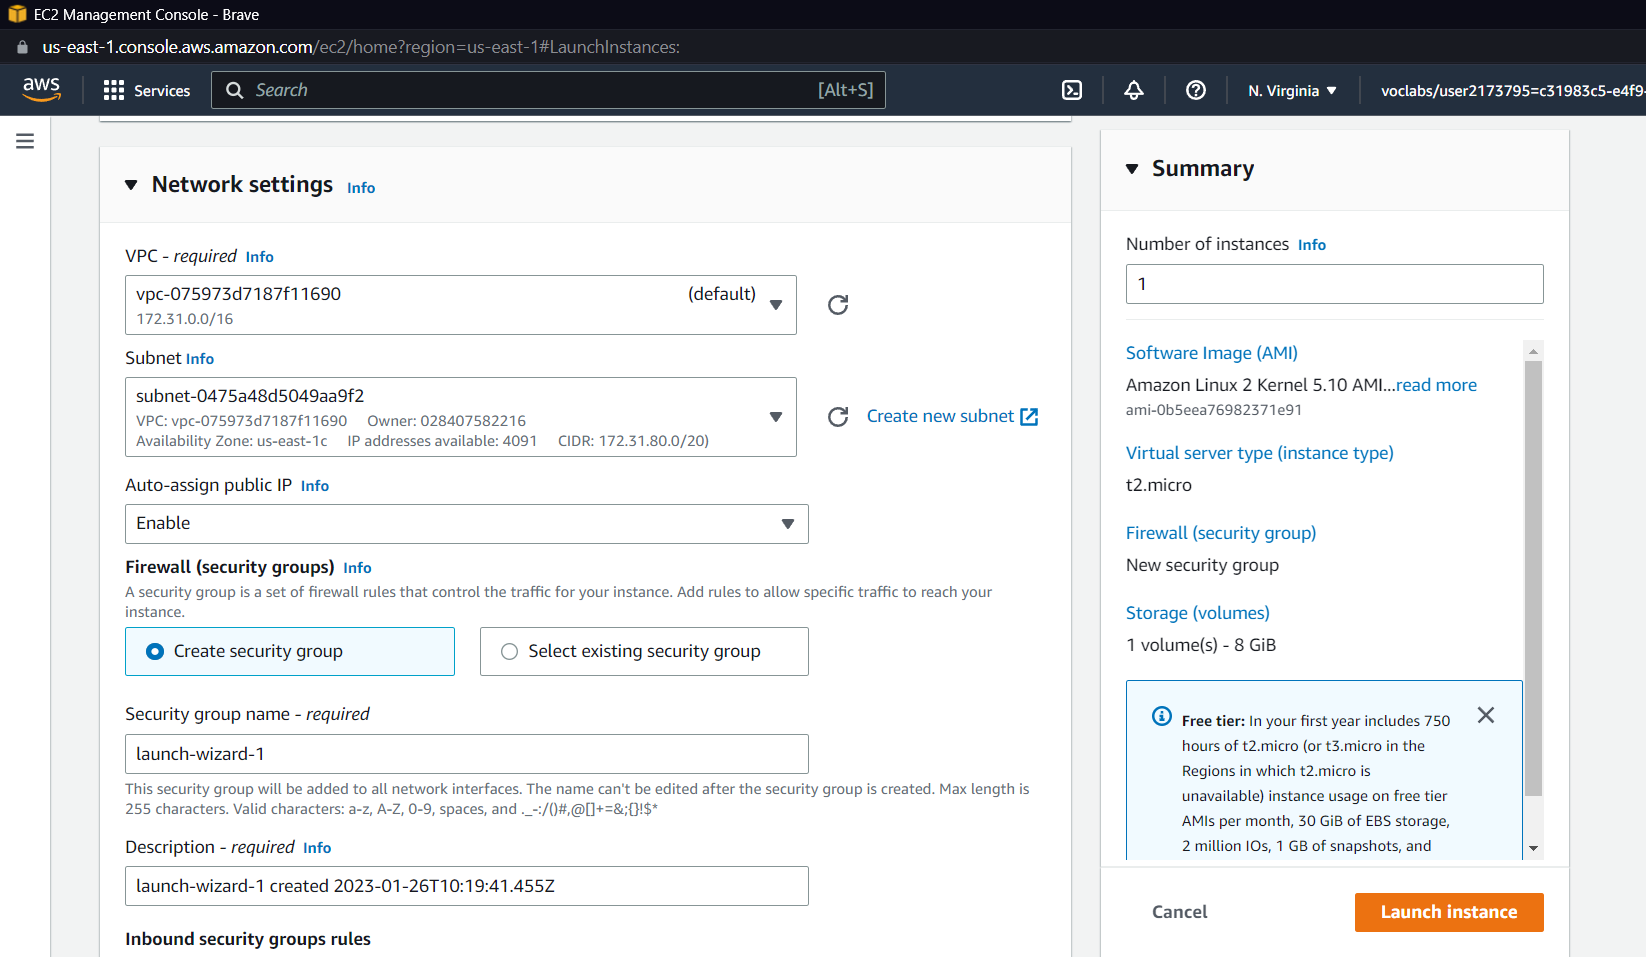
Now click on "launch instance."
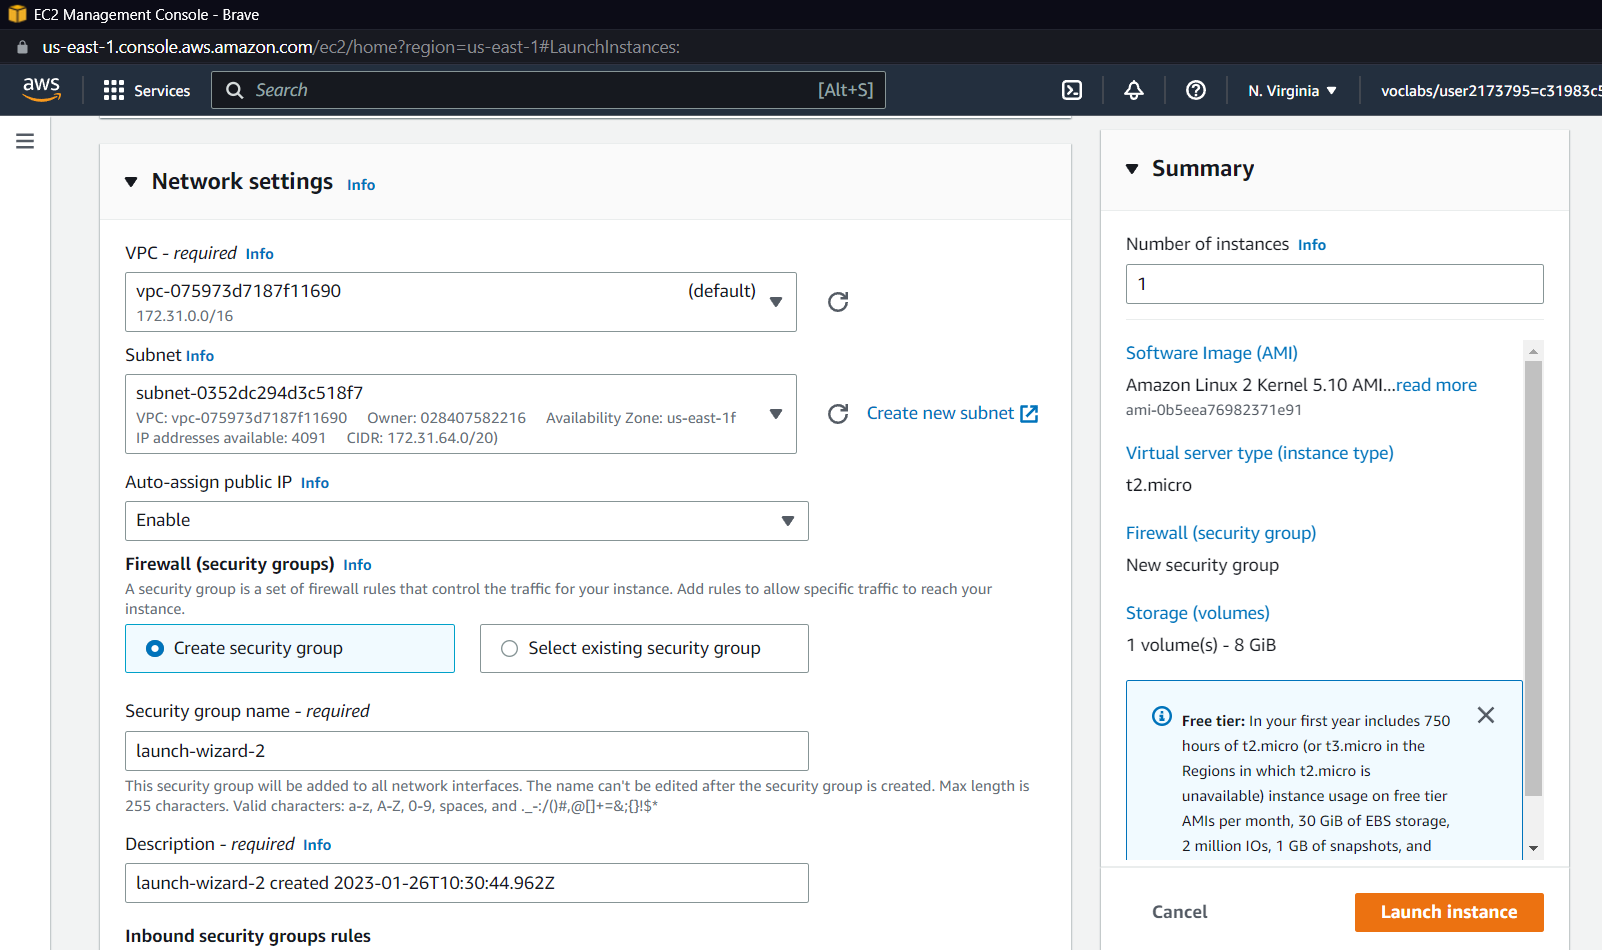
It's time to launch our private instance. Follow the similar steps to create another EC2 instance; just change the subnet to the one associated with the route table.
After launching both instances , check if both are in running states
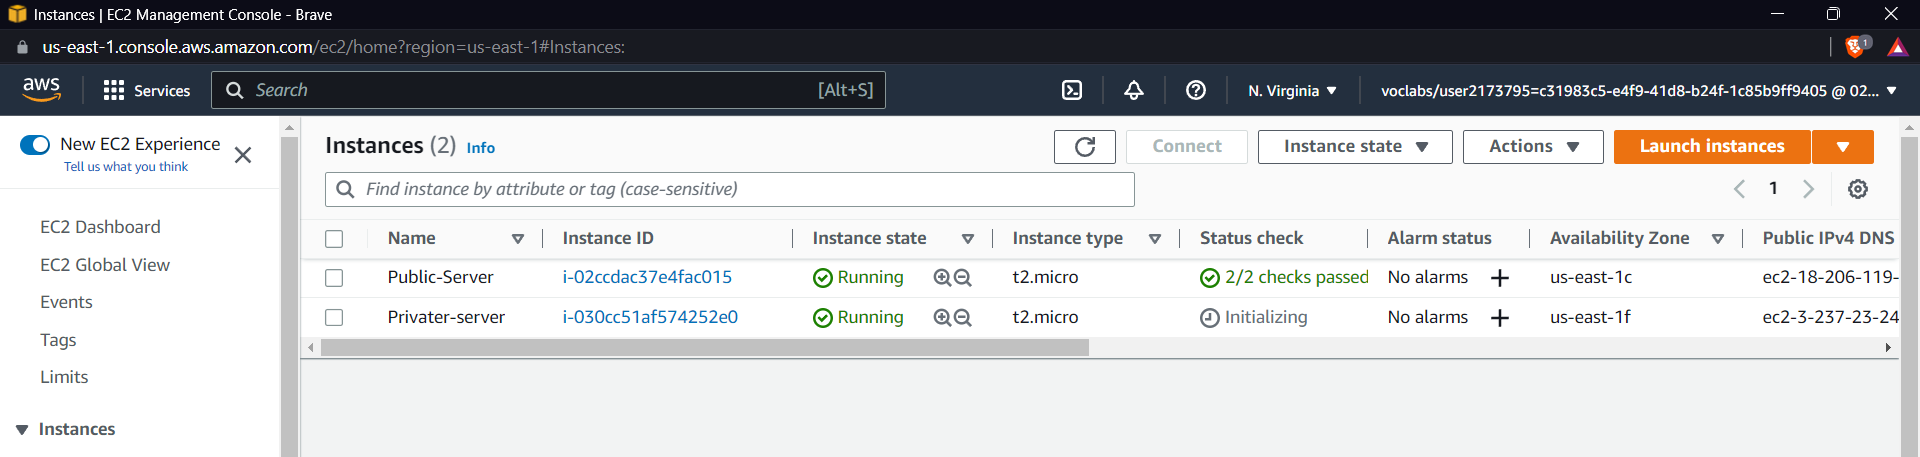
Now let's move on to test cases
Test Cases
For test cases:
Our first test case would be whether there is proper connectivity, and then we will try to upload a file from a private server.
For the next test case, we will try to upload a file from the public server, and it should give you an error.
Go to the public server and click on "connect."
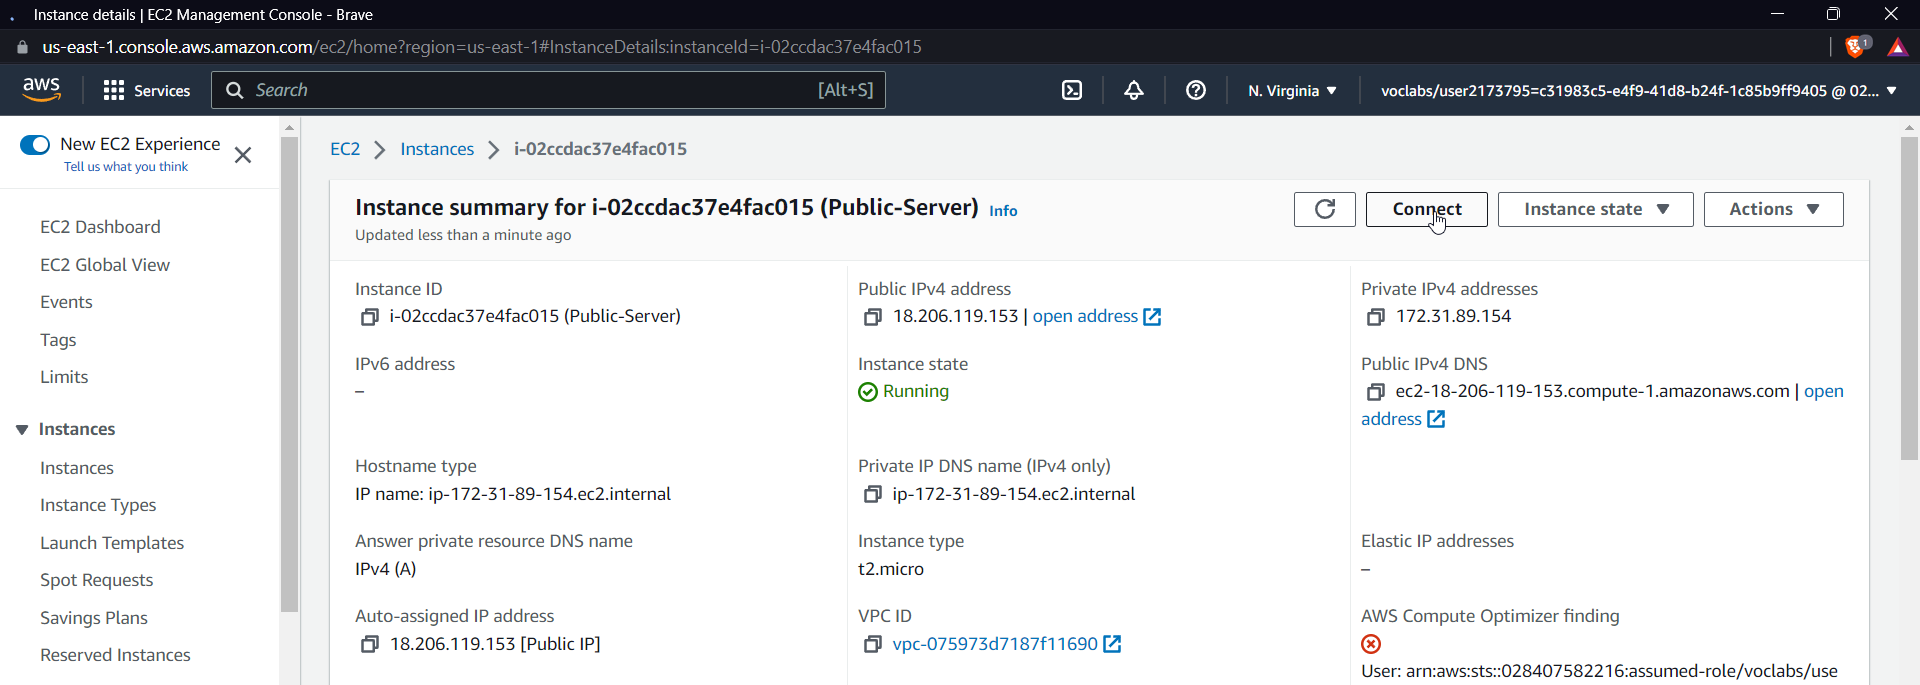
You will get an ssh instance of the public server

The next step would be connecting to the private server through ssh; for this, open the private key file that we used while creating both the instances.
Paste the private key inside the file created through vim in the above screenshot.
Now, get the private IP of the private instance. To do so, use the AWS console to search for EC2 and then select the private instance.

Now use the following command to ssh inside the private instance from the public instance:
ssh -i <pem-key-file> ec2-user@privateip
You may get a permission error for the file, change it by using chmod command
chmod 400 <pem-key-file>
If you don't change the proper permission you will get an error

Now that we're inside the private instance, let's try to upload a file to the S3 bucket from the private instance. To be honest, this didn't work for me the first time because I was testing it on a lab, so I just went to my own AWS account and replicated it exactly the same way.
Also, to upload a file from the terminal to S3, use the following command:
aws s3 cp abc.txt s3://awsproject-private-backup
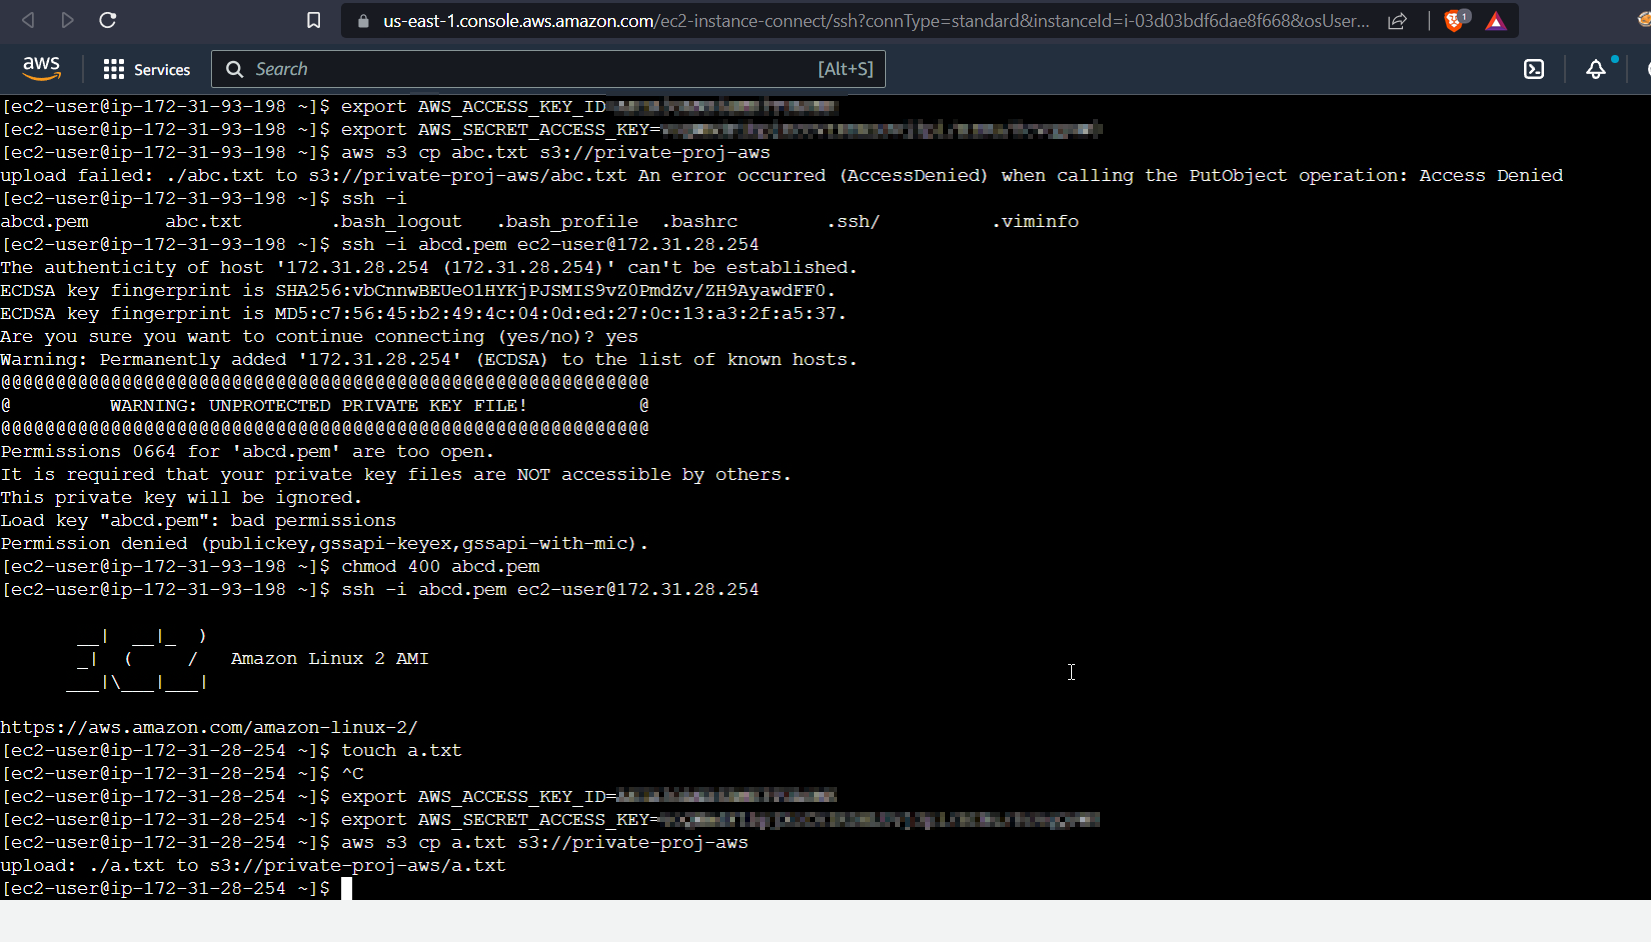
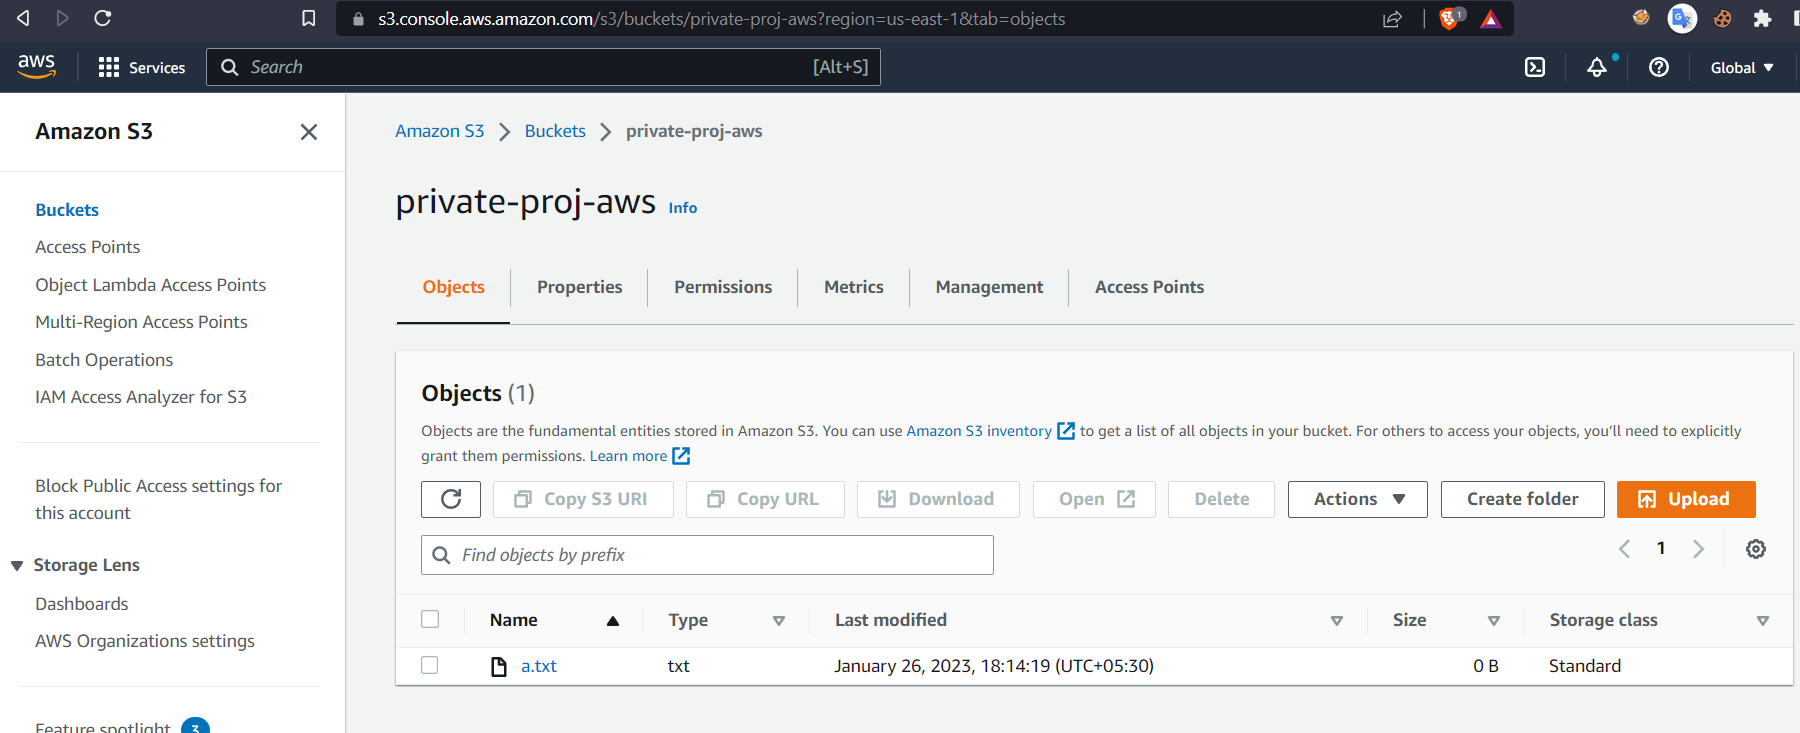
This proves that we can upload a file to the S3 bucket through a private server.
Now, let us test in the public server

It shows upload failed, so we have confirmed that we cannot upload any file from the public instance.
After Clean Up
Conclusion
Time to conclude the blog. I hope you enjoyed it. We successfully created a VPC endpoint that works specifically for uploading backups securely and through a private network.


