Building Serverless Workflow to Process Files Uploaded to Amazon S3

Hey everyone, welcome to the AWS project. As the name suggests, today I will be building a serverless workflow to process files that are uploaded to the Amazon S3 bucket, and the content of each file is stored as an item in DynamoDB.
Goal of the project and why is this required???
We have many applications with the functionality of file upload. In such projects, the main concerns for these projects may involve questions such as:
What if too many users request to upload the file at one time?
What if there is some error in uploading the file due to some other network issue? Does the user have to upload the file again? Does he get the message if the file is uploaded or not?
How do we know the file was successfully uploaded?
How do we make sure that even if we scale up our infrastructure, we can upload files in an organised way?
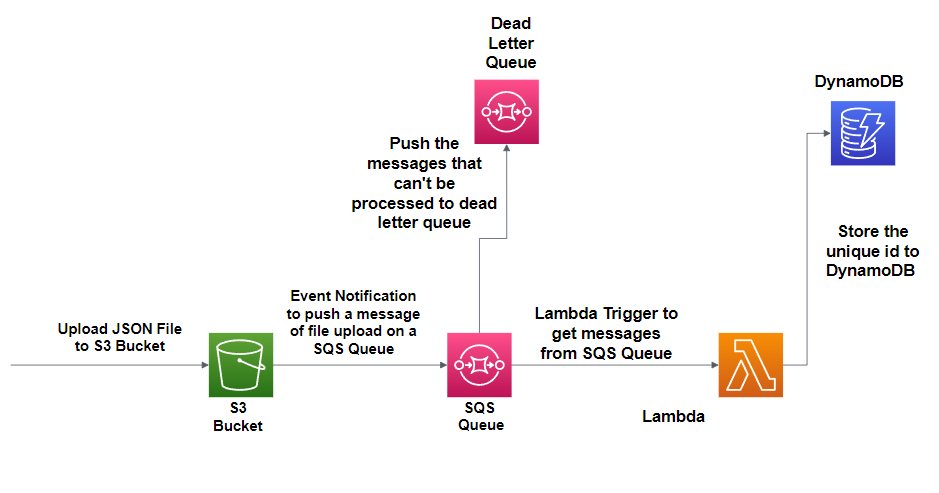
We would need to build a new workflow. We are receiving millions of JSON files (of different formats). First, these files are uploaded to an Amazon S3 bucket. As soon as we receive a file, we need to store the content of the file as an item in a DynamoDB table. It is important to ensure that every file is successfully processed. We would need to have a mechanism that would automatically retry failed files. In the event that processing of a file did not succeed after multiple tries, you would need to send it to a failed message queue. We are leaning towards a serverless approach using Amazon SQS and AWS Lambda.
What does creating a serverless workflow even mean?
So does "serverless" mean that it doesn't require any servers? We don't need to assign any servers because our system or infrastructure should take care of this on its own.
In this project, our system will take a new JSON file, which will be uploaded to an S3 bucket, and store details from the JSON file (as an item) with a unique id in a DynamoDB table. We have to build a serverless auto-scaling and highly resilient workflow involving Amazon S3 notifications, Amazon SQS, and AWS Lambda to store data in a DynamoDB table.
Below are the steps that I will be following to create the workflow.
Highlights
Creating an S3 bucket to store files
Creating a DynamoDB table
Assign the lambda function a role with the appropriate permissions.
Create a Lambda function using the above-created role.
Create a dead letter queue to store failed messages.
Create a SQS queue with a lambda trigger.
Update the S3 bucket to trigger notifications in the SQS queue.
Creating Bucket
Let us look for S3 bucket in our AWS console; we need S3 bucket to store objects, which in this case is a JSON file.
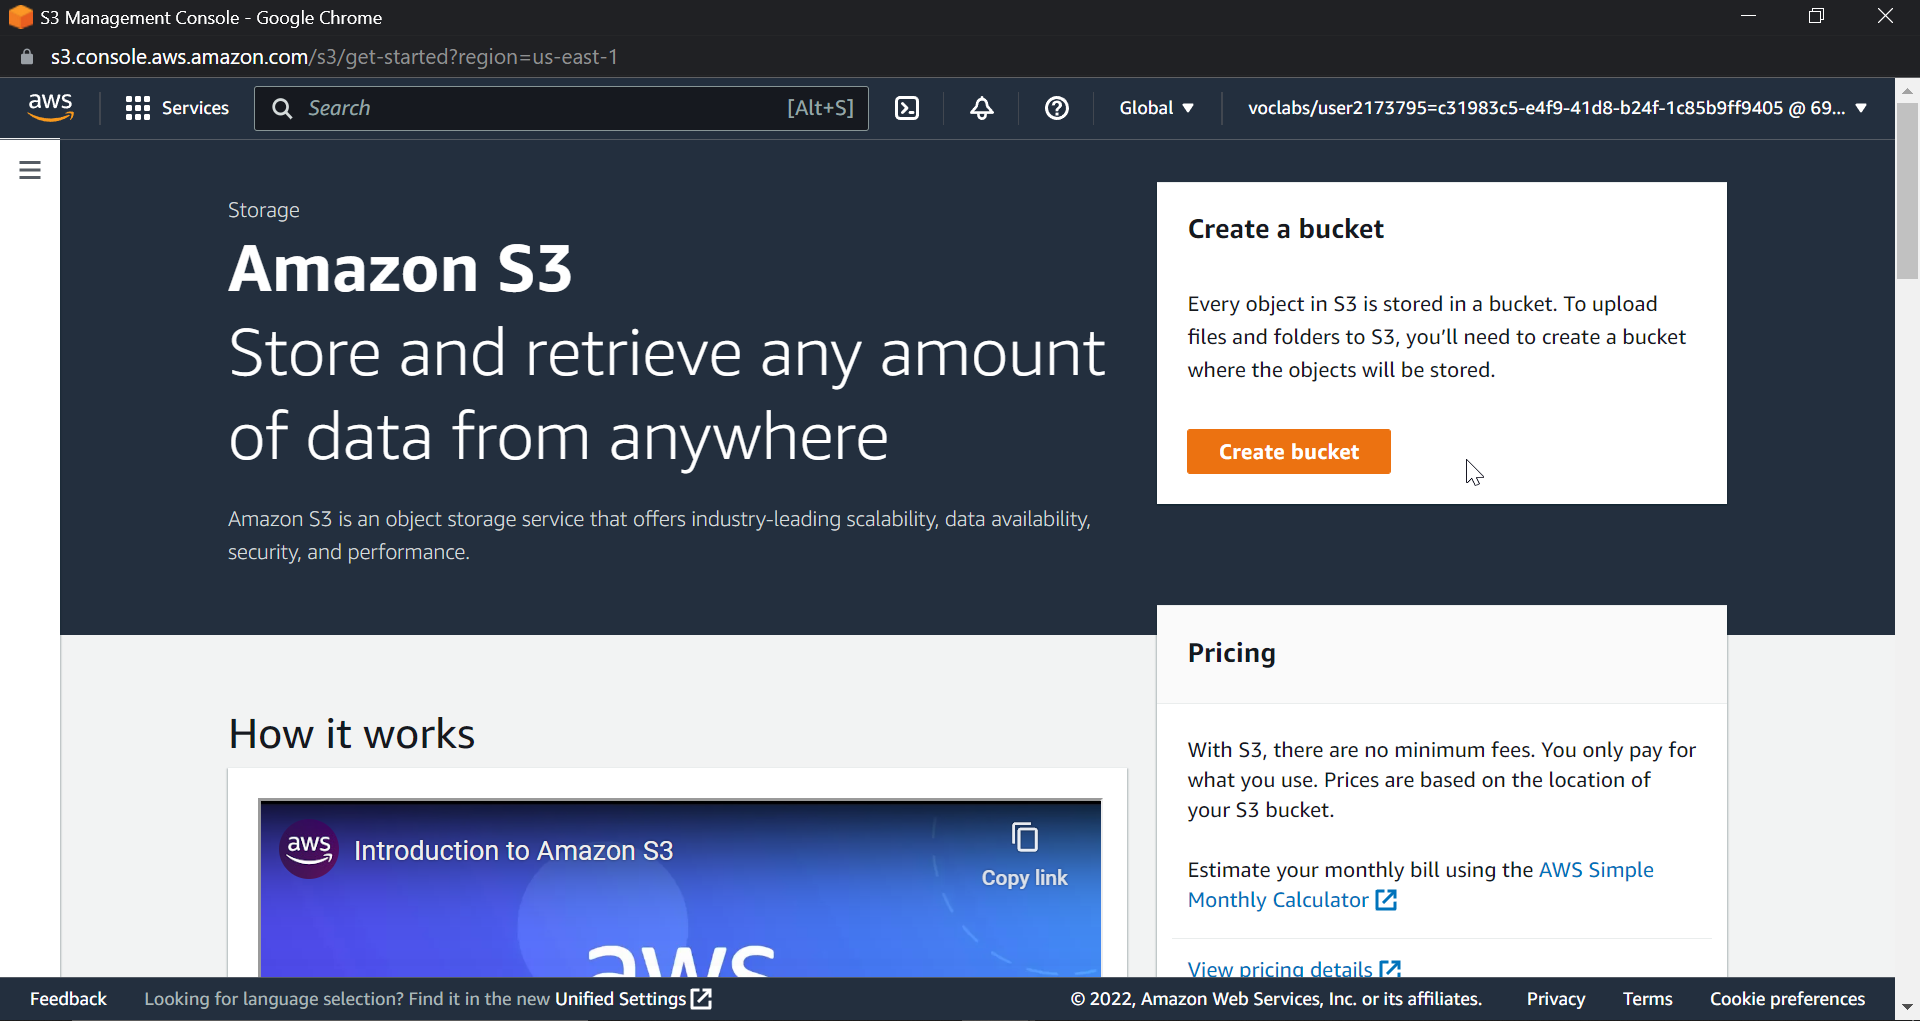
I won't be deep diving into the creation of an AWS bucket; for that, you can refer to the following guide:
Leaving everything as is and creating a bucket called "item-processing-bucket."
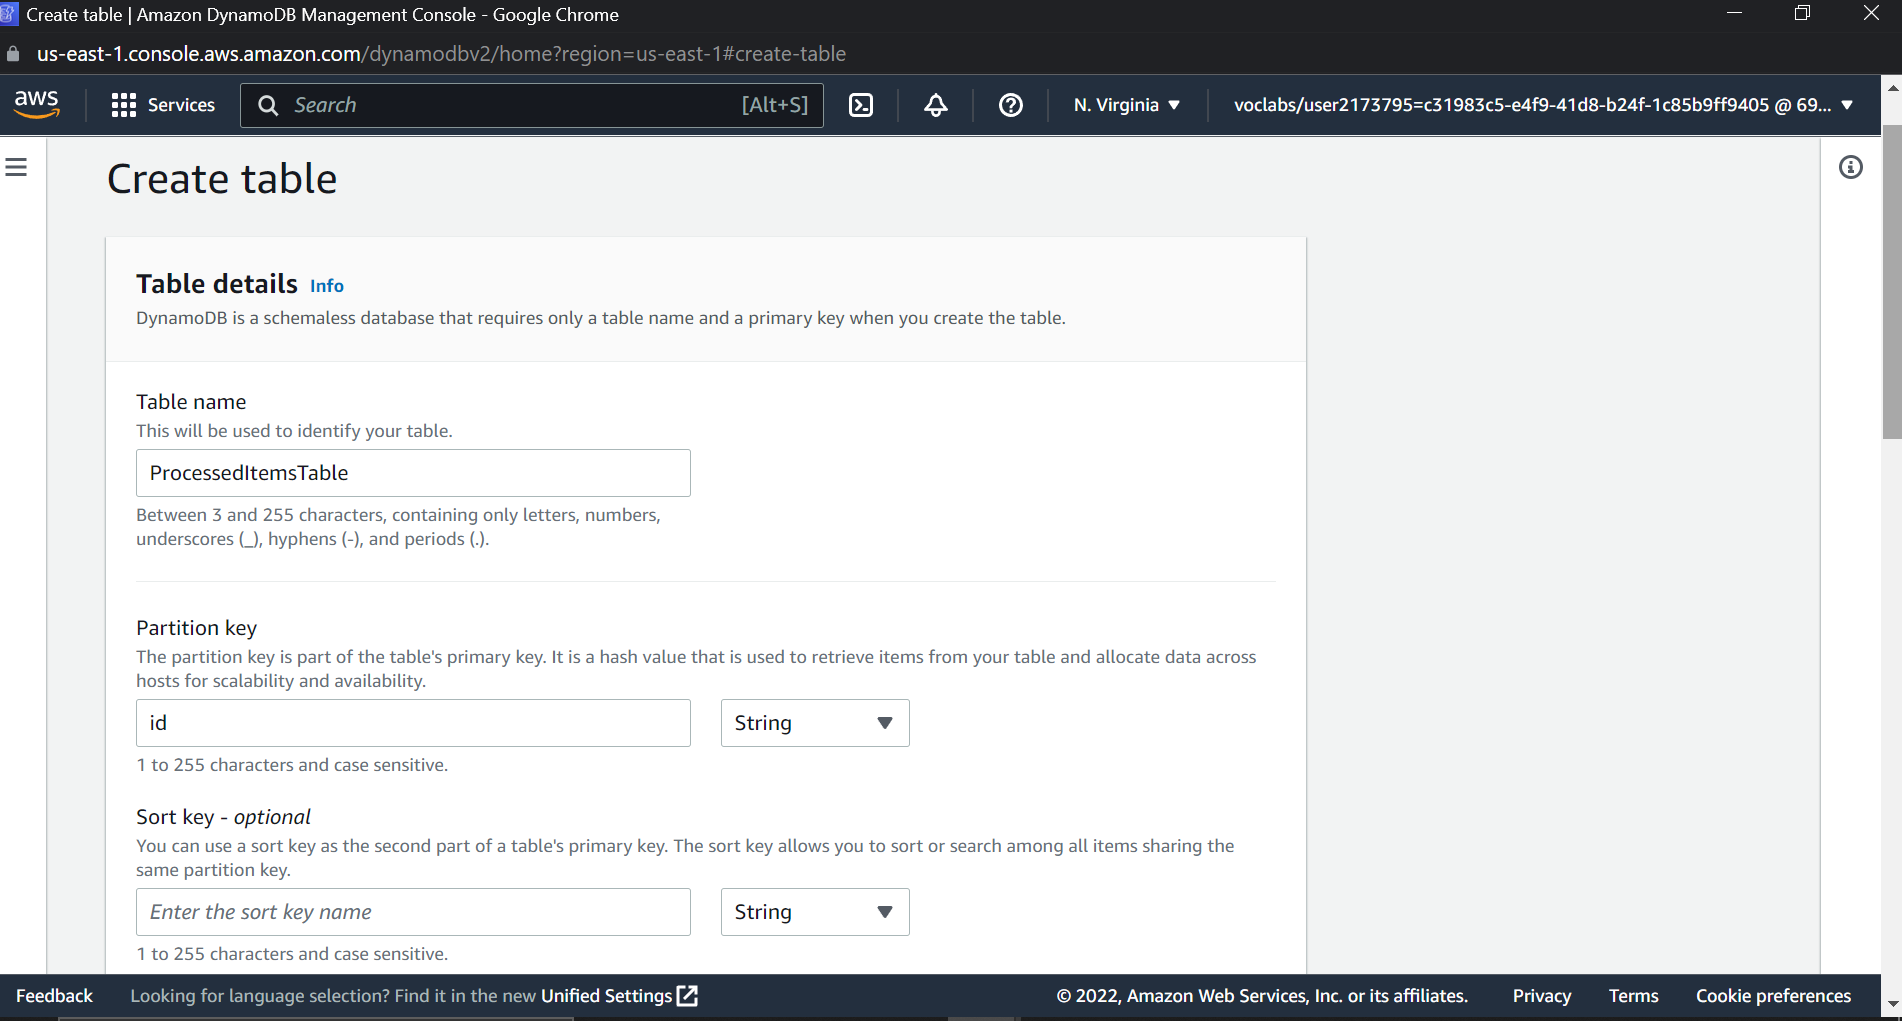
Creating DynamoDB table
Now let's create a Dynamo DB table. To do so, search for DynamoDB in the console and type in the desired name for the table. Next, select the primary key as a string and the name as an id. Keeping everything at default, let's create a DynamoDB table.
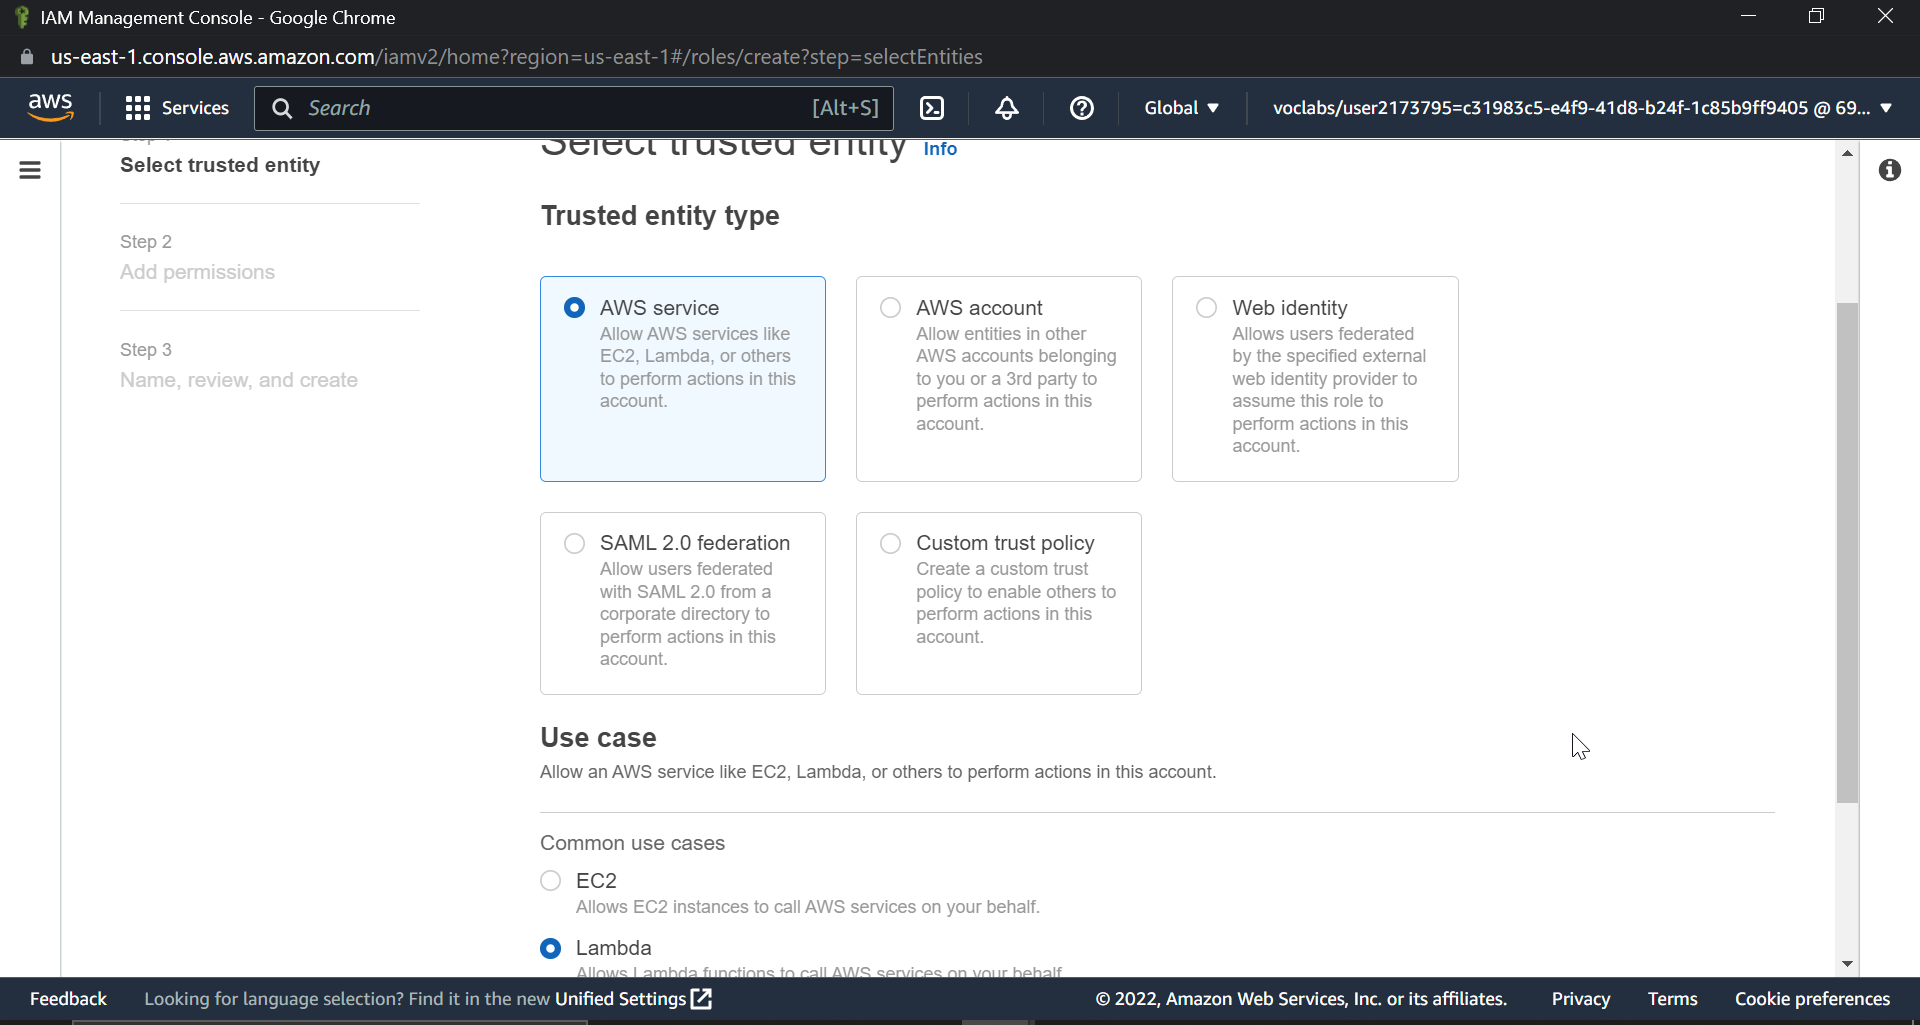
Next we will be creating a role for lambda function
Why do we have to create a role?
Lambda functions should have access to perform different actions, such as read objects from S3 buckets, have execution access on the SQS queue, and create IDs in DynamoDB tables.
Search for IAM in the AWS console, then select roles, and then create a new role. Select AWS service and lambda from the list of trusted entities, as shown in the image below.
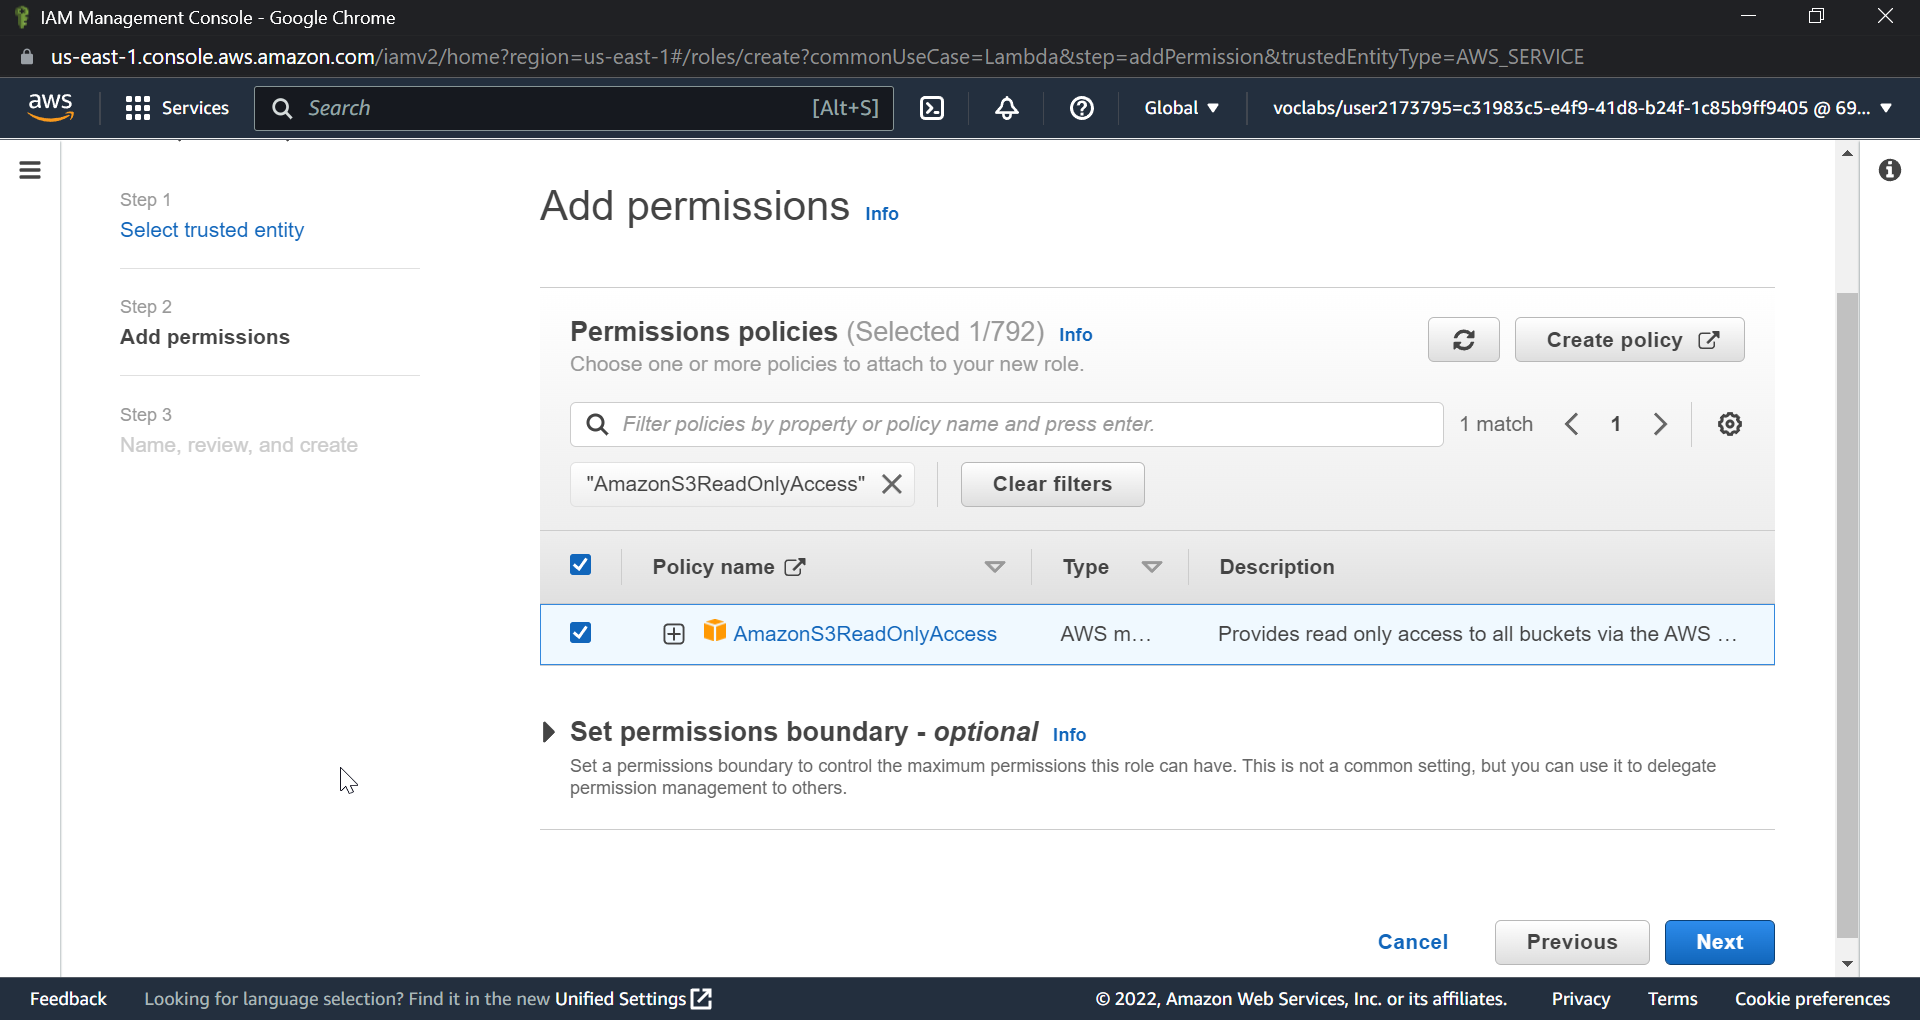
The next step would be permissions, and as per our project, we require the following permissions:
AmazonS3ReadOnlyAccess
AWSLambdaSQSQueueExecutionRole
AmazonDynamoDBFullAccess
AWSLambdaBasicExecutionRole
Simply look for them in the dropdown and check the boxes as shown in the image.
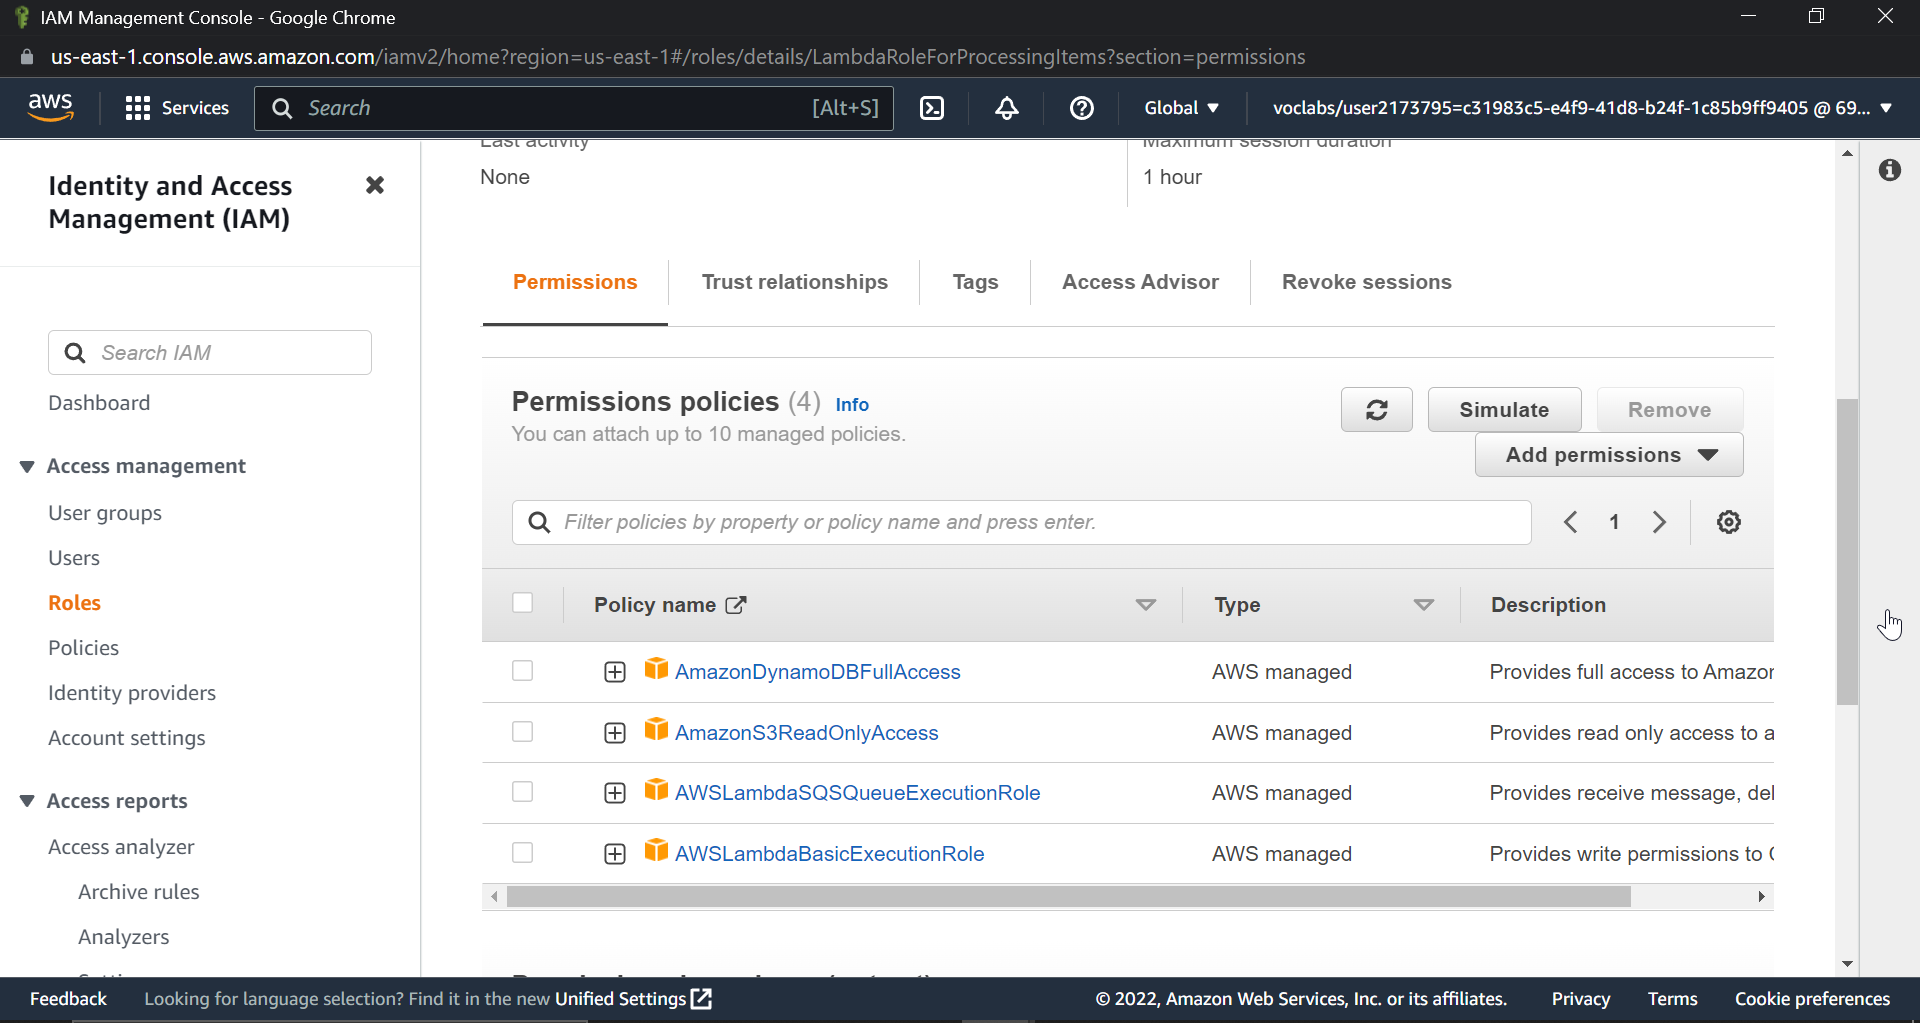
After you've added a role, click Next, give it a name, and finally click Create Role .To check if you have successfully created a role, you can check by navigating through the role name.
Now let's create the lambda function that will actually process things.
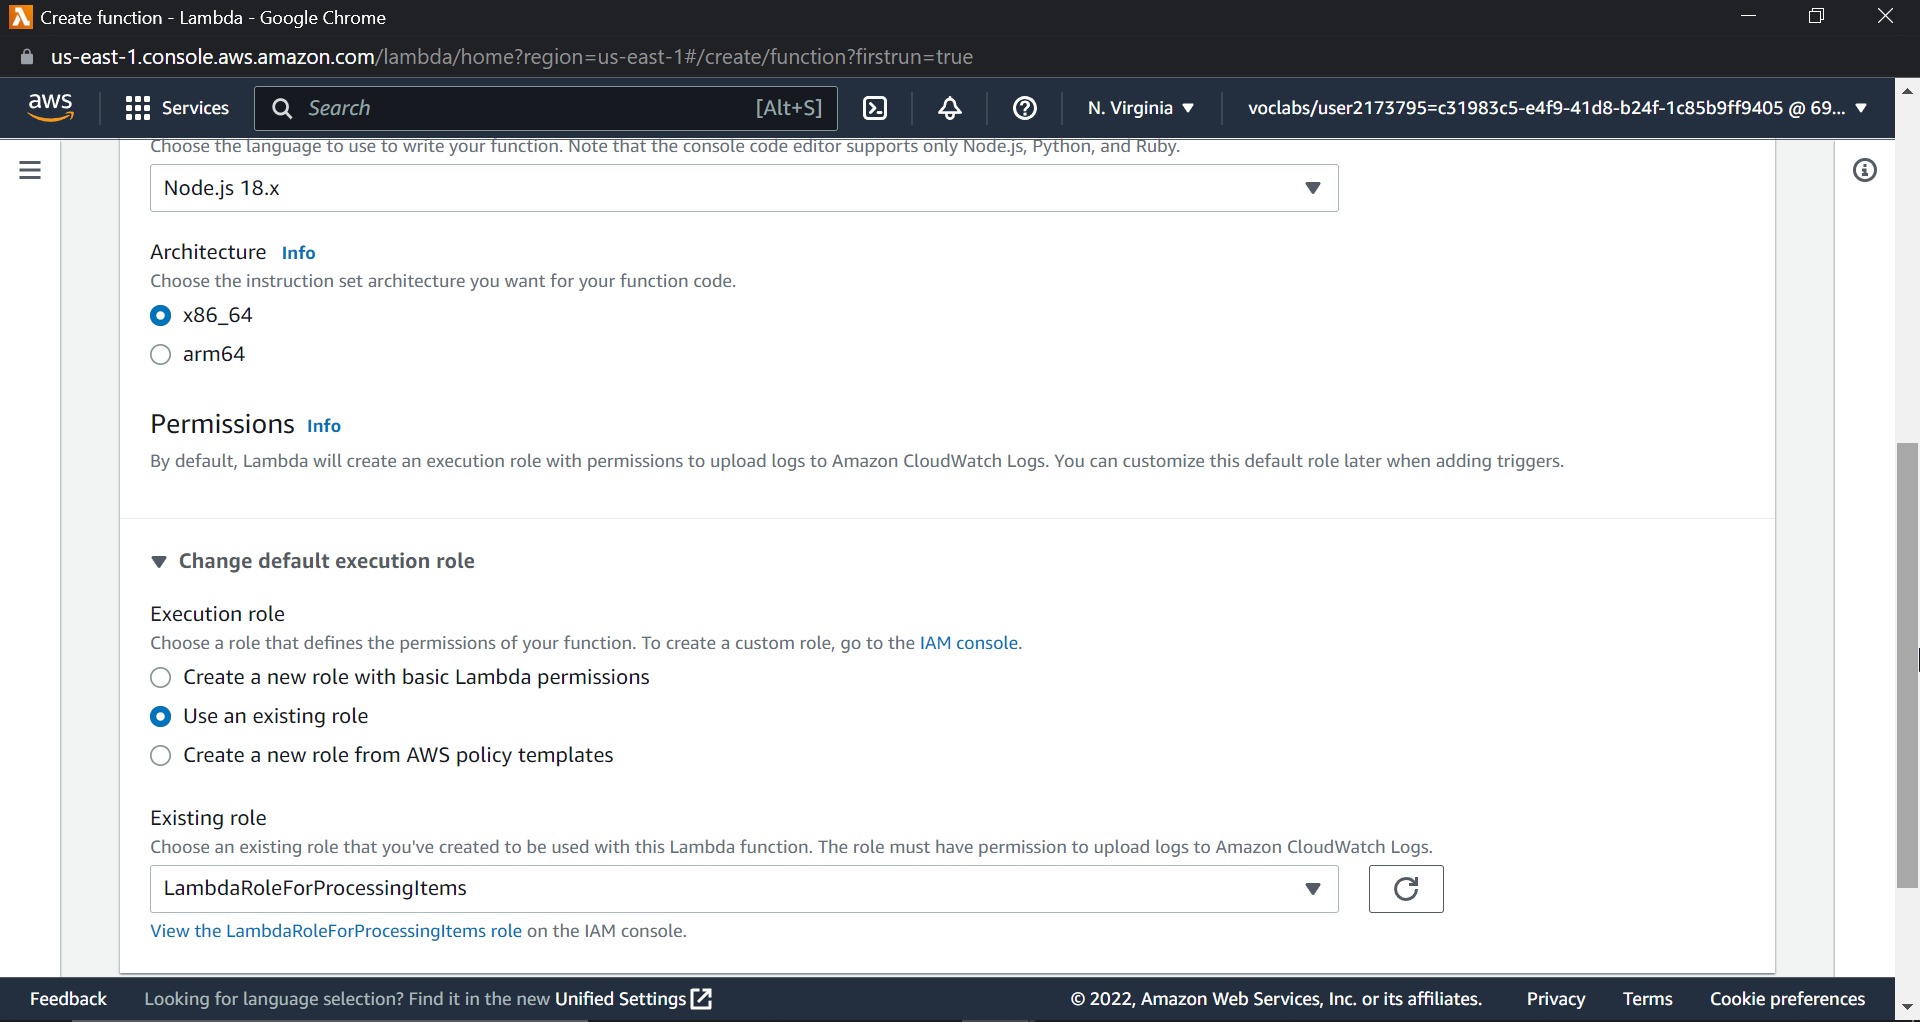
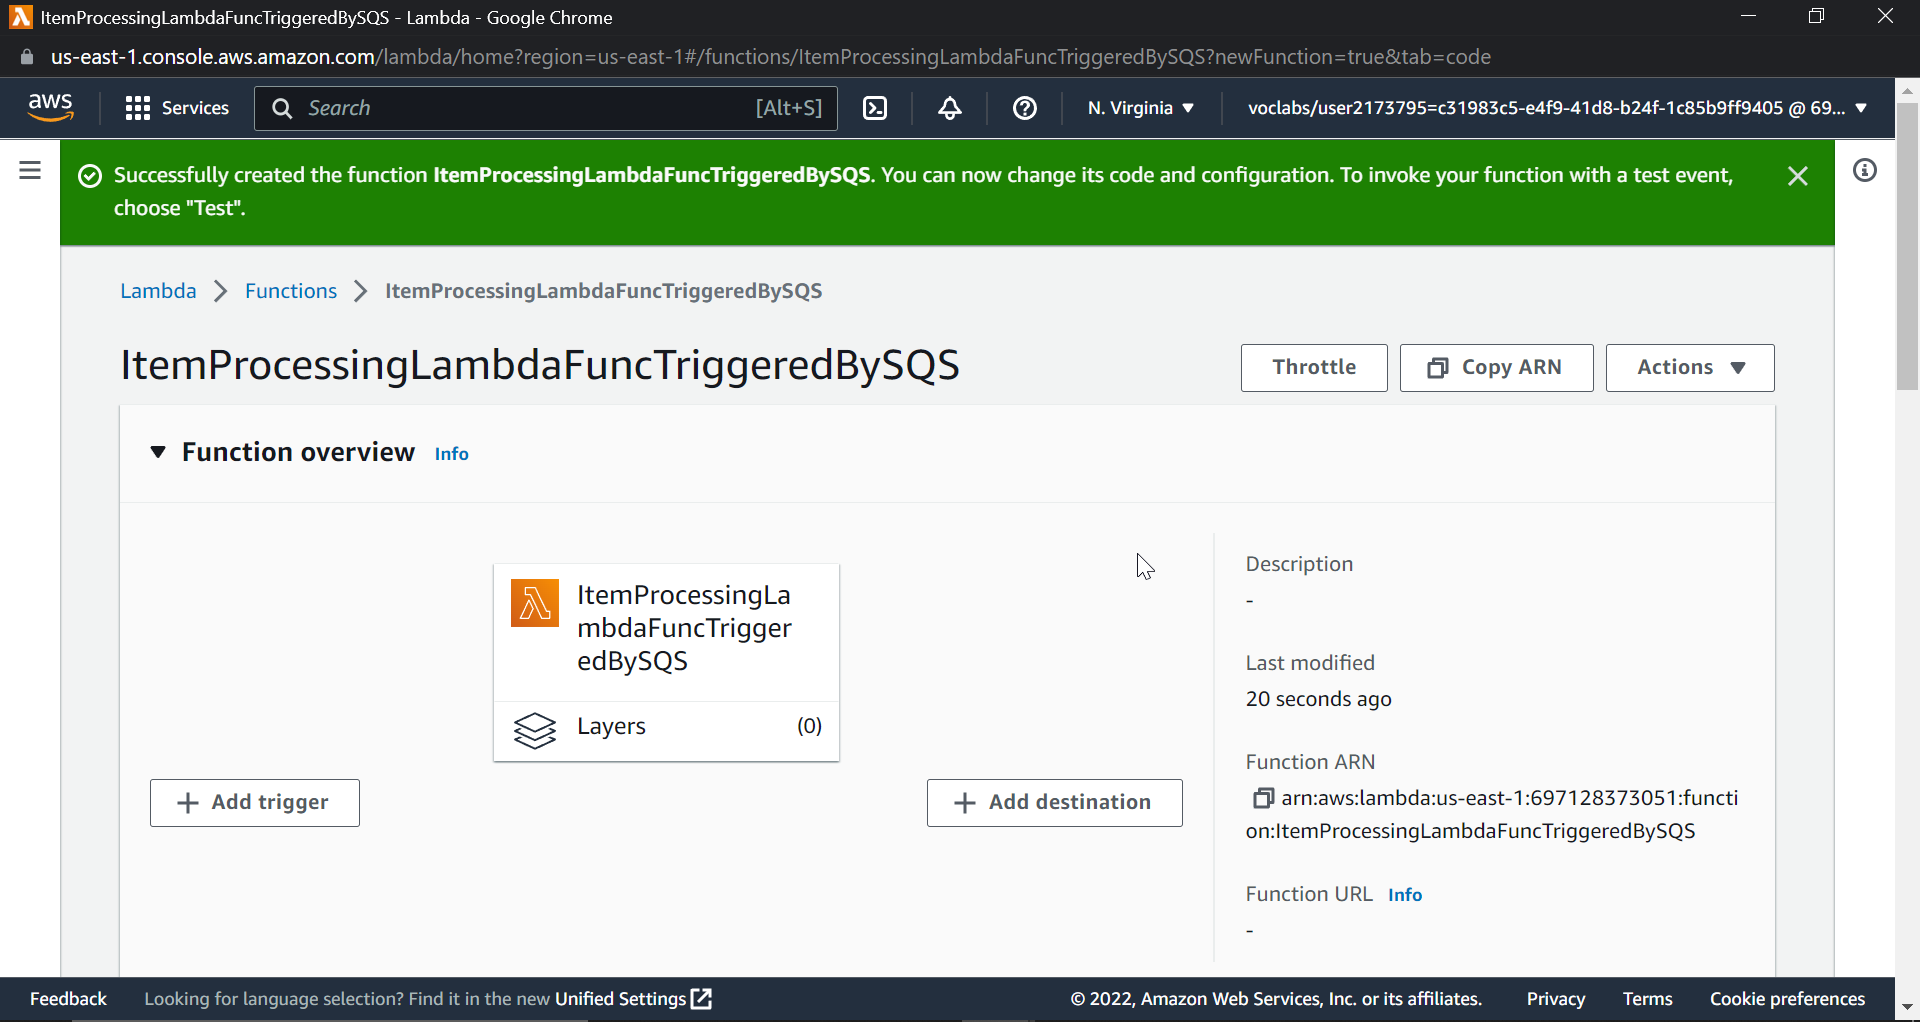
This lambda function will actively listen for messages from the SQS queue. When a new message arrives, we will process it and insert an item into the DynamoDB table. Search for lambda in the AWS console and create a new function. Now select the author from scratch. I am giving the name of my function as ItemProcessingLambdaFuncTriggeredBySQS. As shown in the following image, keep the language as node.js and change the existing role from default to the role that we create; in my case, the name was LambdaRoleForProcessingItems.
Now click on create function you will get following output
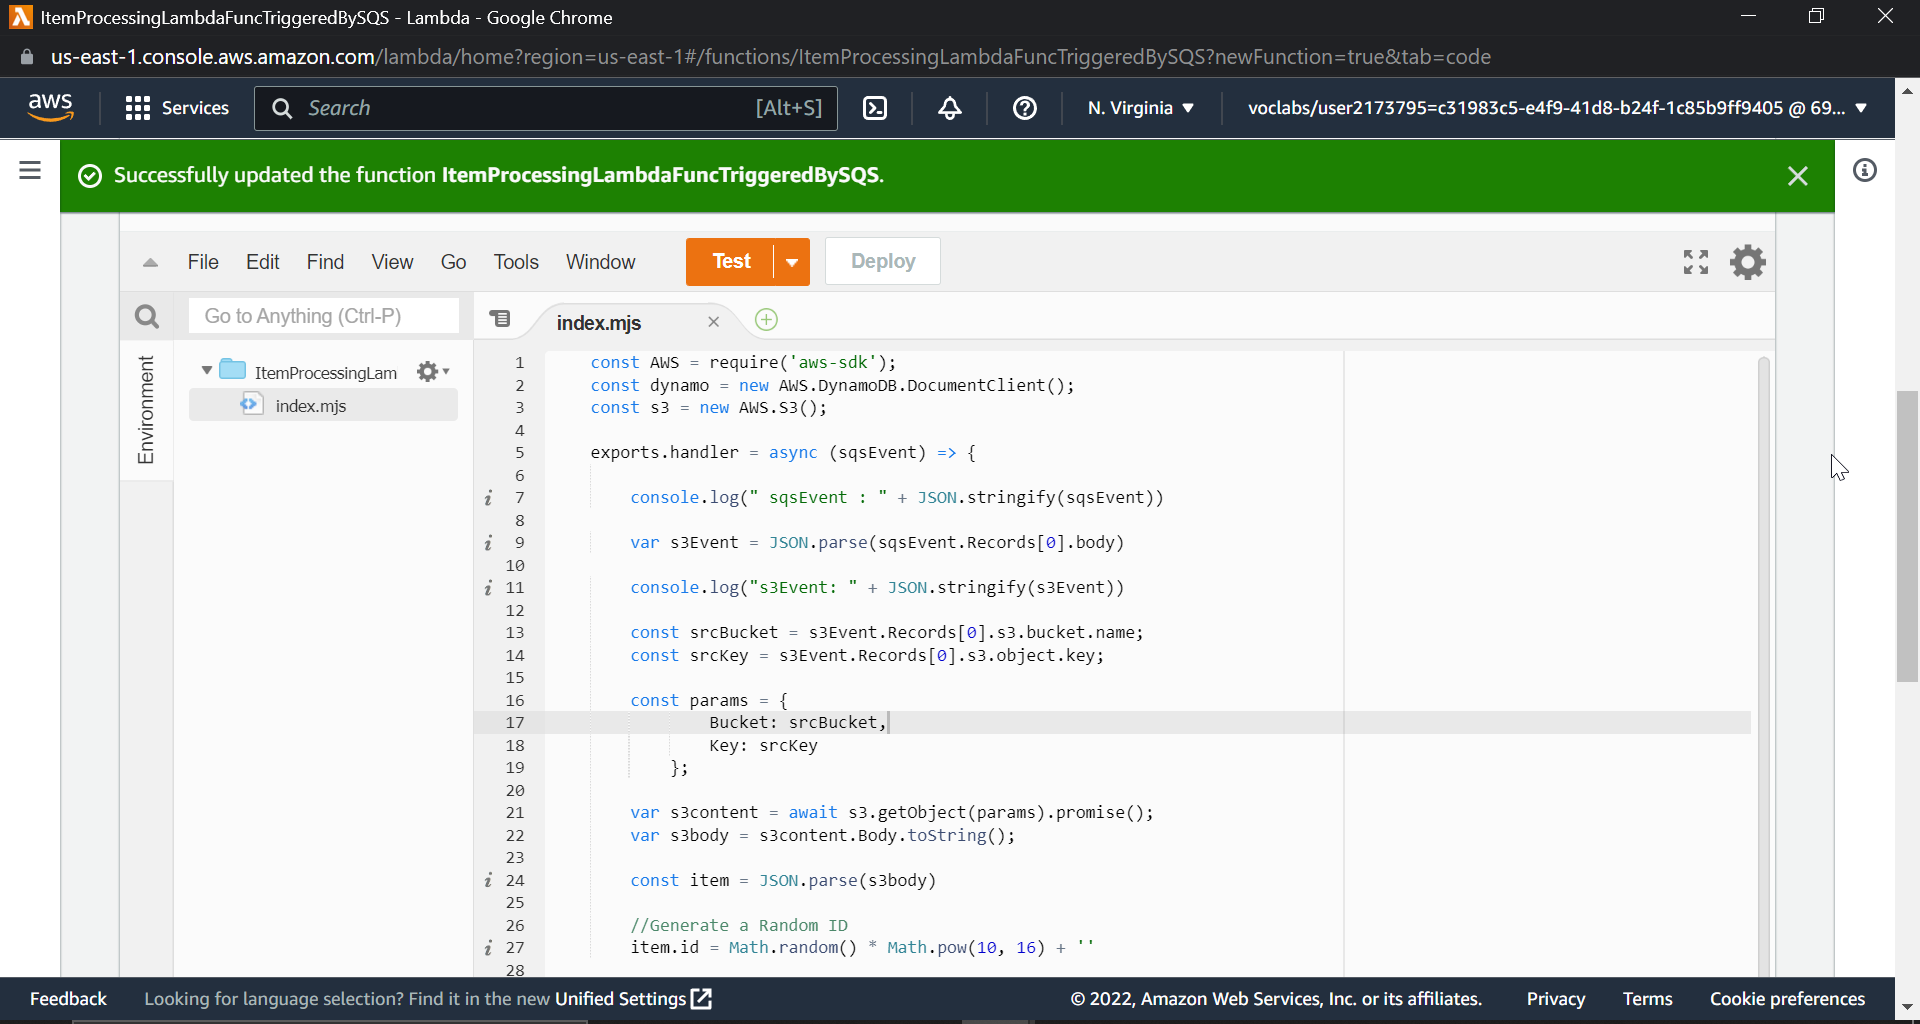
Now inside the function, we have to add some code, select the index.mjs file, which is already created, and paste the following code snippet. Don't worry, I will explain code too.
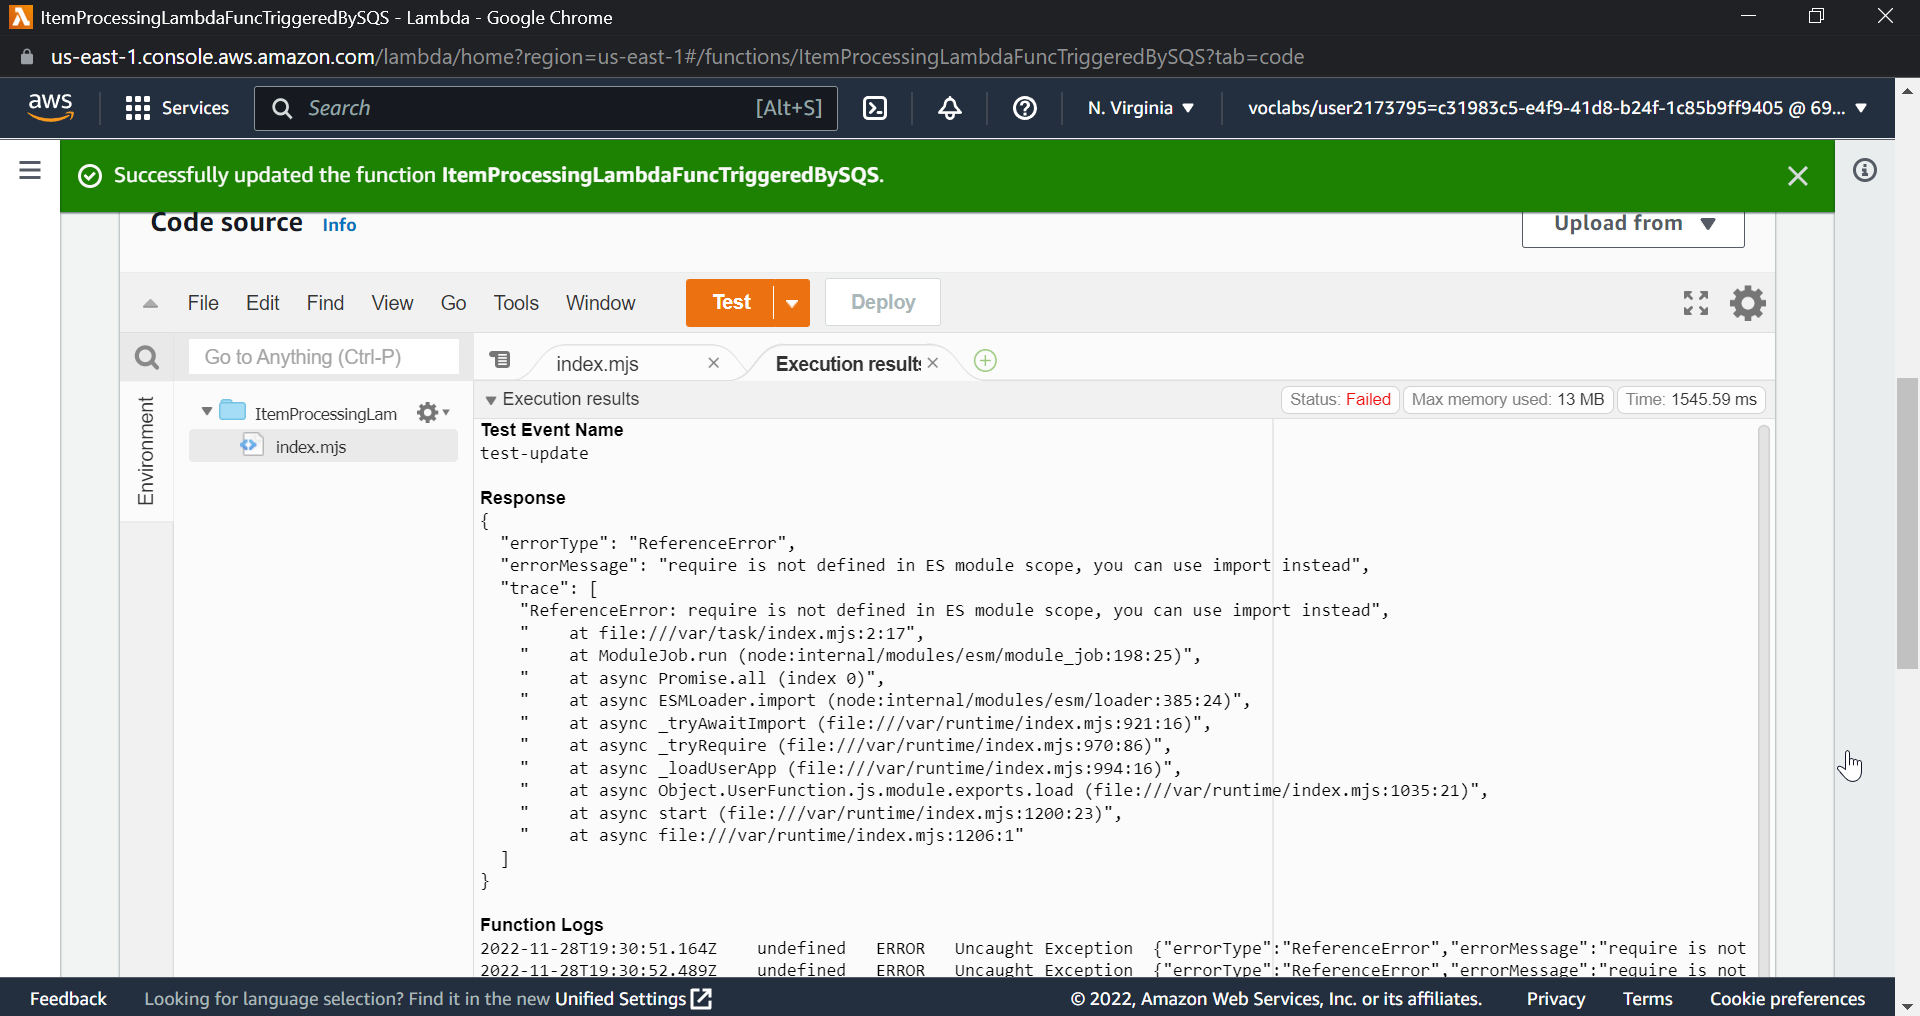
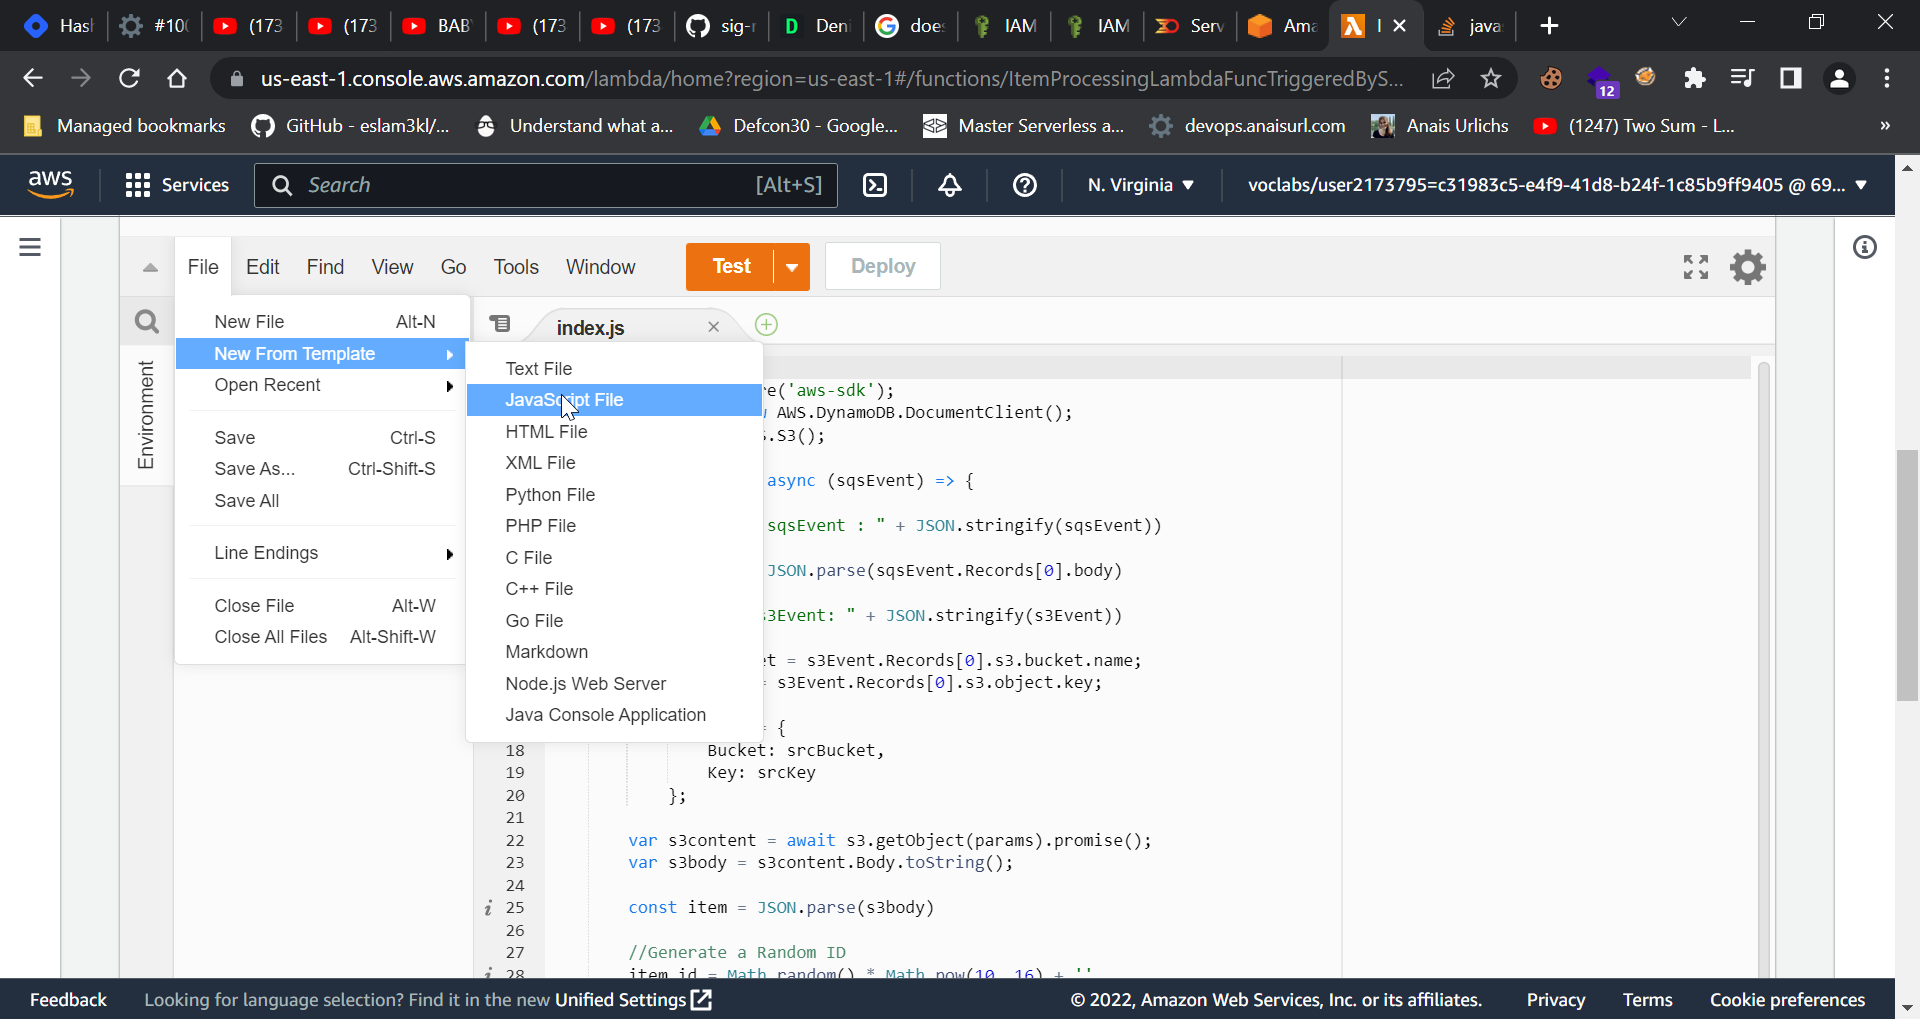
Here I faced a problem, which is that we must have a.js file instead of a .mjs file. If a .js file is not present, just create a new javascript file with the index.js filename.
const AWS = require('aws-sdk');
const dynamo = new AWS.DynamoDB.DocumentClient();
const s3 = new AWS.S3();

exports.handler = async (sqsEvent) => {

    console.log(" sqsEvent : " + JSON.stringify(sqsEvent))

    var s3Event = JSON.parse(sqsEvent.Records[0].body)

    console.log("s3Event: " + JSON.stringify(s3Event))

    const srcBucket = s3Event.Records[0].s3.bucket.name;
    const srcKey = s3Event.Records[0].s3.object.key;

    const params = {
              Bucket: srcBucket,
              Key: srcKey
          };

    var s3content = await s3.getObject(params).promise();
    var s3body = s3content.Body.toString();

    const item = JSON.parse(s3body)

    //Generate a Random ID
    item.id = Math.random() * Math.pow(10, 16) + ''

    var dynamoParams = {
        TableName: 'ProcessedItemsTable',
        Item: item
    };

    const result = await dynamo.put(dynamoParams).promise();

    return result;
};
- The code starts by logging the event that is being received from AWS.
- It then parses the JSON object and extracts all of the relevant information about it, including a bucket name and key.
- The code then creates an object with these values, which is passed to S3 for retrieval.
- Once retrieved, it will be parsed into a JavaScript Object Notation (JSON) string and returned. as a promise.
- The code is a function that will be executed when the event "sqsEvent" is triggered.
- The code takes an object as input and logs it to the console.
- The code then parses out some data from the object, which includes information about where the object was stored, how many records were stored, and what type of record it was.
- The next step in this function is to make a request to AWS S3 for an item with a specific key. and bucket name.
- This request will return an object containing all of the data needed for this function's purpose.
After using the above code snippet
Click deploy, and we are done with lambda function creation.
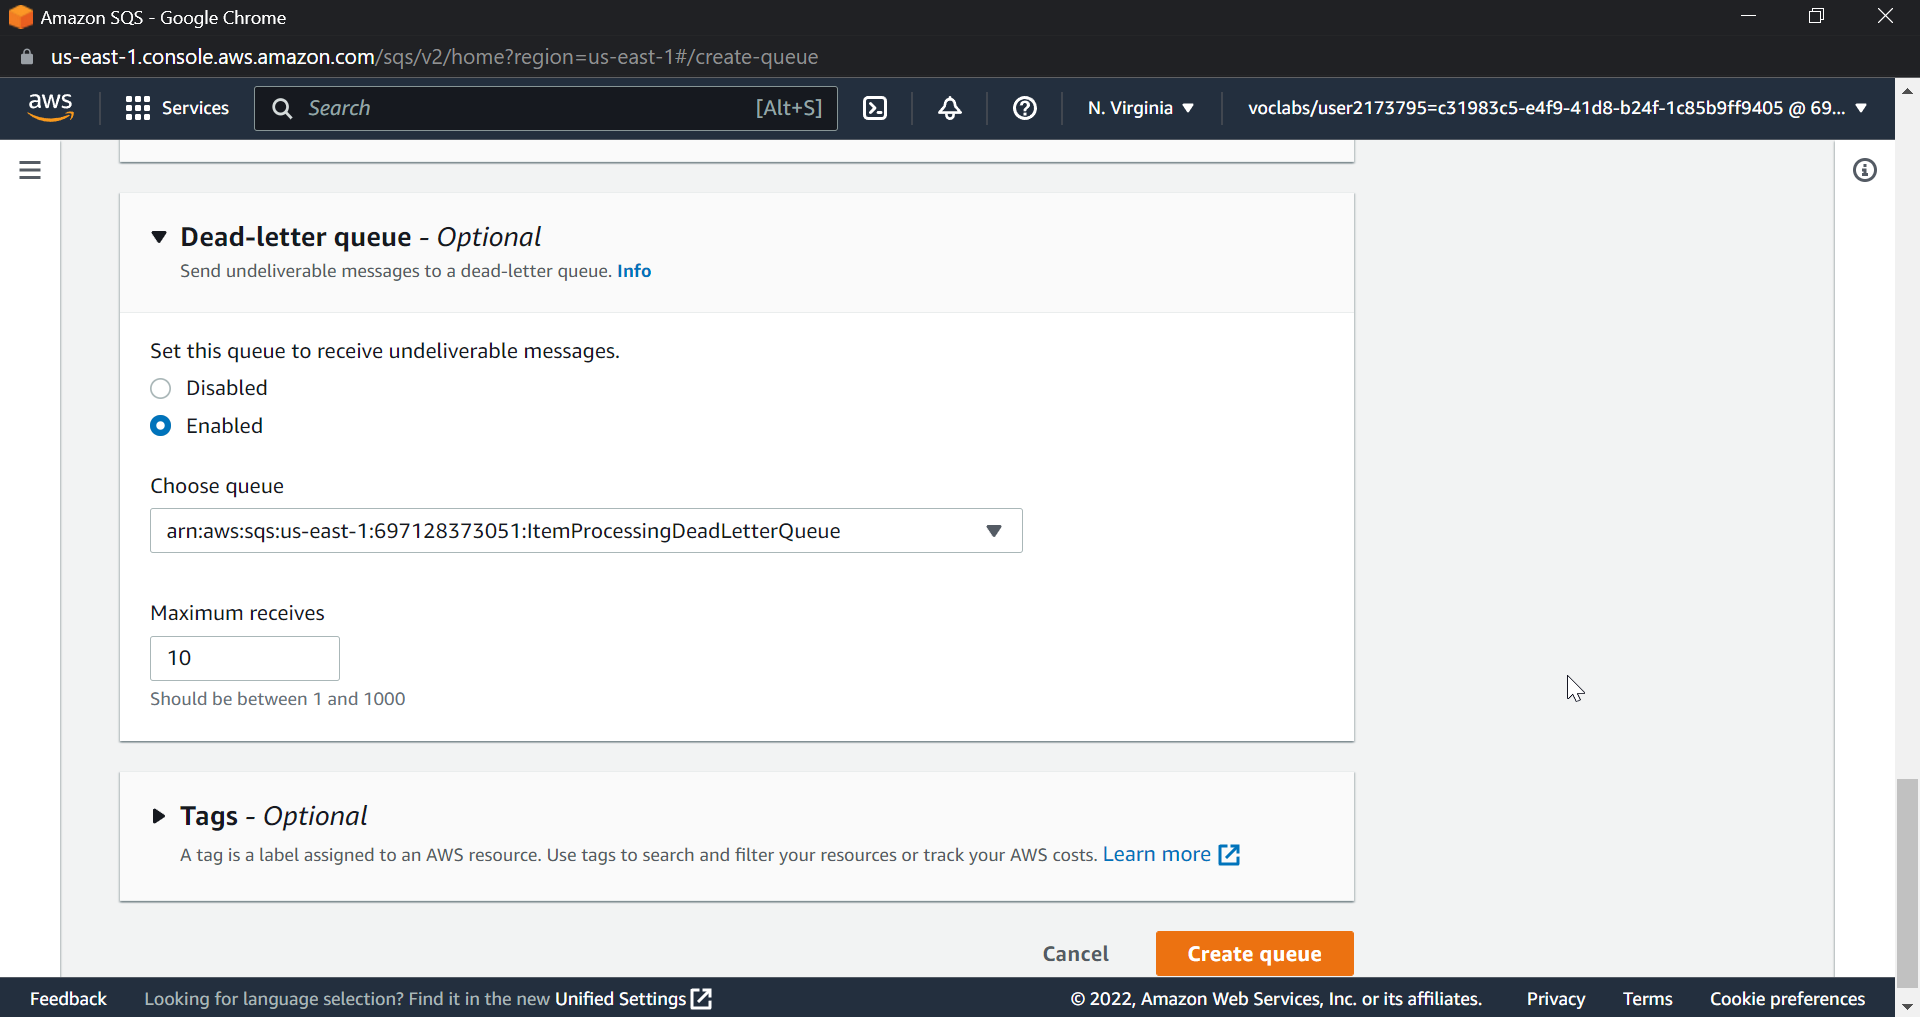
Next step is to create a Dead letter Queue to store failed messages
We want a highly resilient solution. We will create a dead letter queue to store messages that failed processing despite multiple attempts.
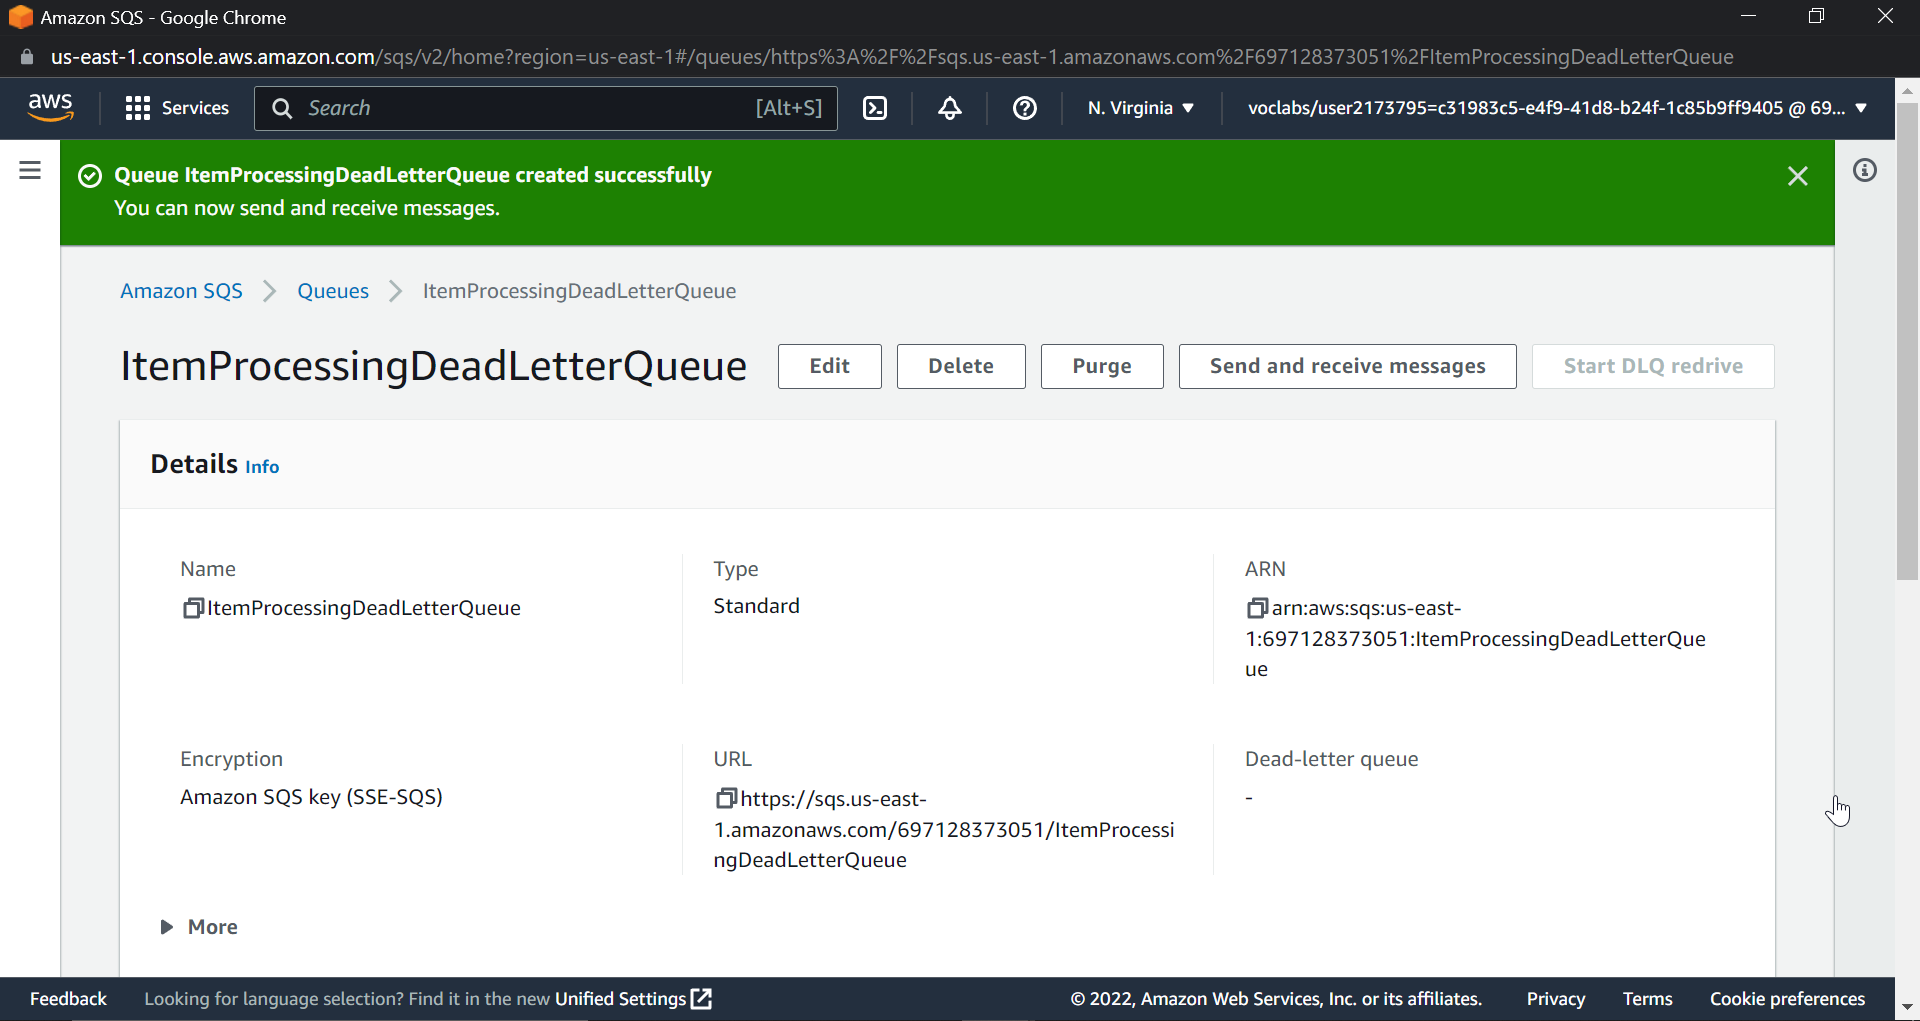
Go to the AWS console and search for SQS. Select Simple and give a name to the queue. I am giving it ItemProcessingDeadLetterQueue.
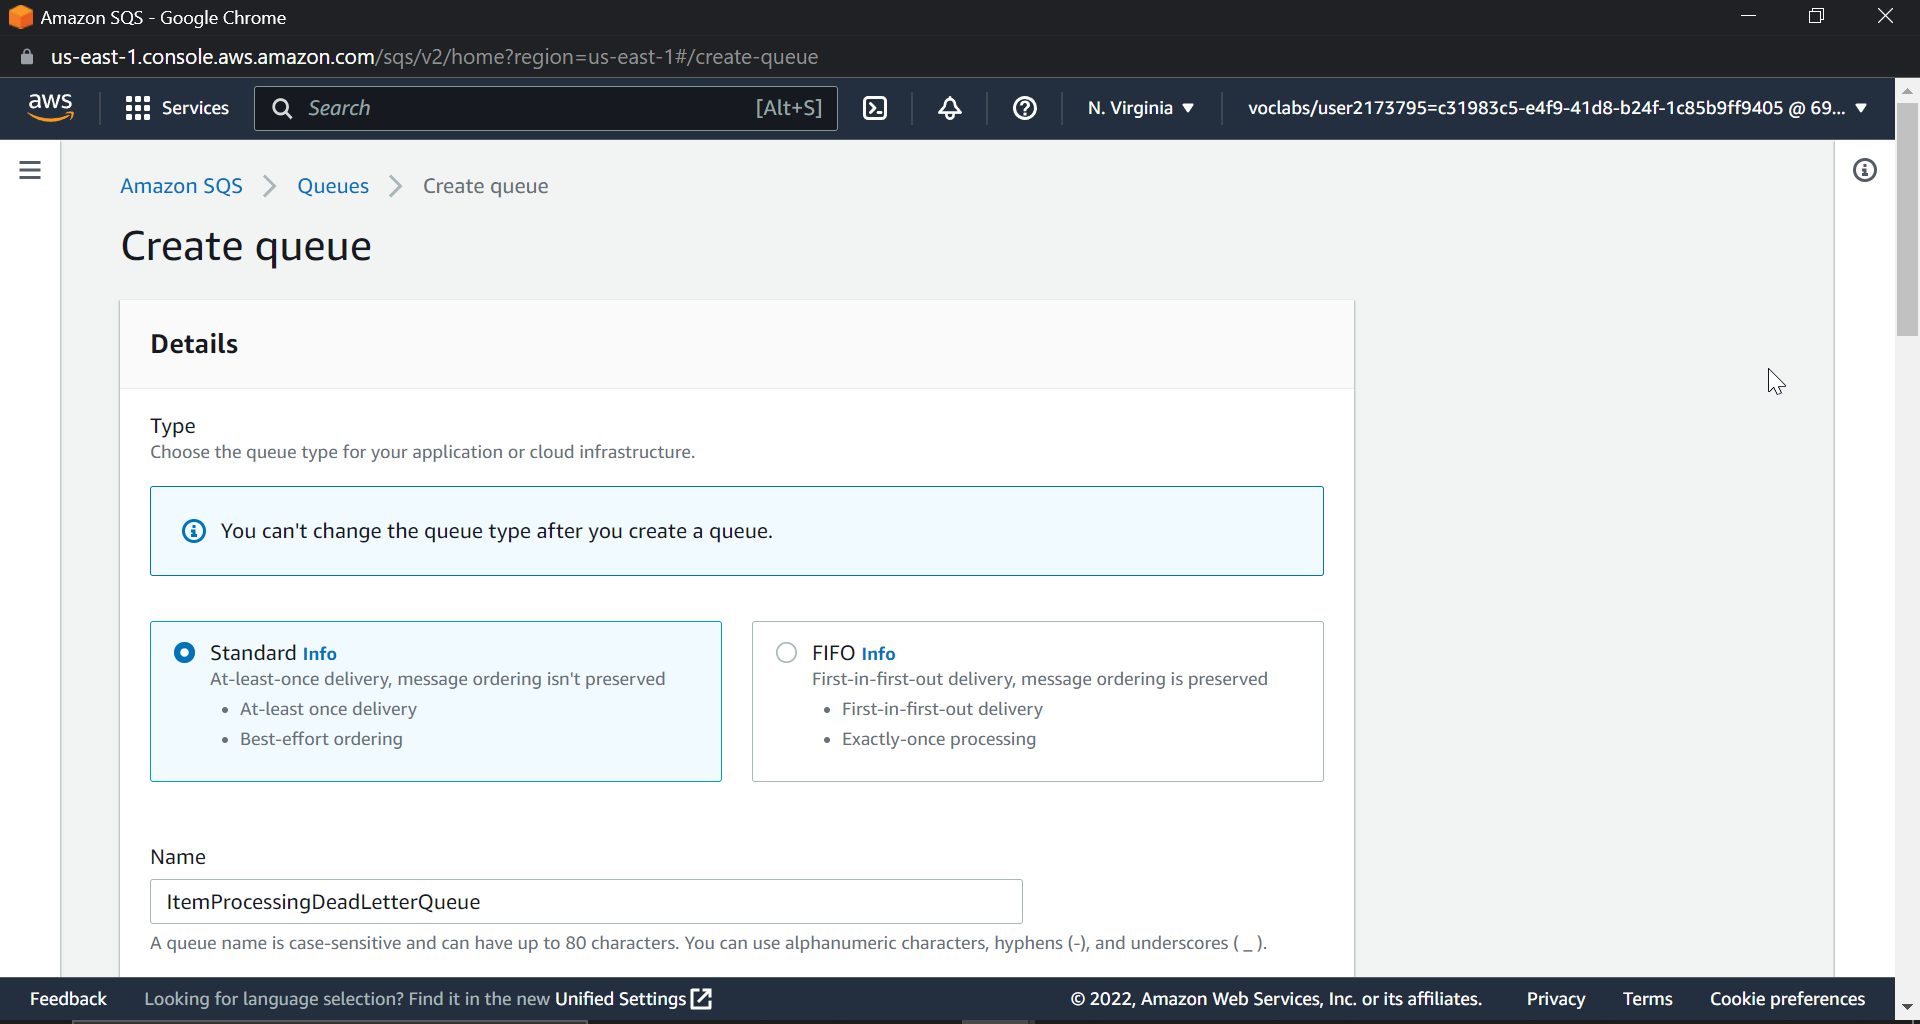
Simply change the retention period to 14 days in configuration; the rest can be left as is; and click Create Queue to get the dashboard shown below.
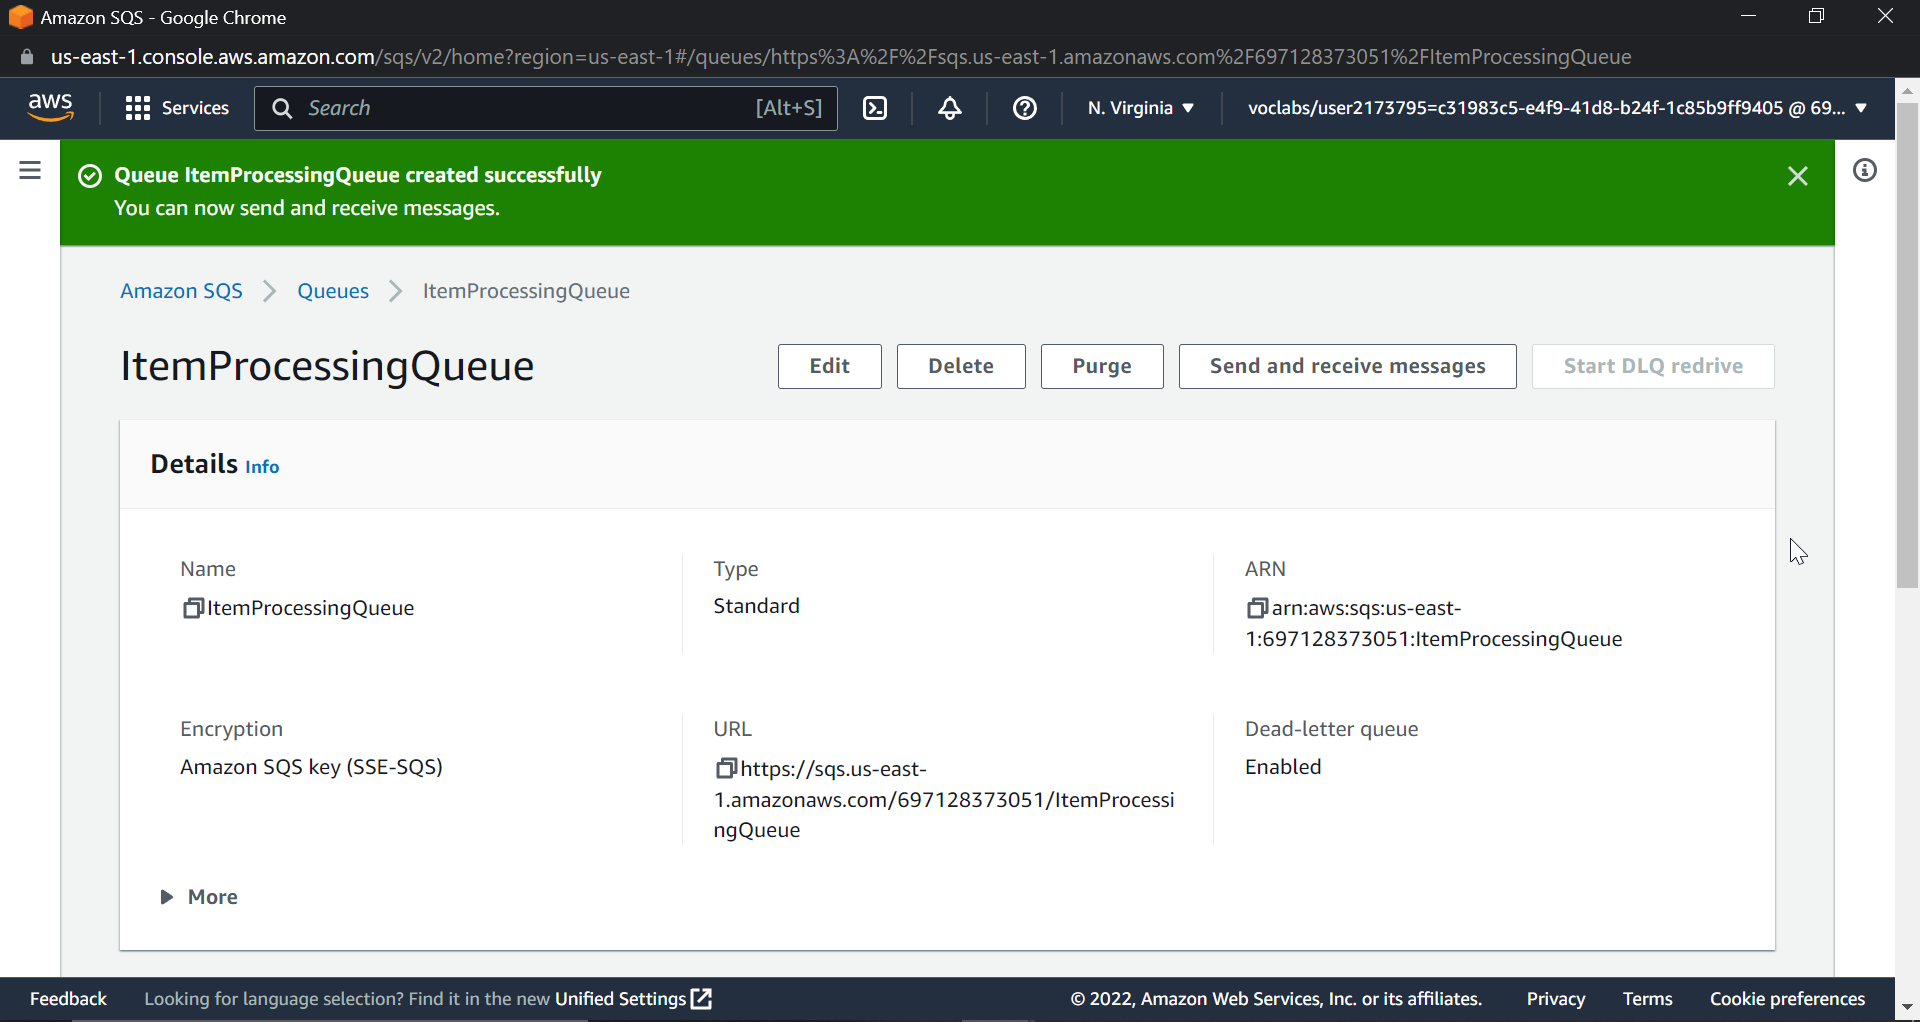
Now lets create a SQS queue with lambda trigger
We want to put a message on the SQS queue as soon as an object is uploaded to the S3 bucket. Let's create an SQS queue. We will also set up a Lambda trigger to enable processing of the message by the Lambda function.
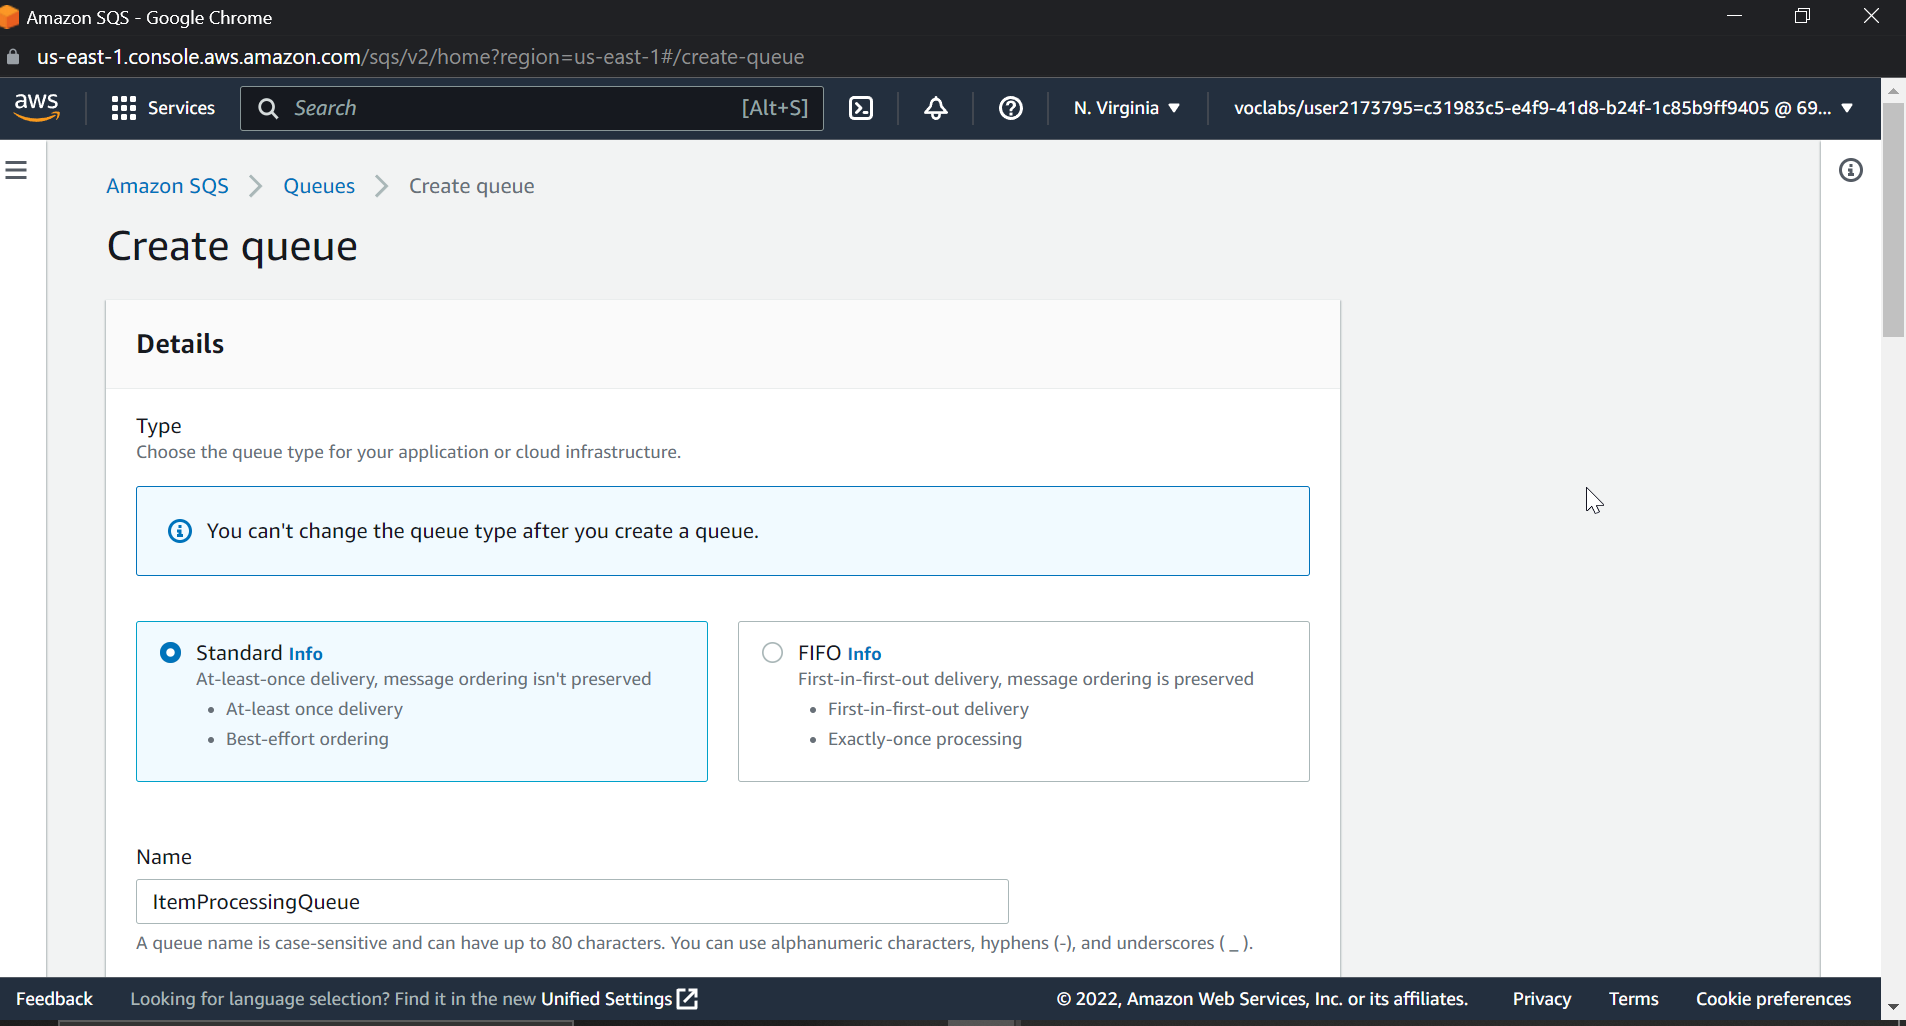
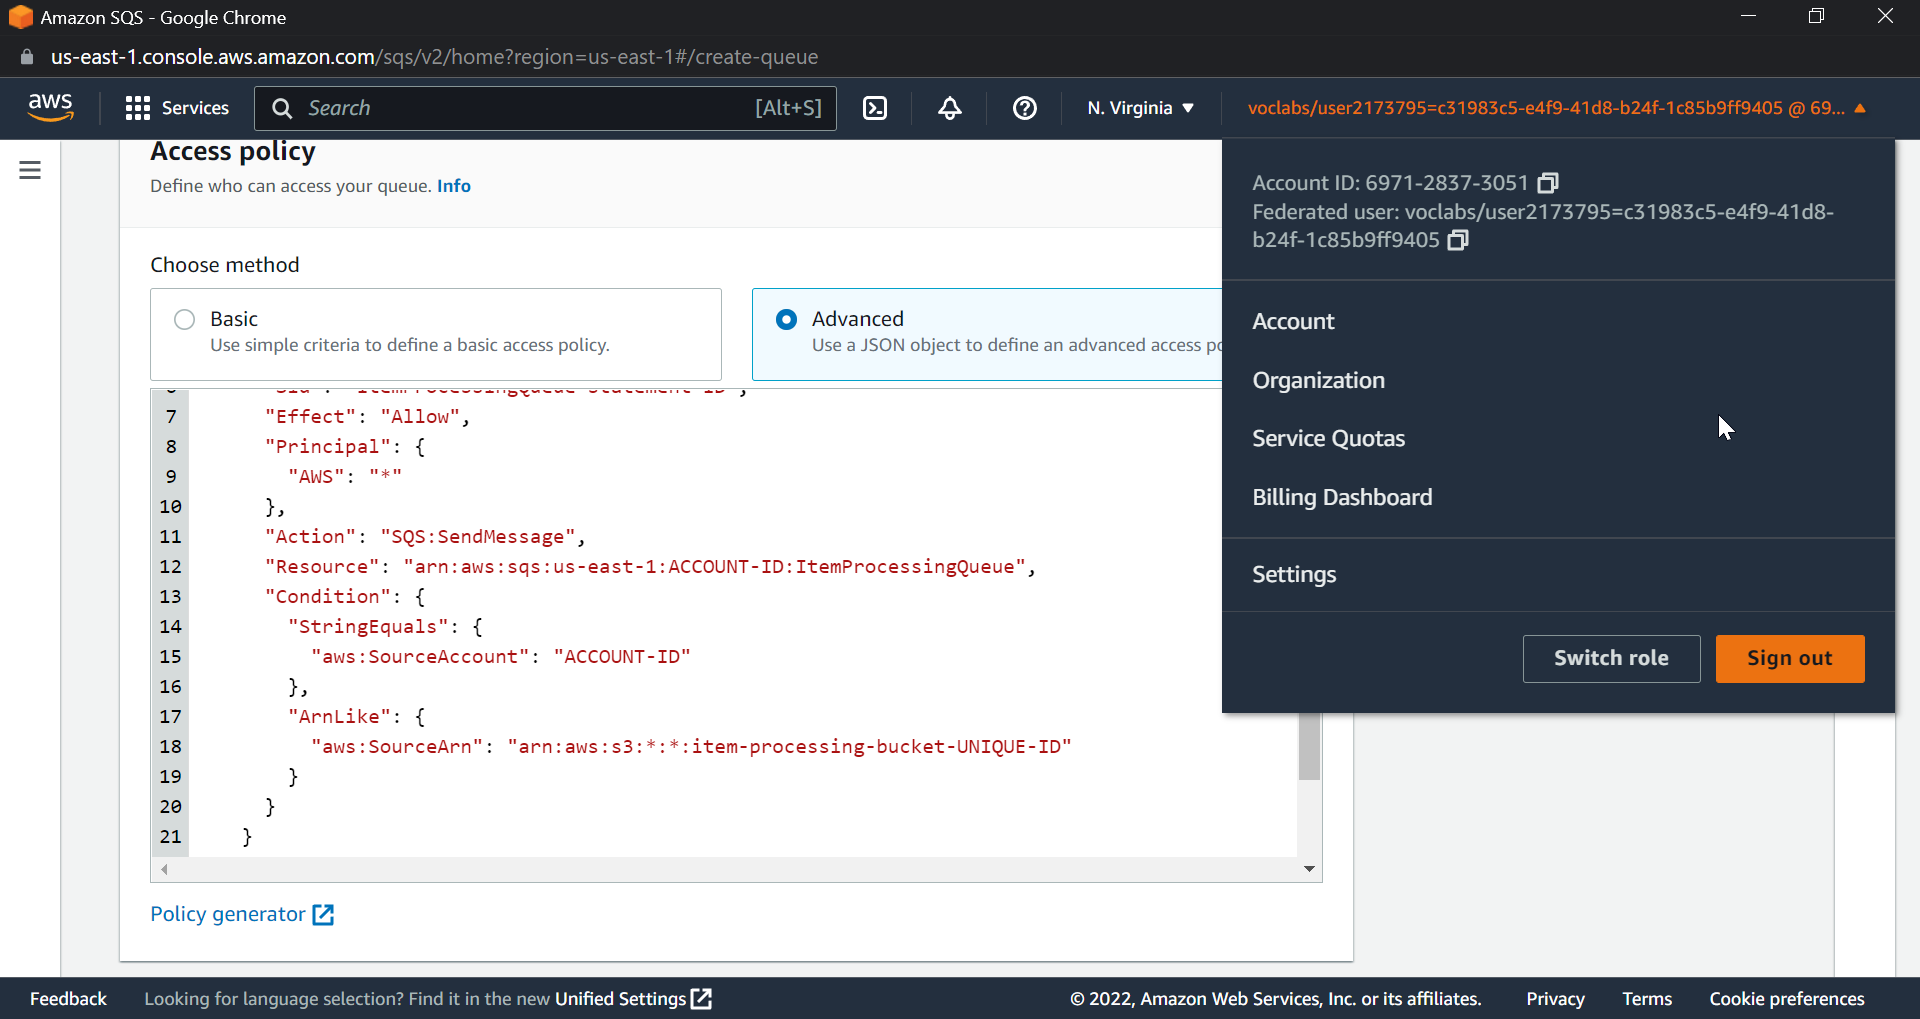
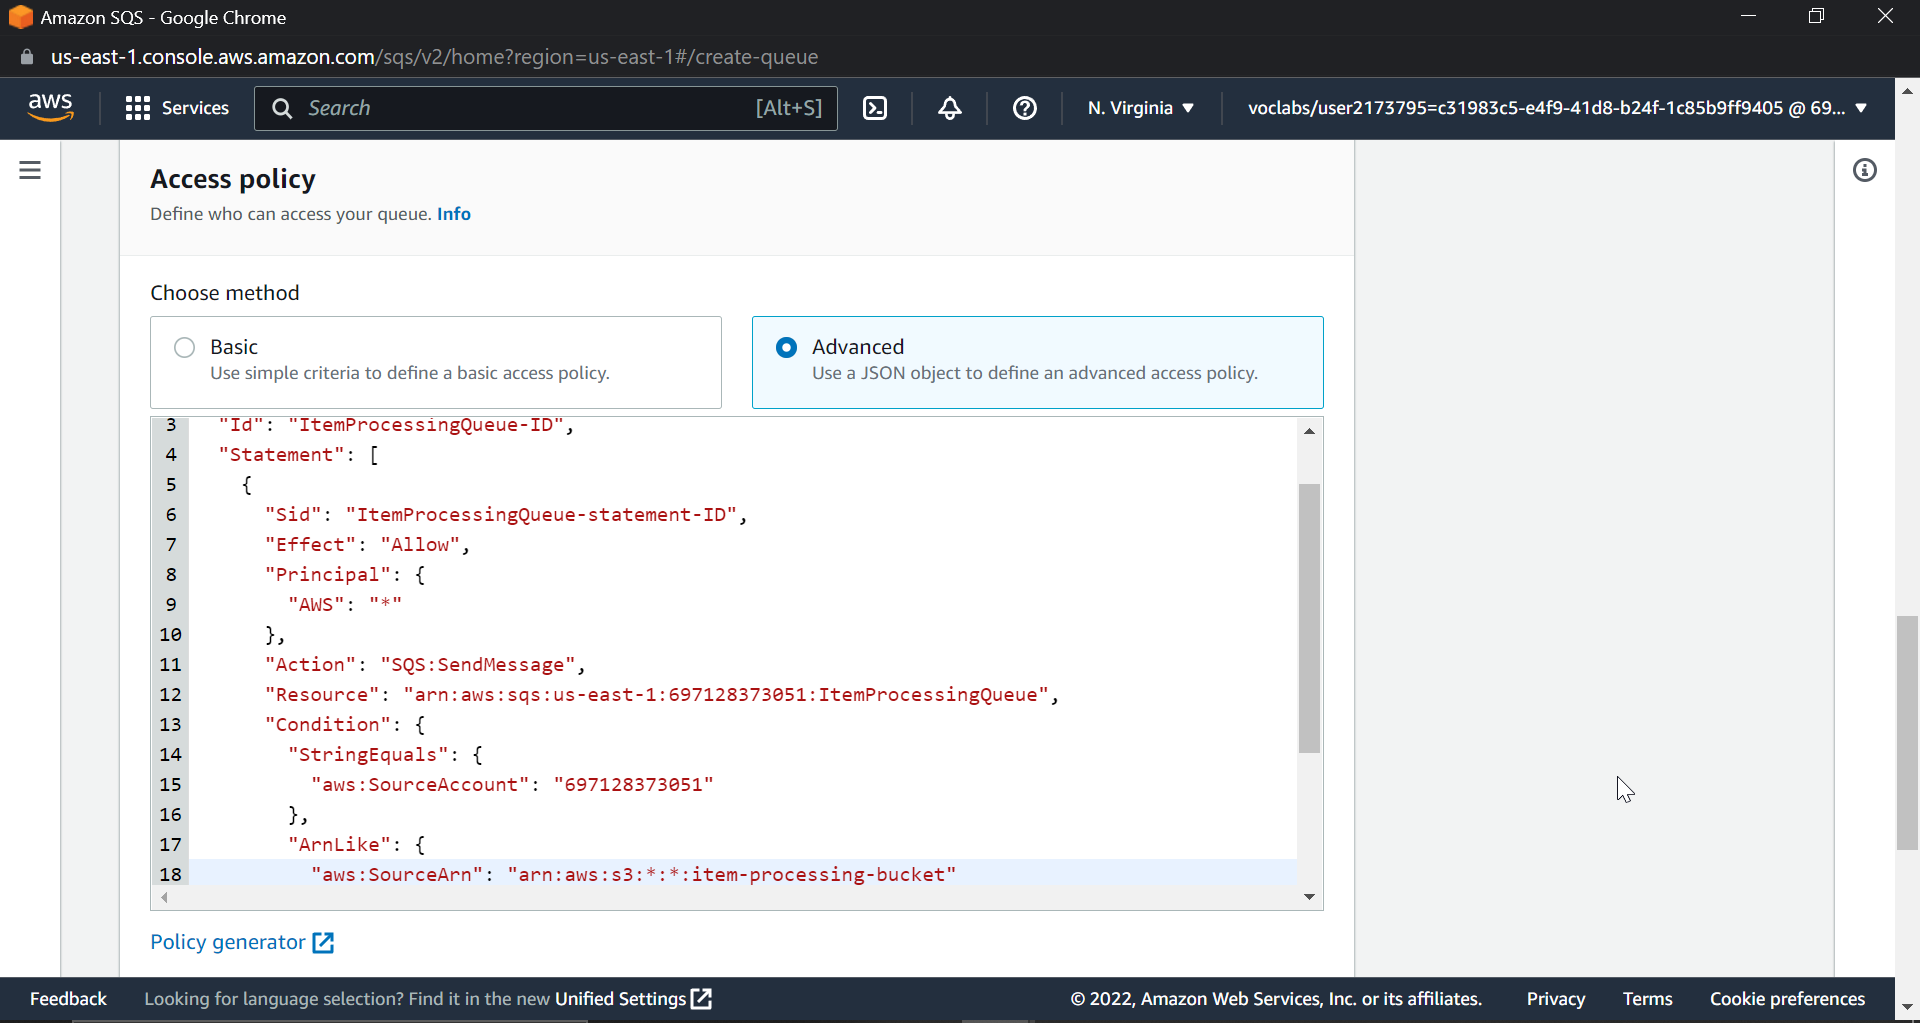
We will also configure an access policy to allow S3 bucket notification to place a message on the SQS queue. Make sure that you replace your AWS account ID, bucket ID, and SQS queue name with the right names in the policy. Now we already created a SQS queue before, so the process will be the same: create a new queue with a different name; I am naming it ItemProcessingQueue.
{
  "Version": "2012-10-17",
  "Id": "ItemProcessingQueue-ID",
  "Statement": [
    {
      "Sid": "ItemProcessingQueue-statement-ID",
      "Effect": "Allow",
      "Principal": {
        "AWS": "*"
      },
      "Action": "SQS:SendMessage",
      "Resource": "arn:aws:sqs:us-east-1:ACCOUNT-ID:ItemProcessingQueue",
      "Condition": {
        "StringEquals": {
          "aws:SourceAccount": "ACCOUNT-ID"
        },
        "ArnLike": {
          "aws:SourceArn": "arn:aws:s3:*:*:item-processing-bucket-UNIQUE-ID"
        }
      }
    }
  ]
}
Finally click on create Queue.
Now scroll down and click on set lambda triggers
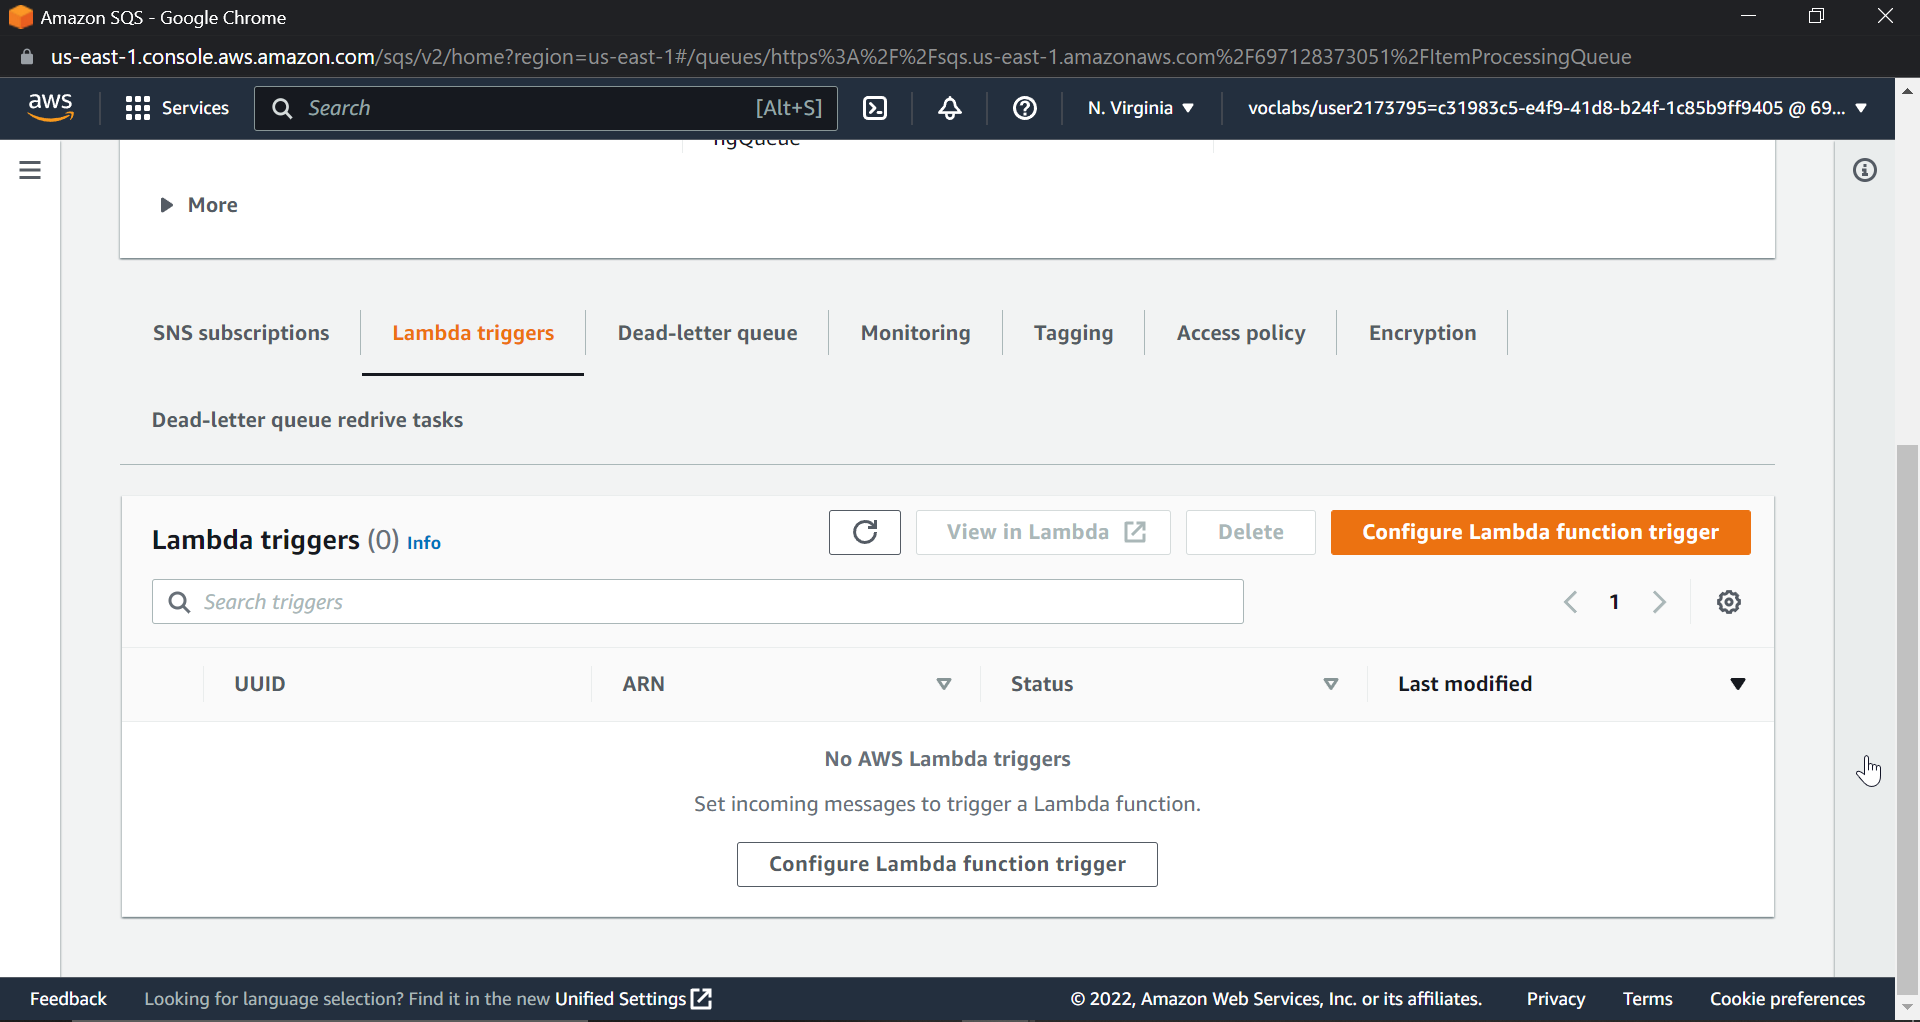
Click on configure lambda triggers.
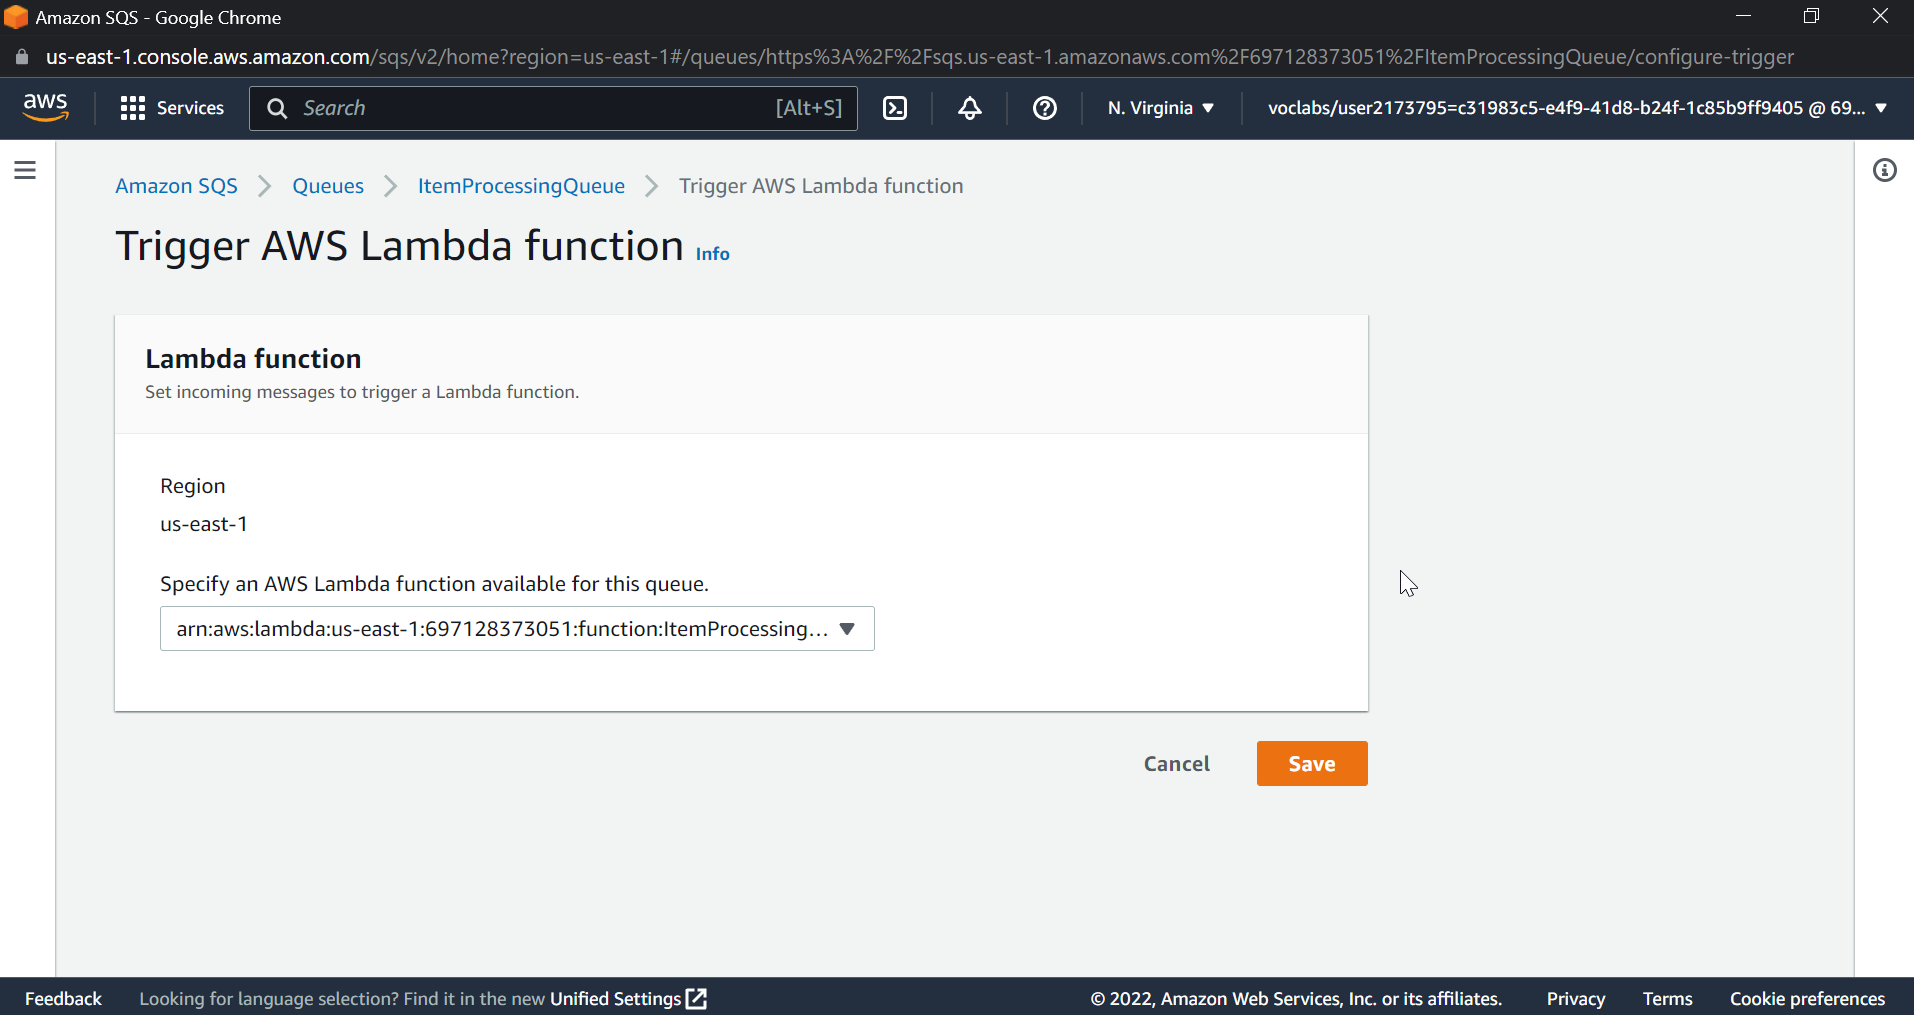
Use drop down to select the lambda function
What does trigger lambda function mean?
The purpose of triggers is to let lambda functions process data automatically after certain events. Here we will be using S3 bucket notifications to trigger a lambda function that will process messages for the queue.
Click Save
Update S3 bucket to trigger notifications to SQS queue
Now that the SQS queue and the Lambda function to process messages on the queue are ready, let's update our S3 bucket to trigger notifications when objects are uploaded and trigger notifications to an SQS queue.
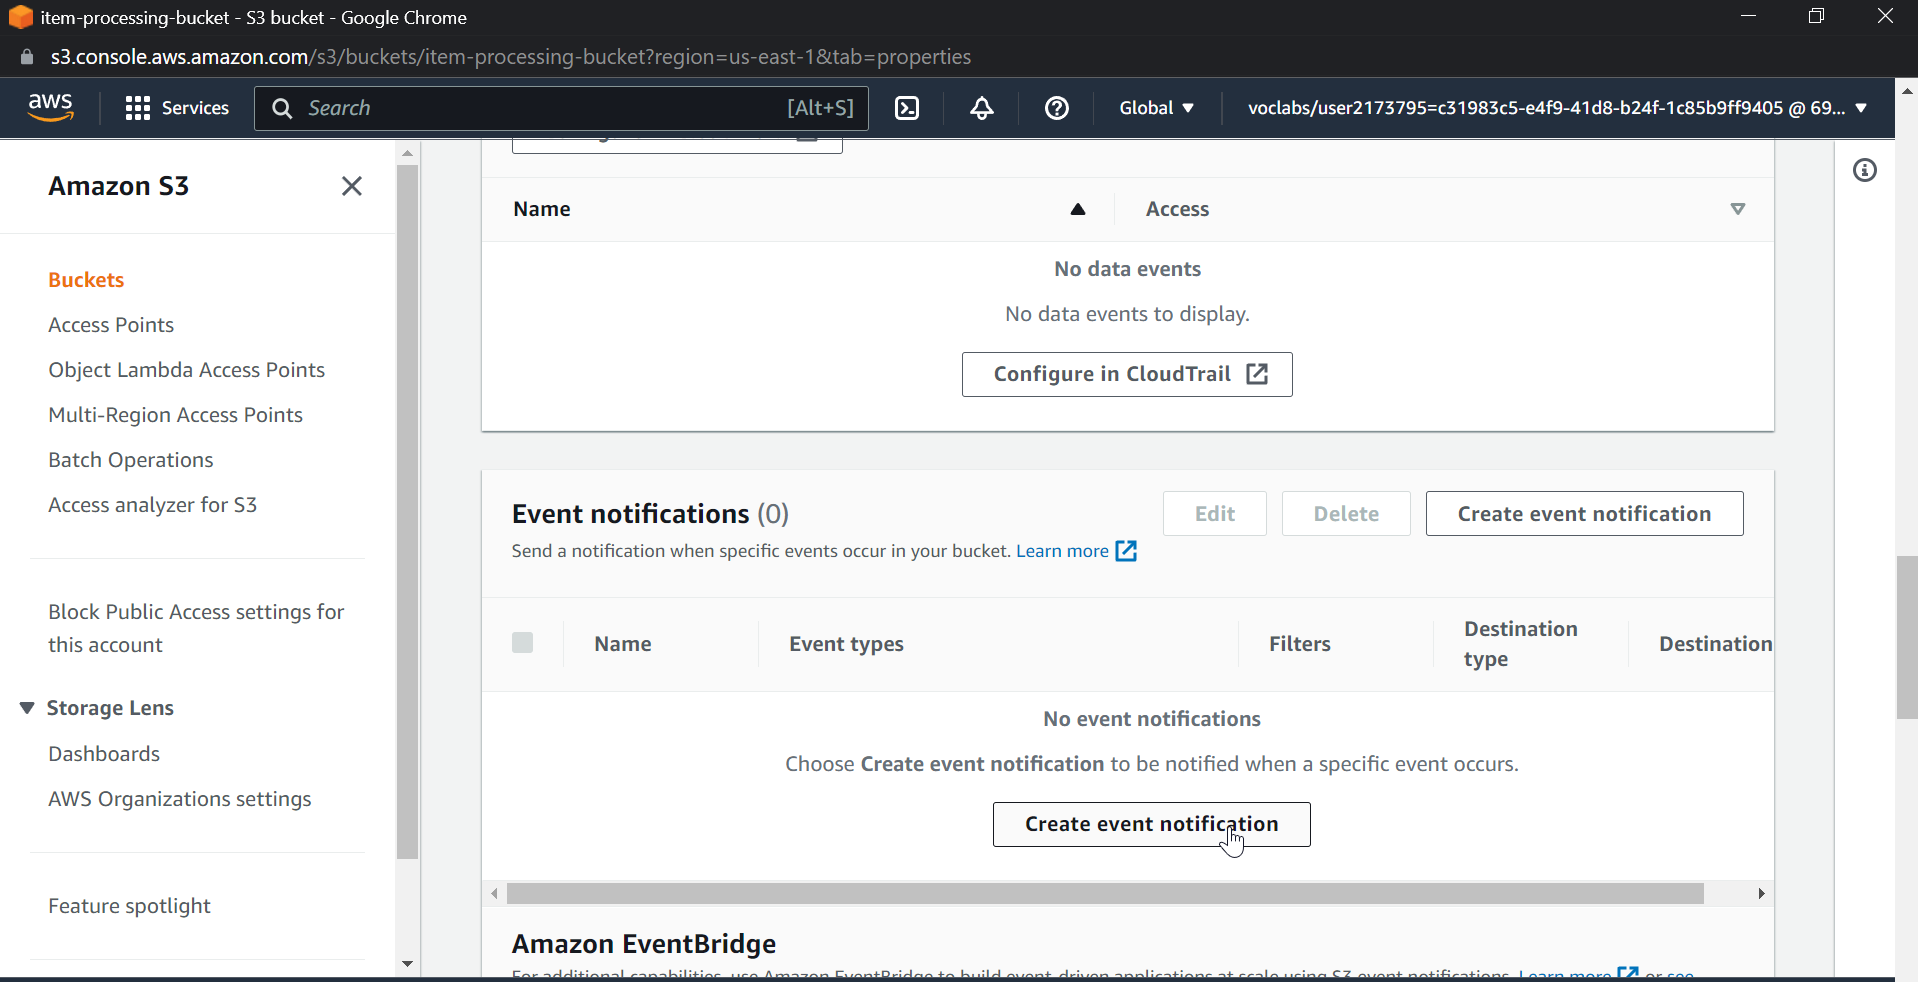
Navigate to S3 Bucket. Select the already-created bucket.
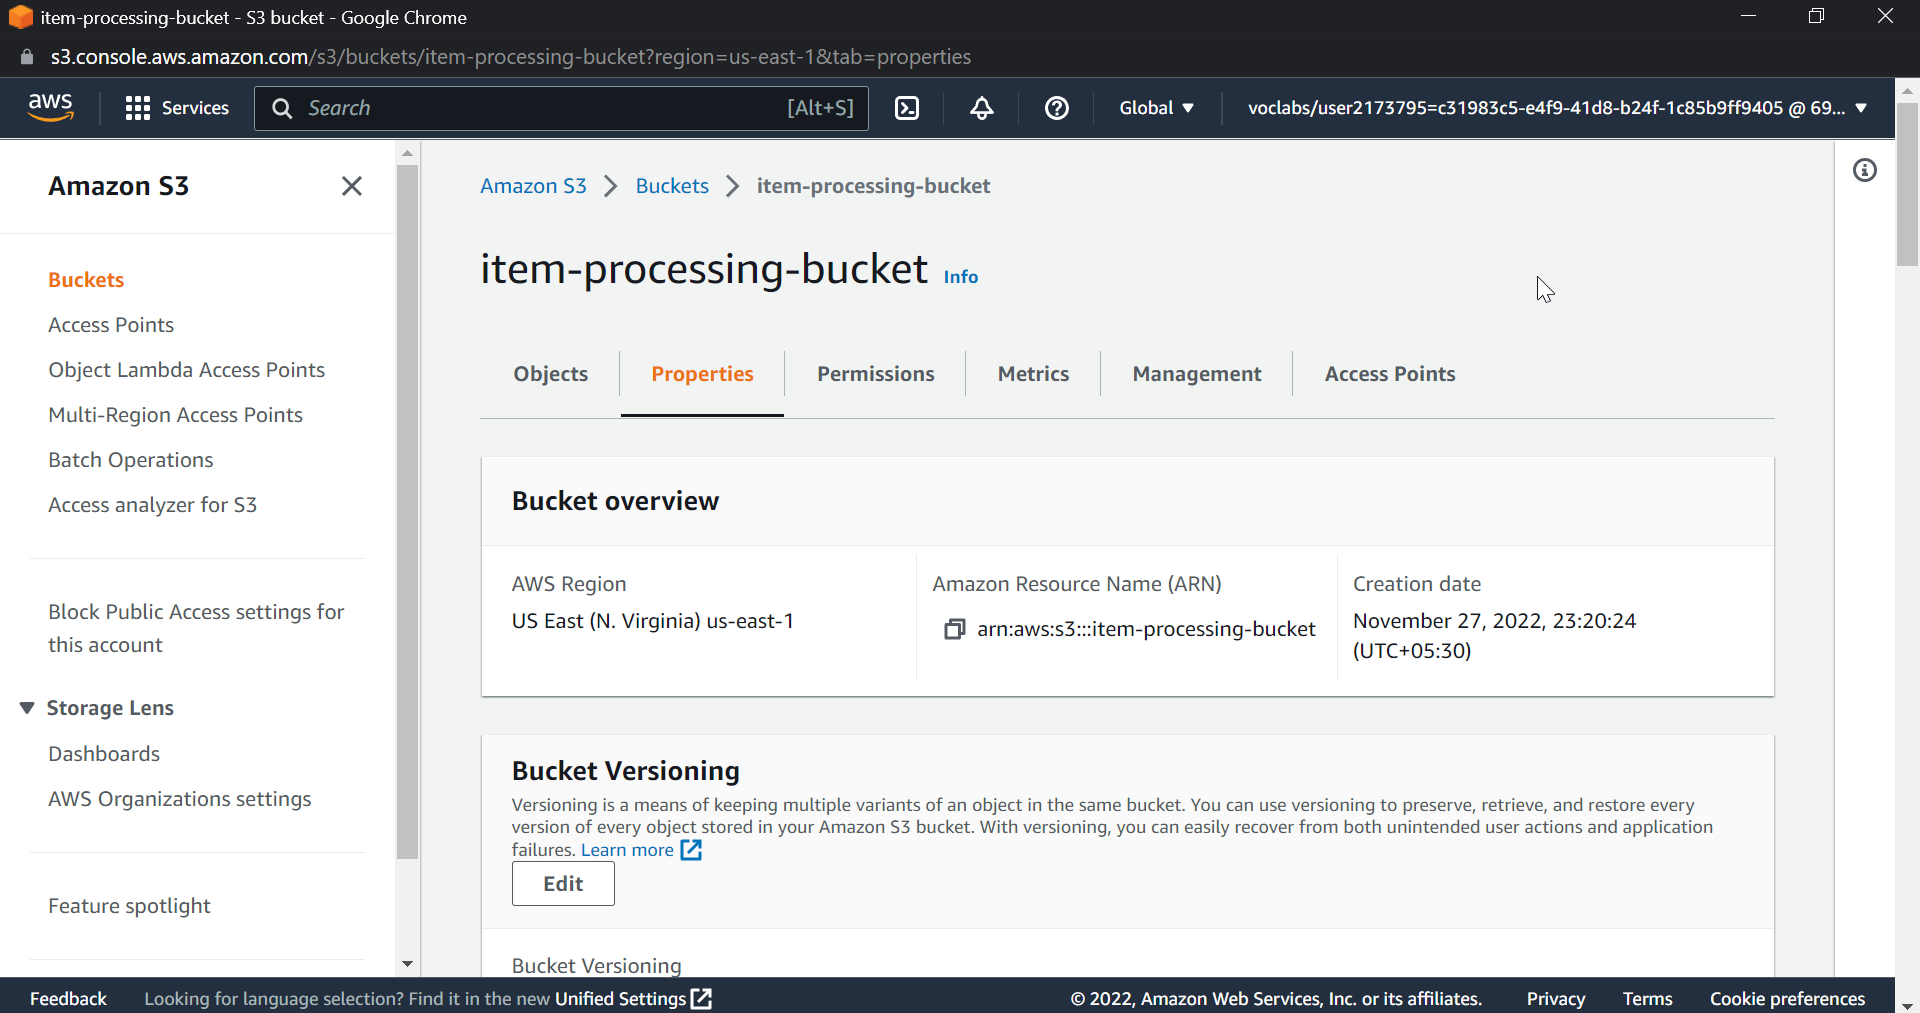
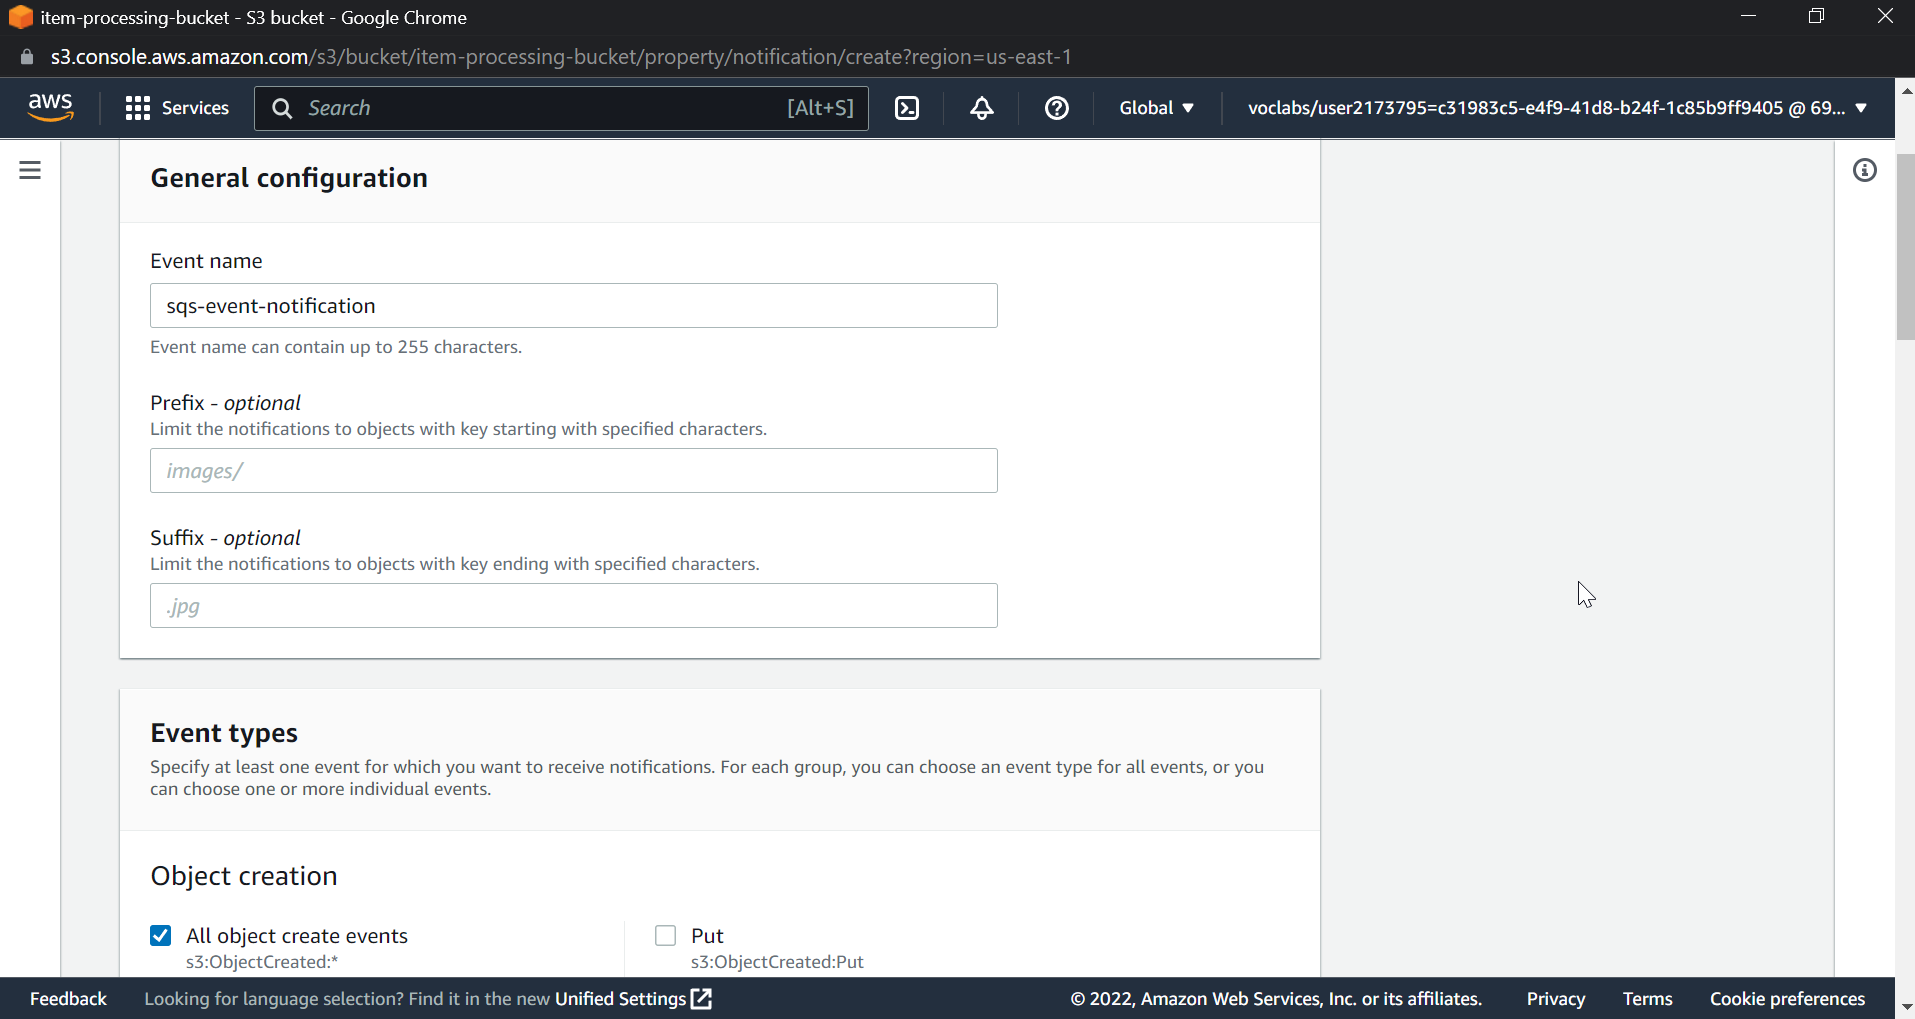
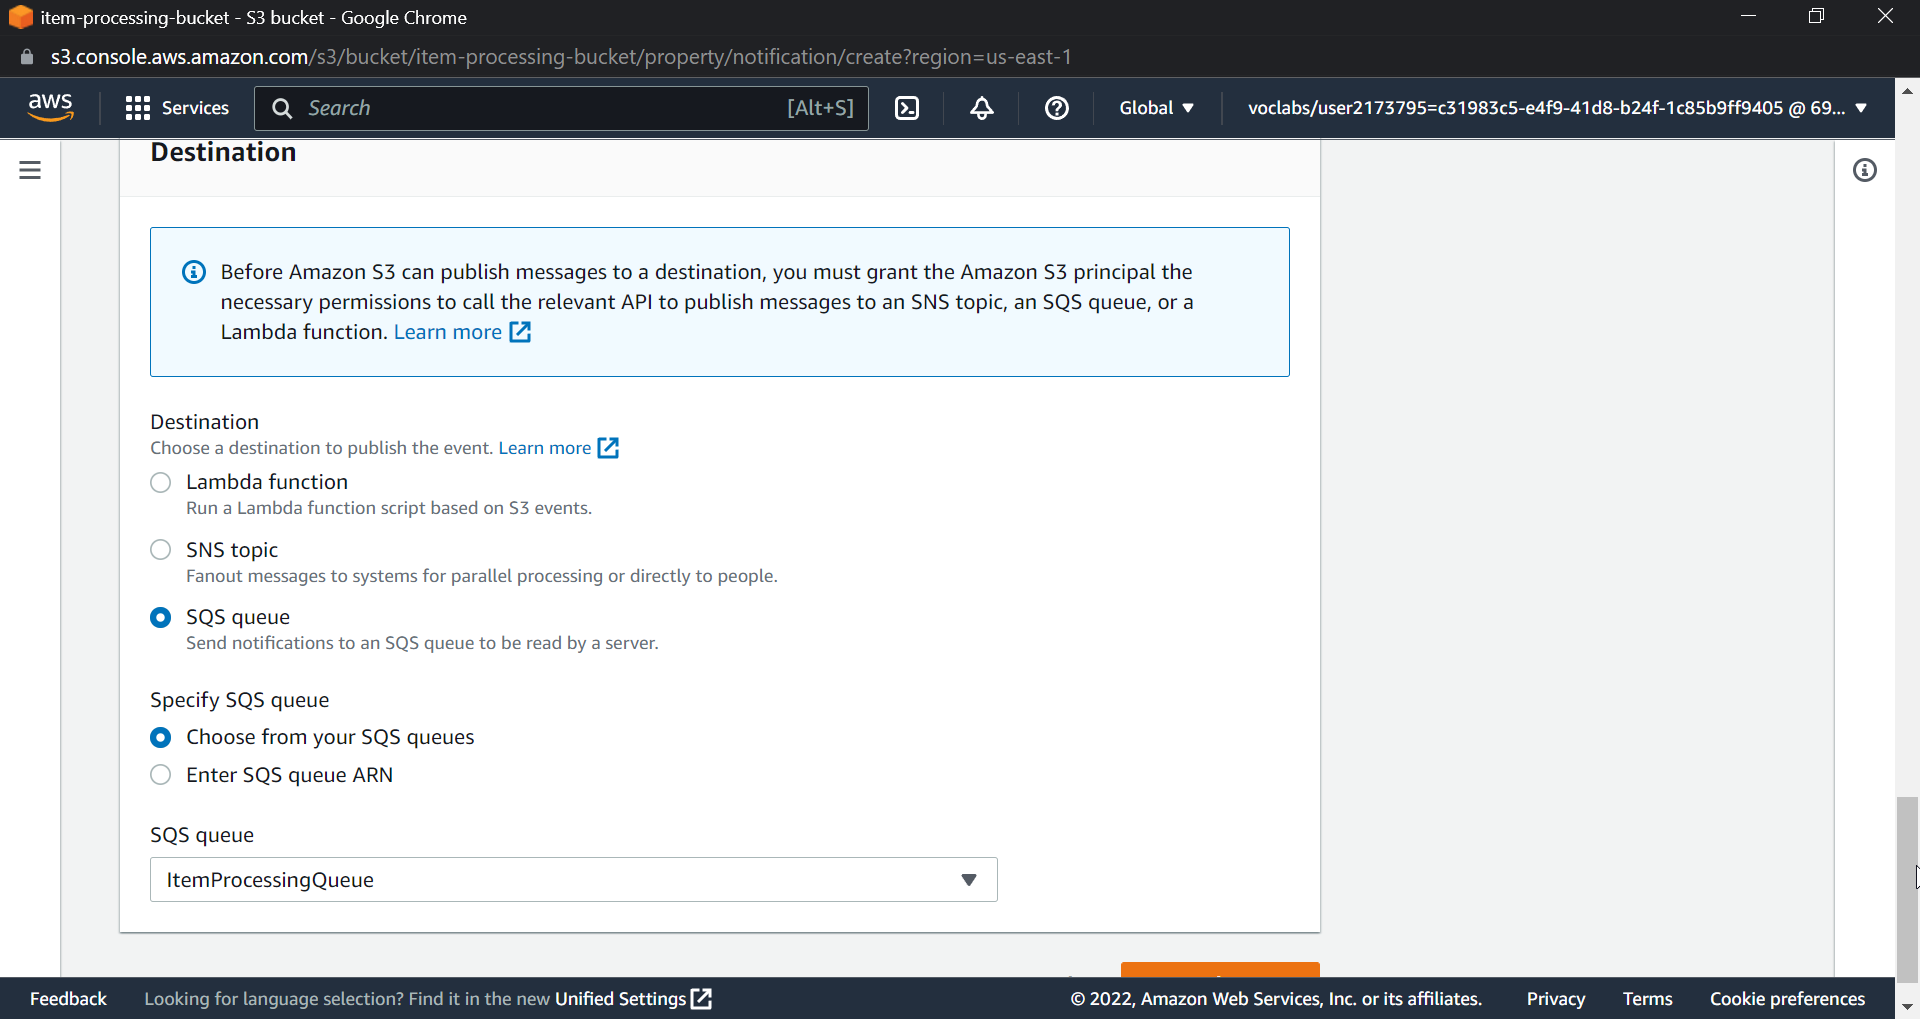
Scroll down and click on event notifications, then select create event notifications, name the event, check the box for all object create events, select destination as SQS queue, and the SQS queue name will be the main queue, in my case ItemProcessingQueue.
Now everything is created and build lets test this by uploading files to S3 Bucket.
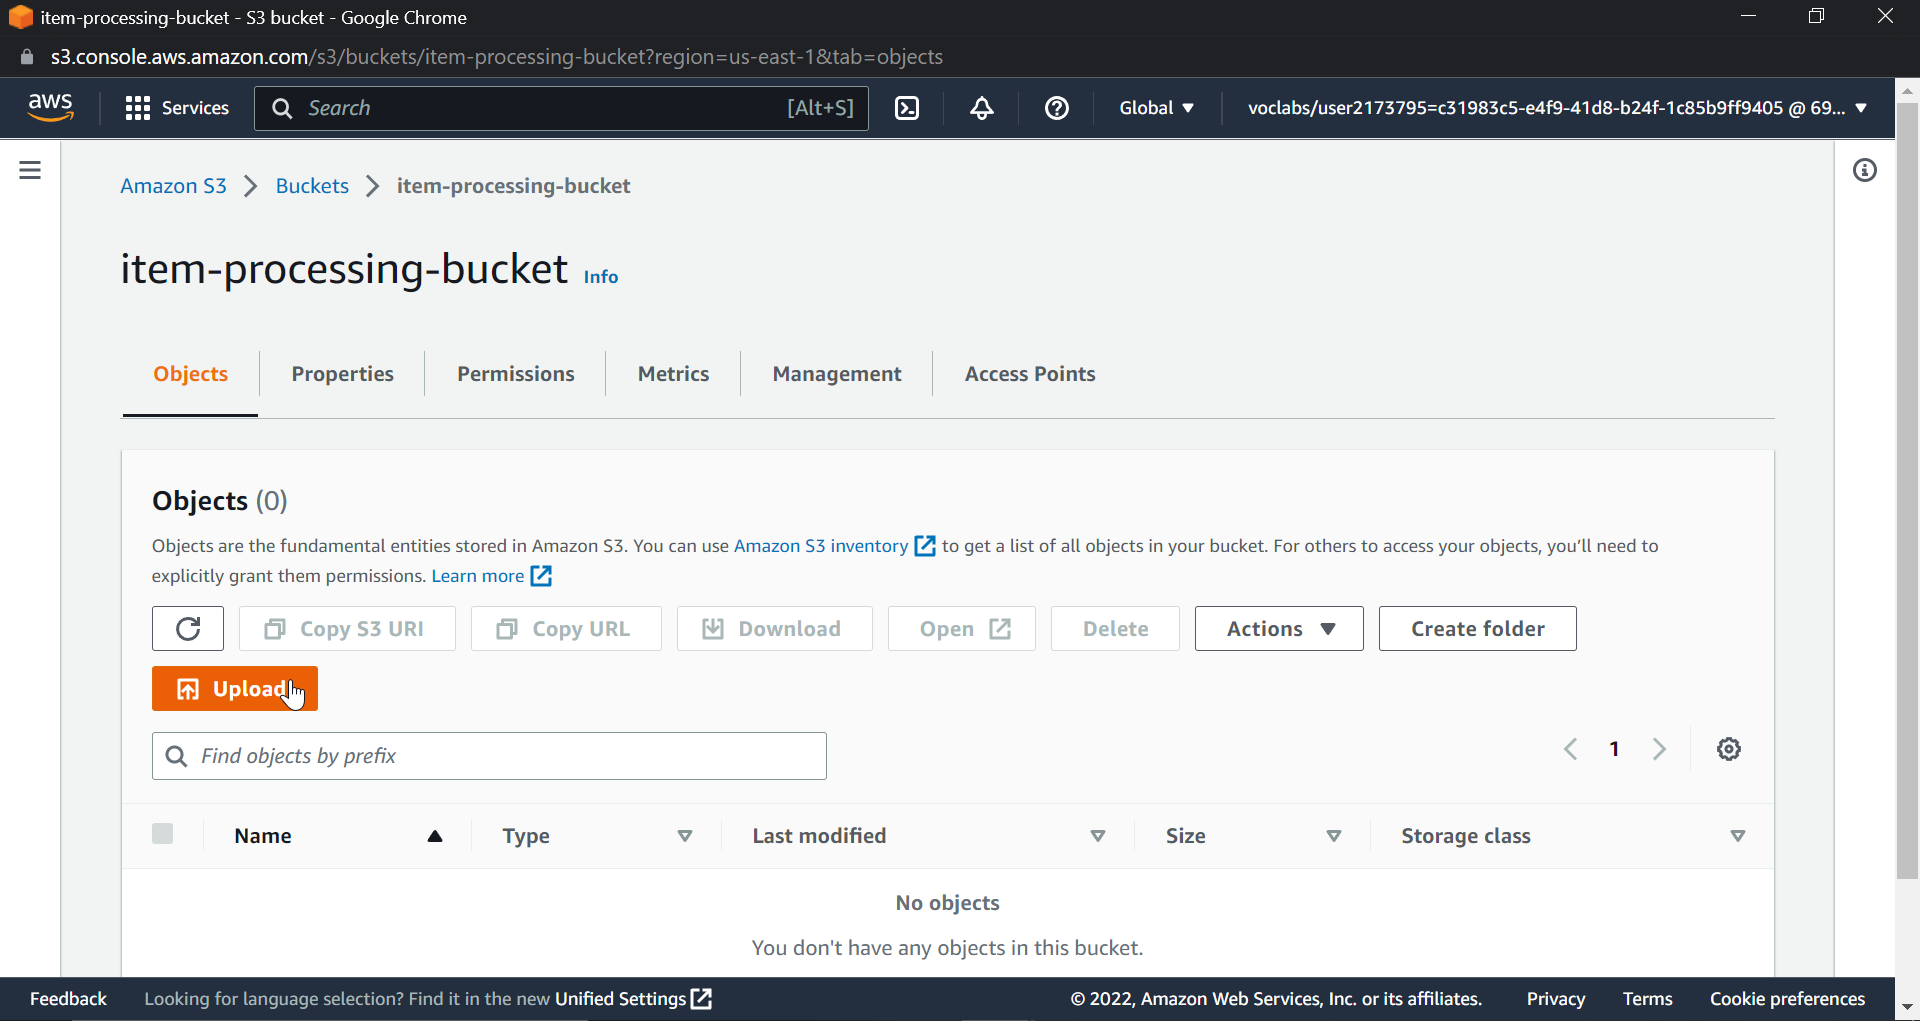
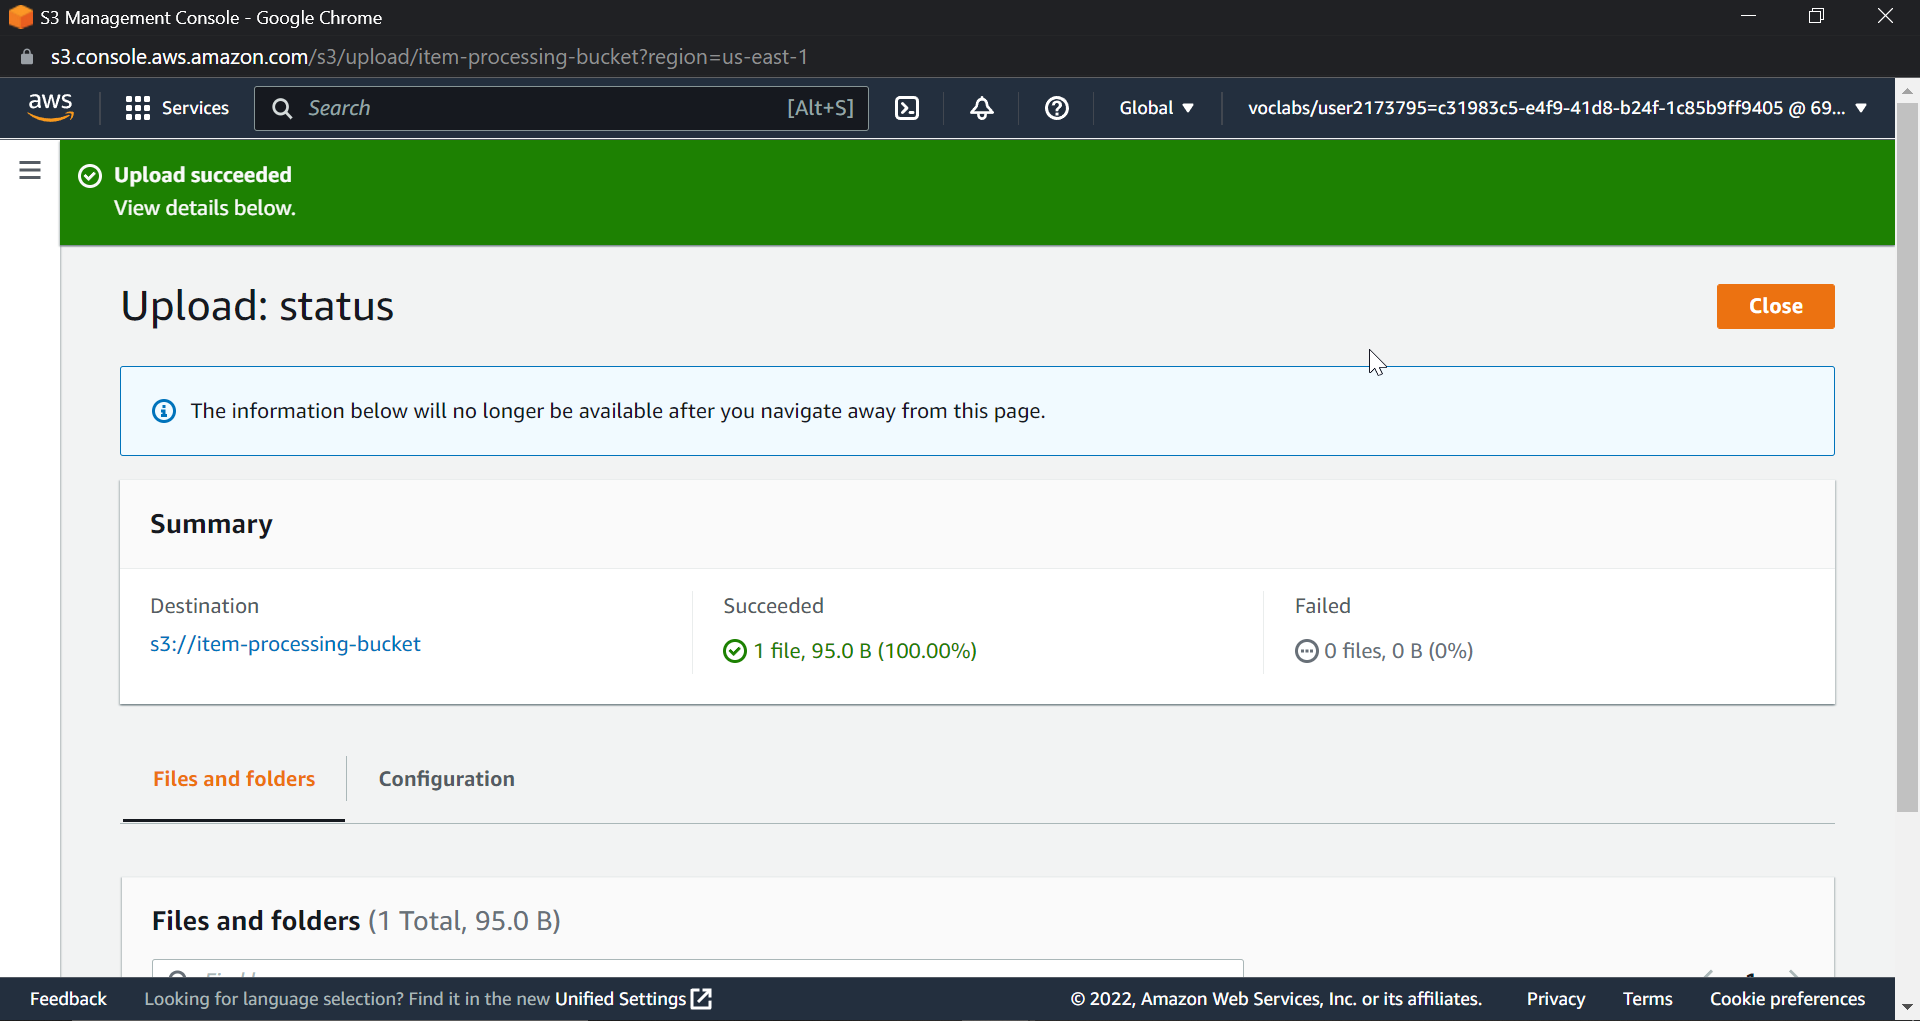
Go to S3 Bucket and click on upload.
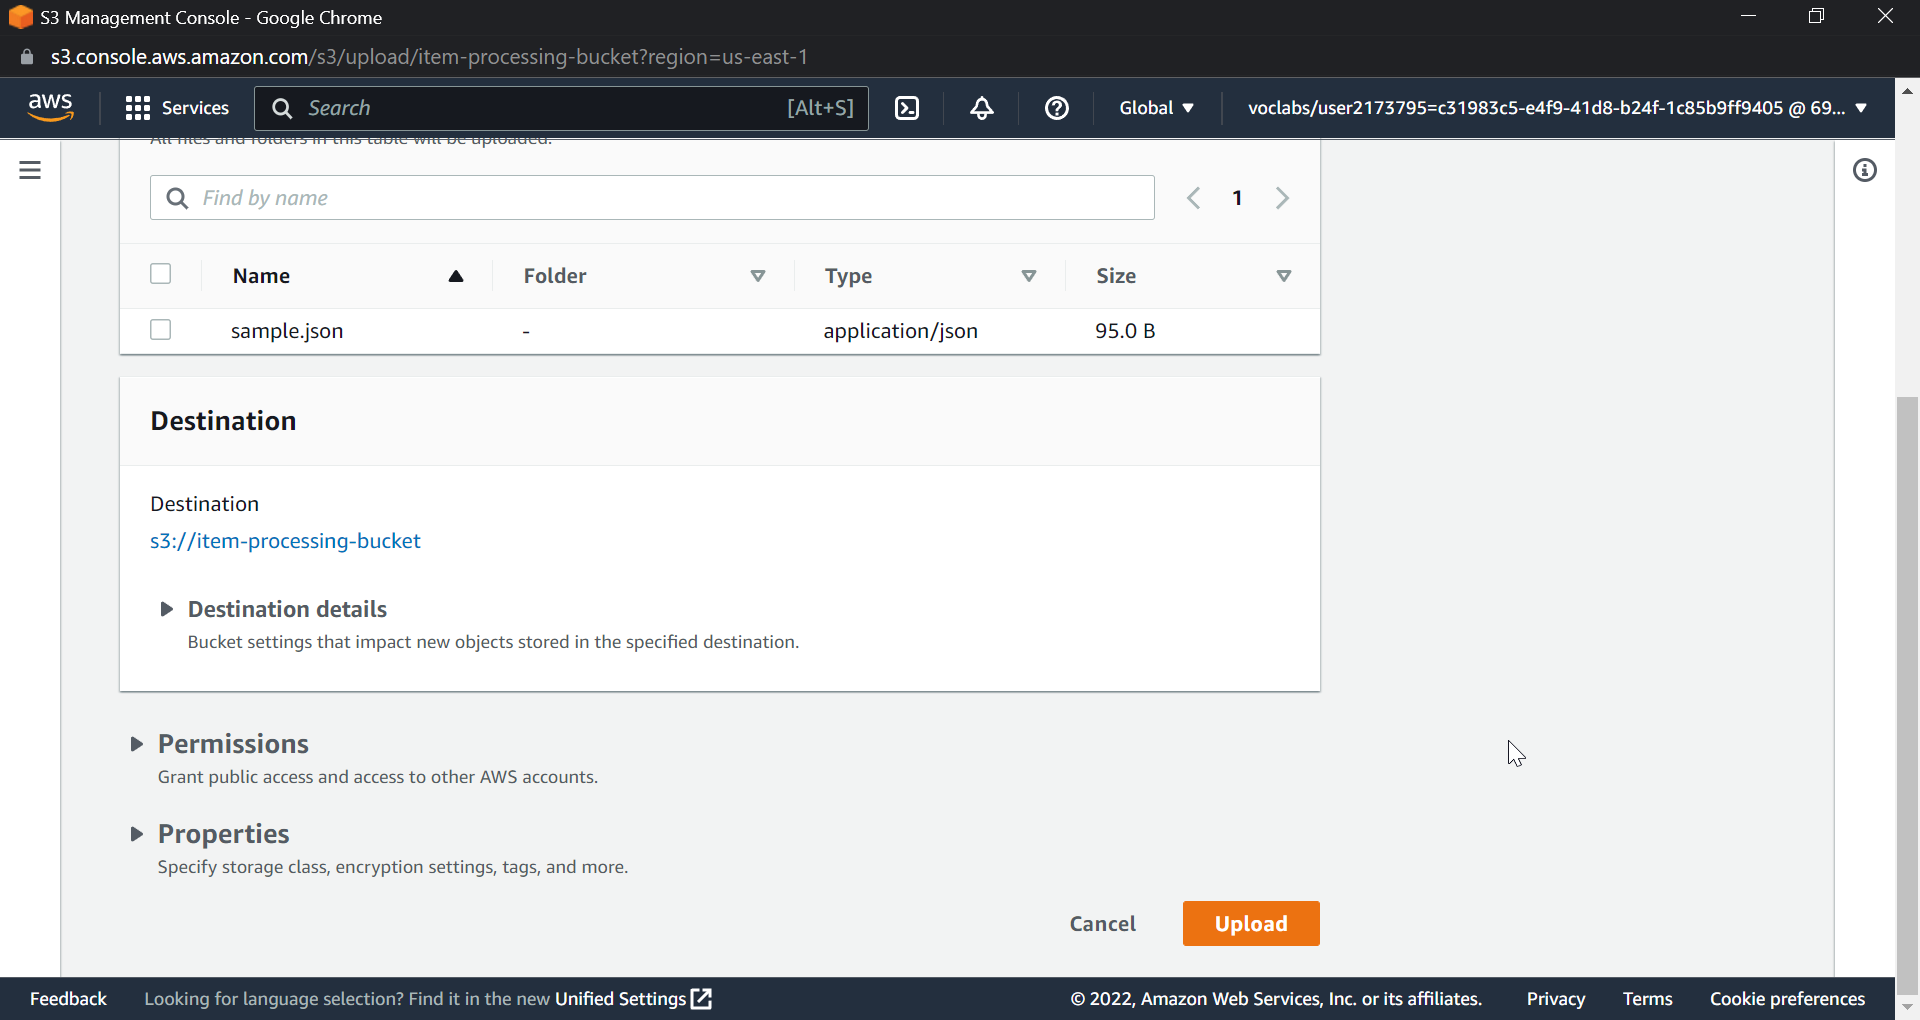
Now upload a JSON file. Click on "Upload"
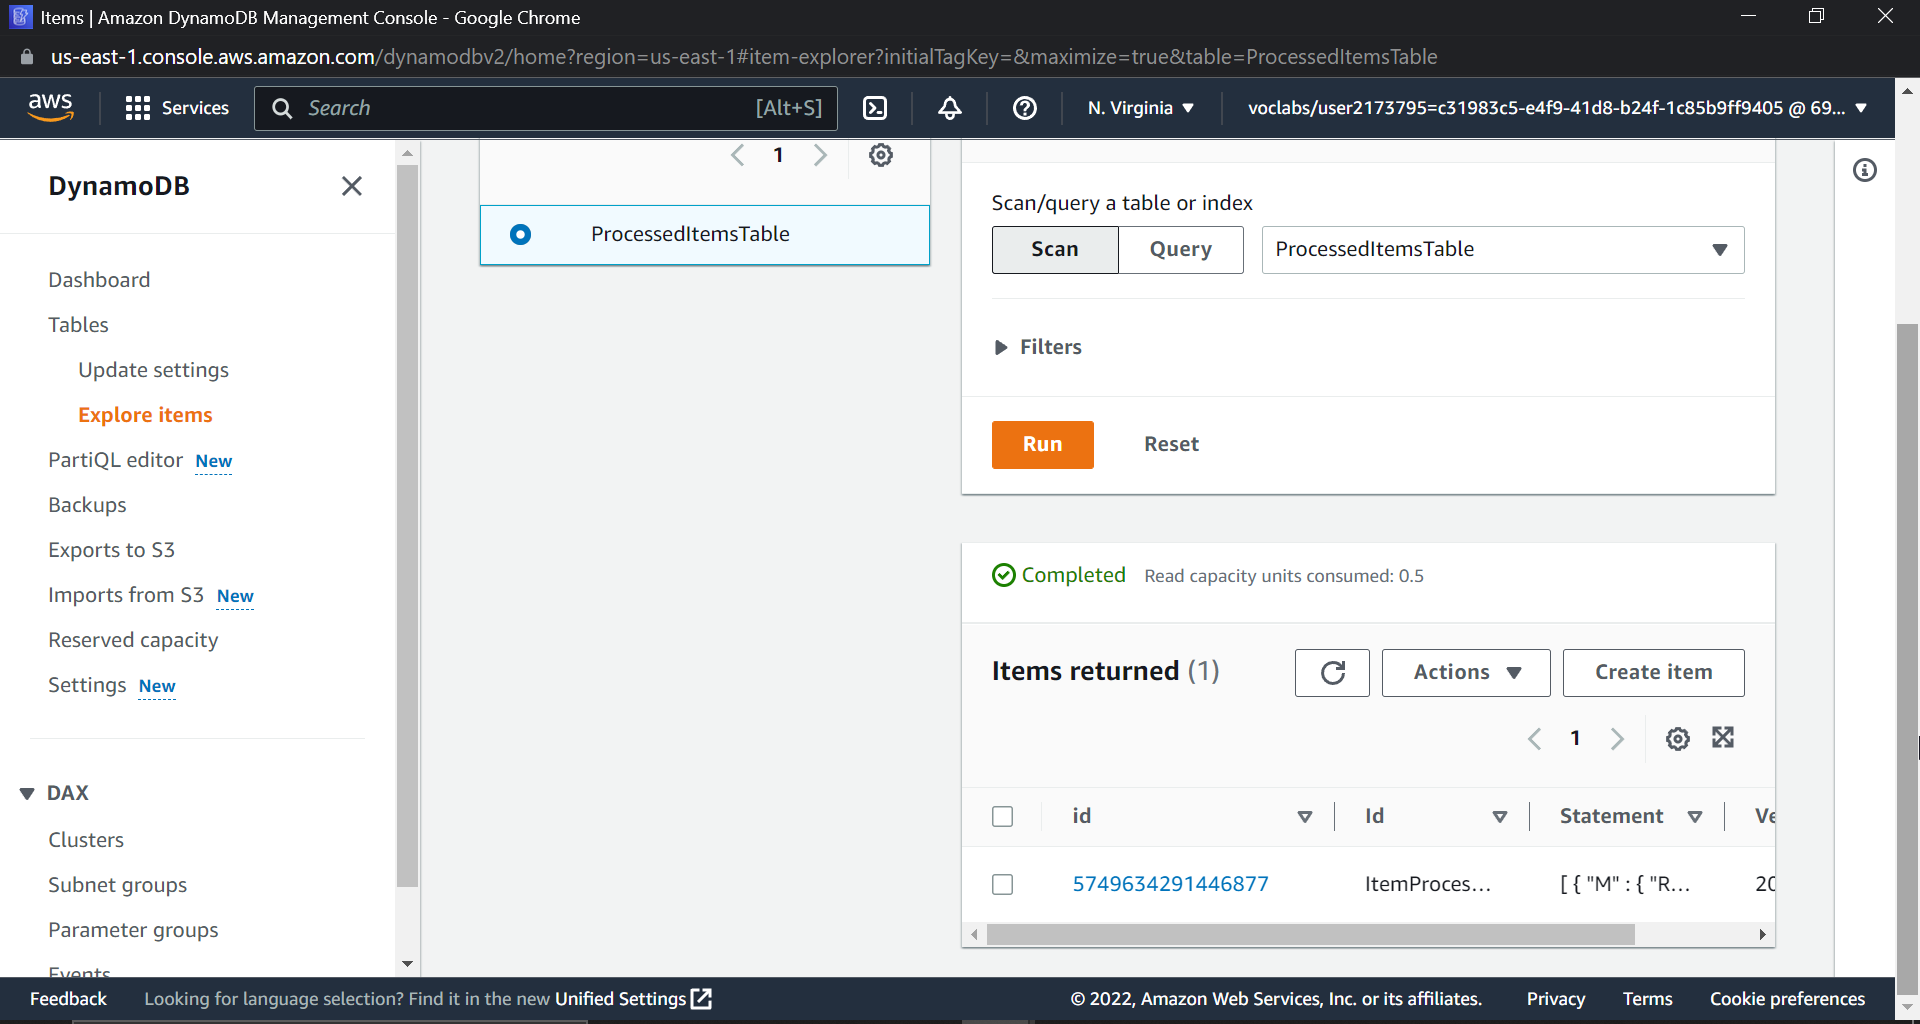
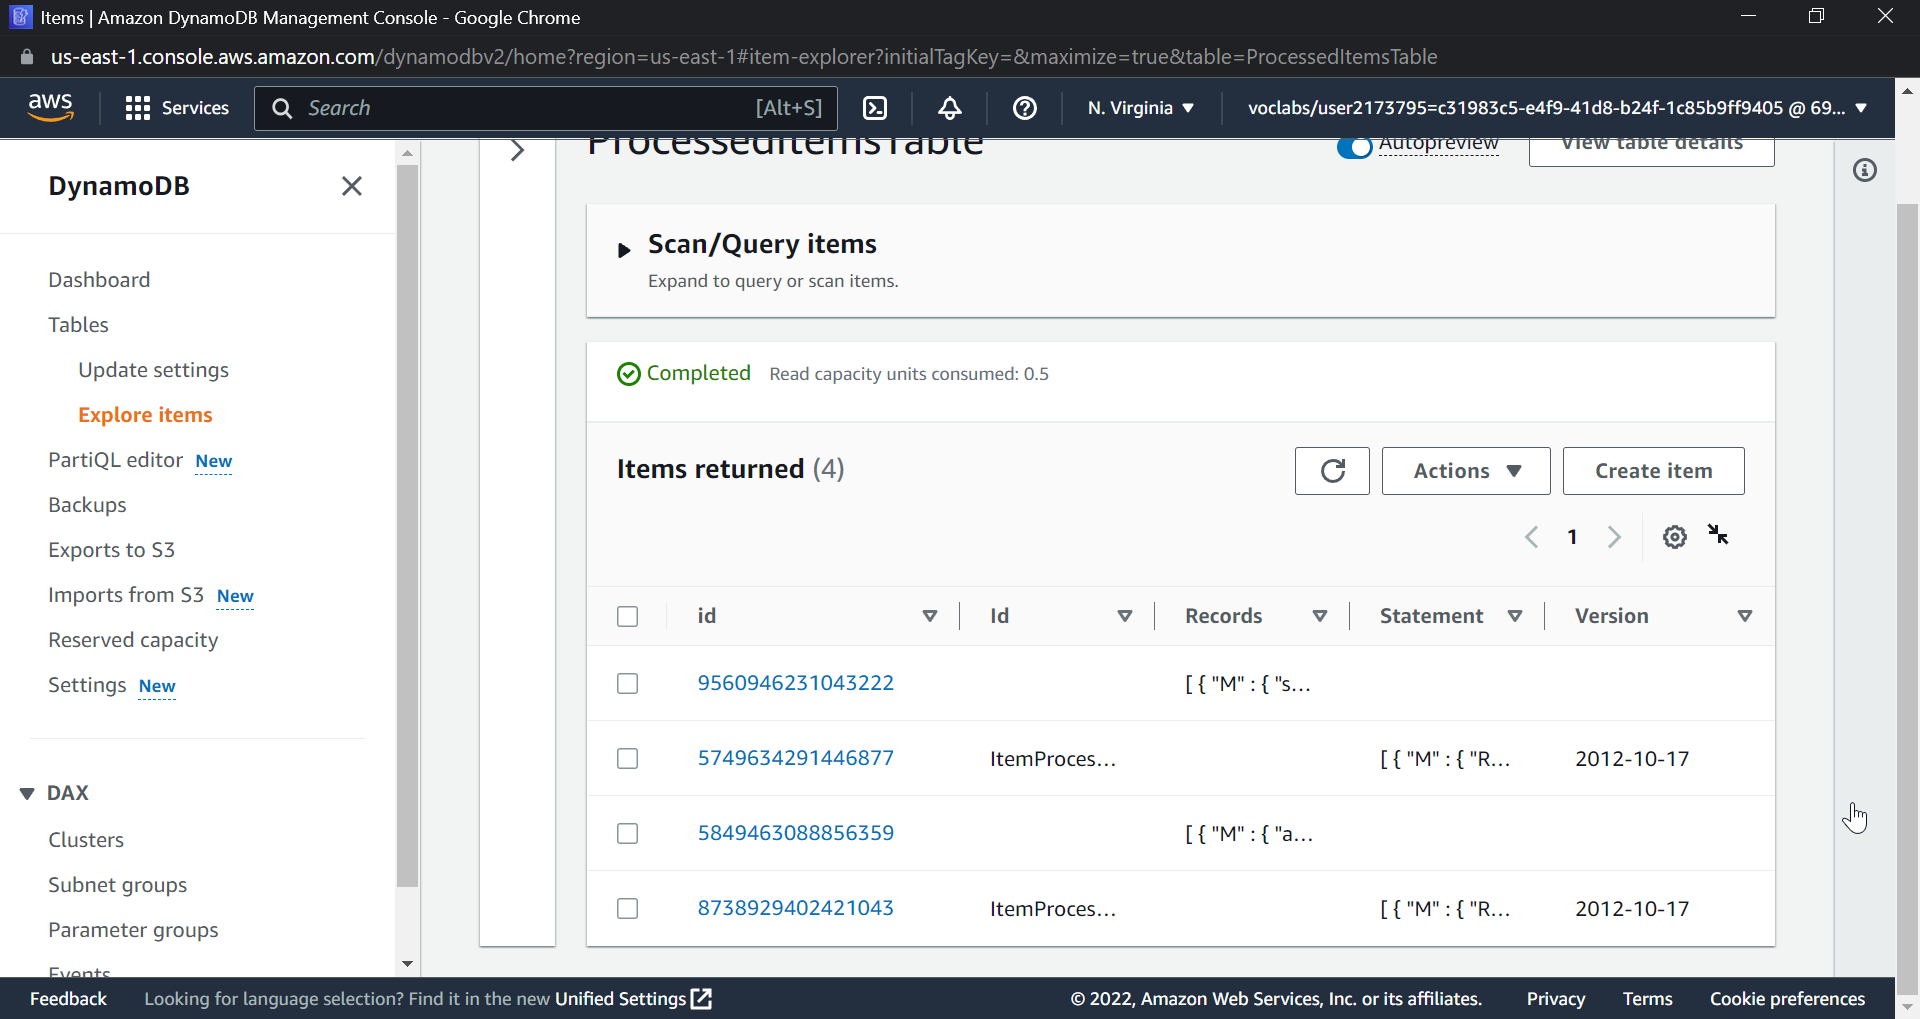
Now search for DynamoDB in the AWS Console, select the table that you created, and click on "Explore items." You will see that an item has been created in DynamoDB.
Go to DynamoDB.
Now search for DynamoDB in the AWS Console, select the table that you created, and click on "Explore items." You will see that an item has been created in DynamoDB.
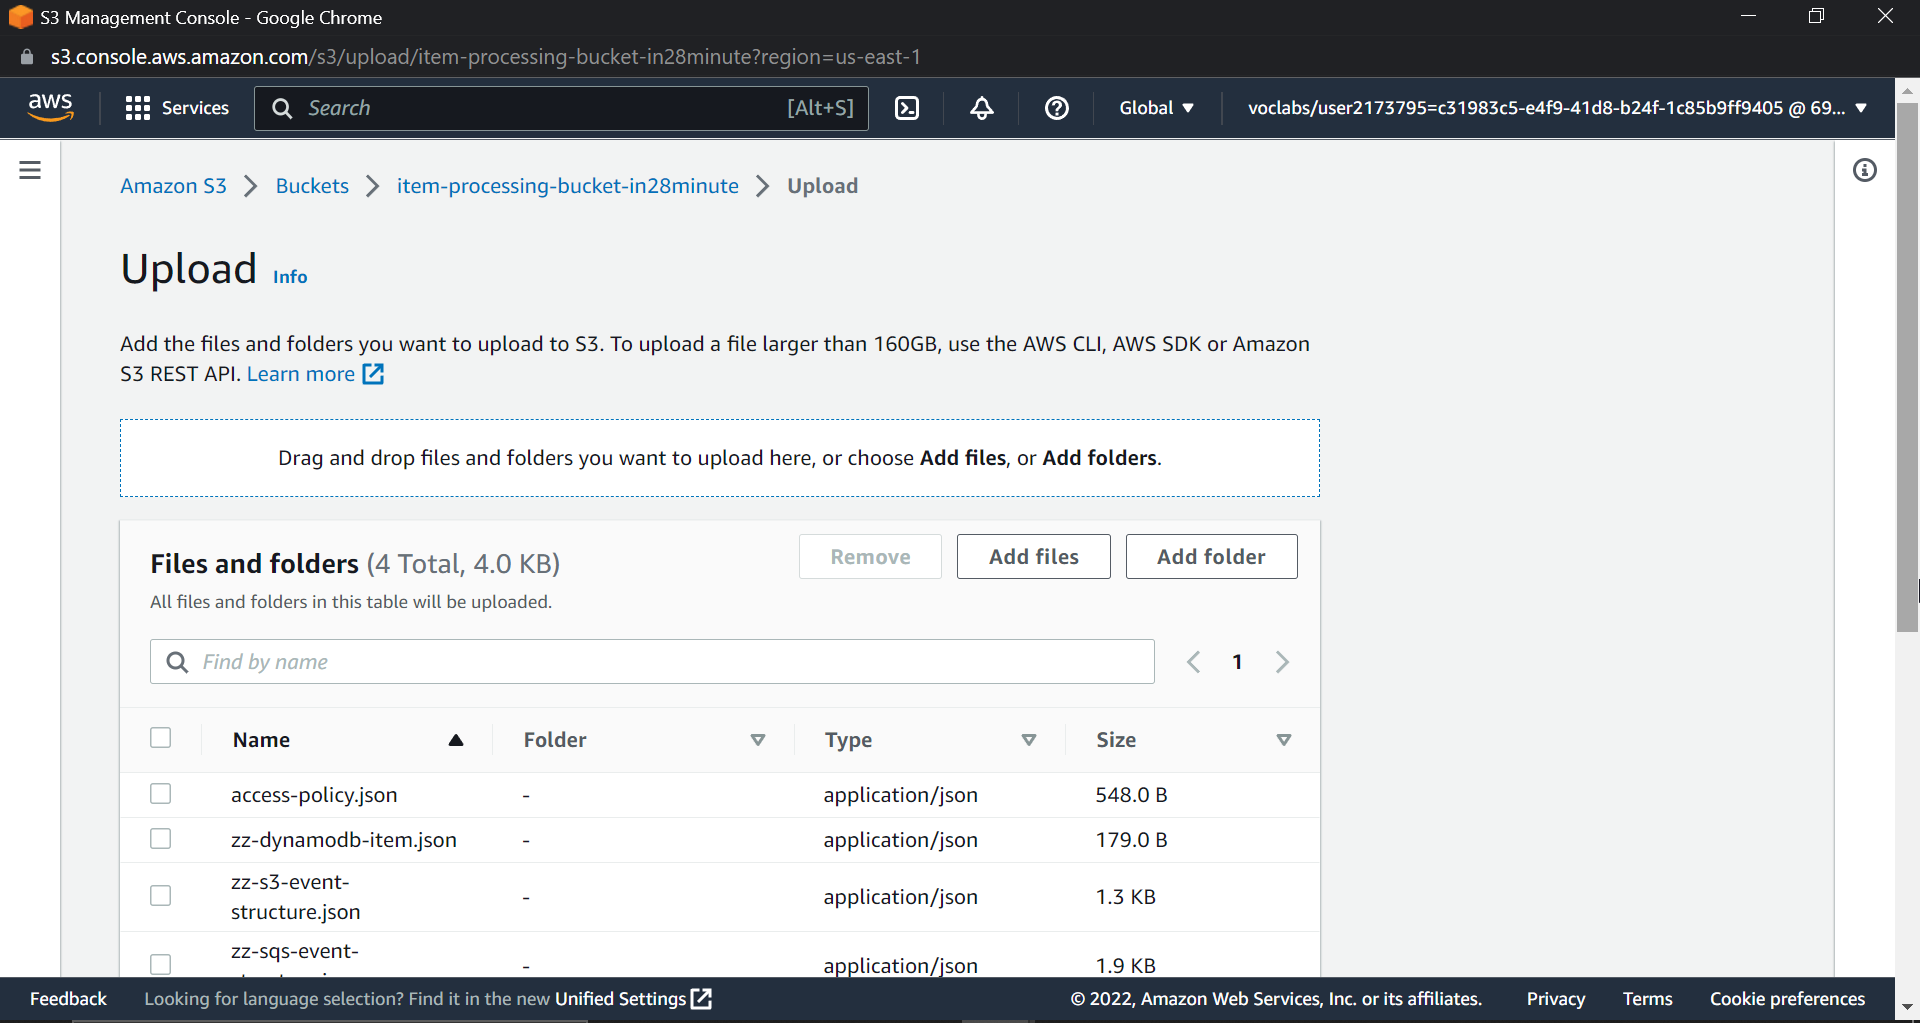
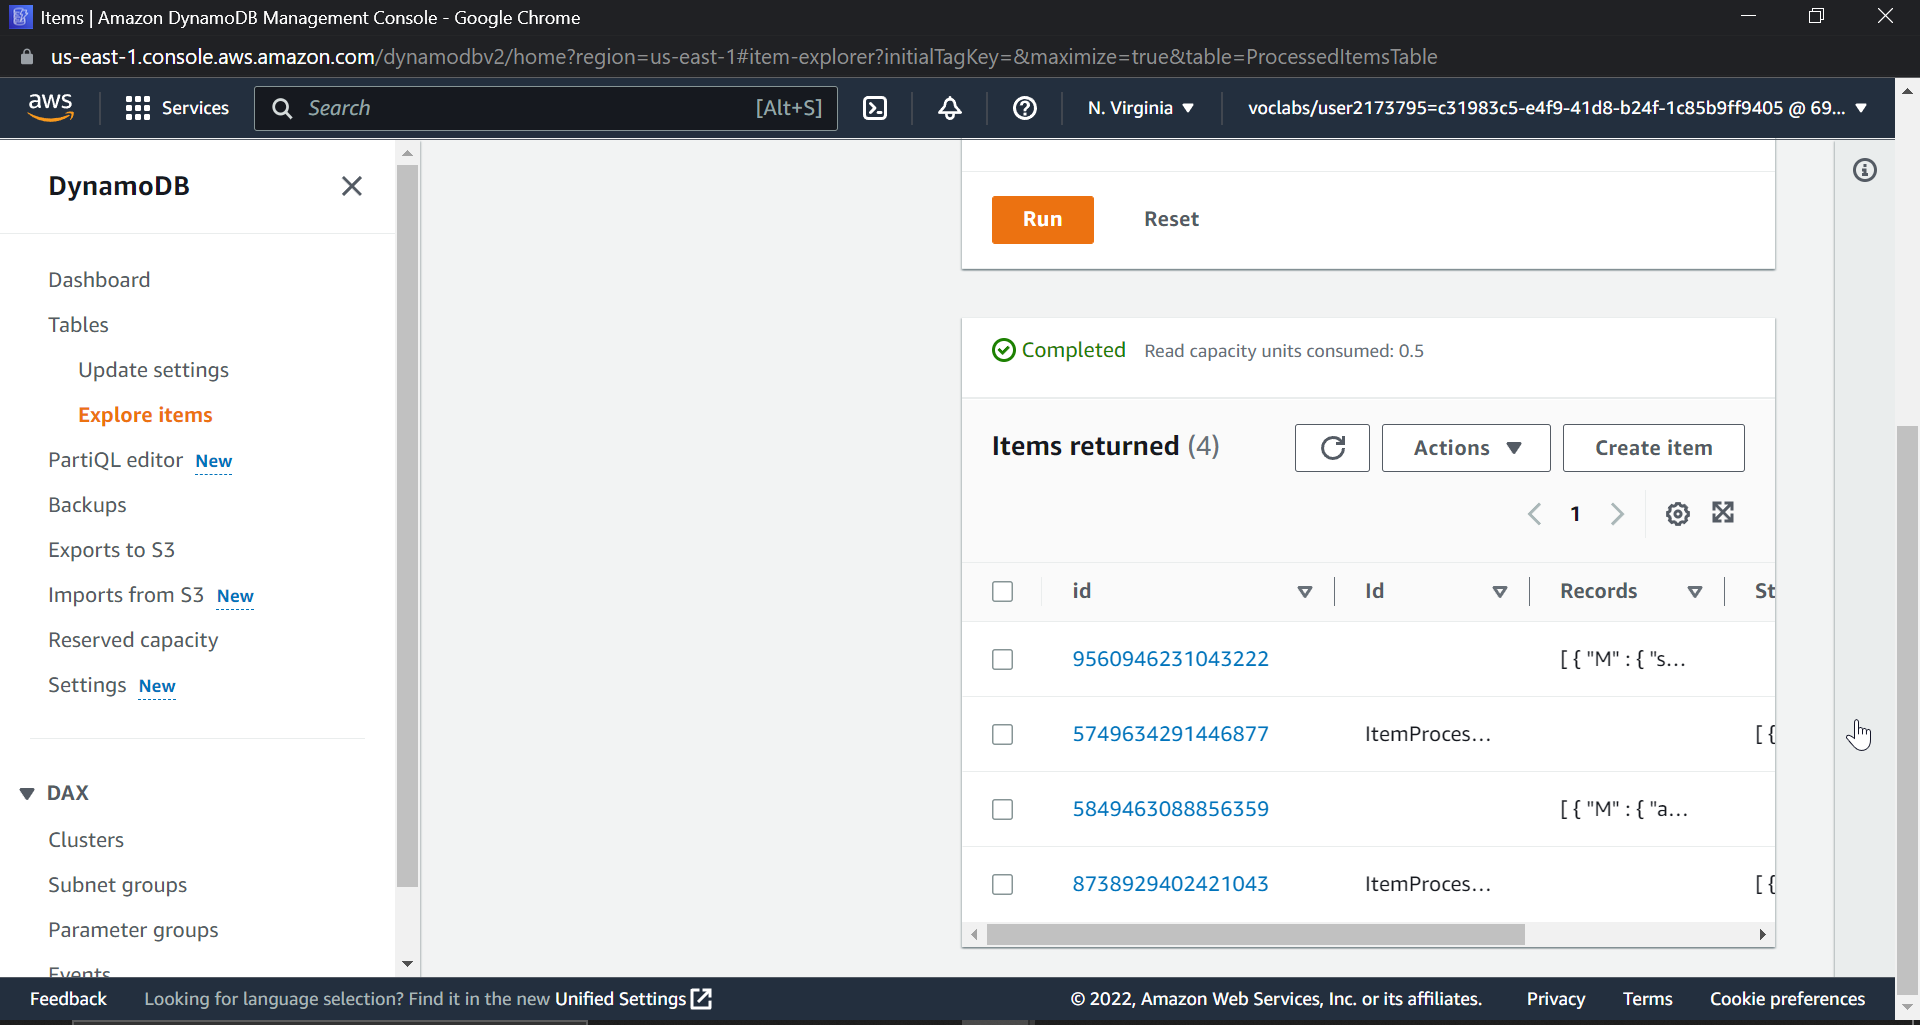
Now, let's try uploading multiple files and viewing them in DynamoDB.
Multiple file uploads
This ends our project; we have successfully created a workflow that will process millions of JSON files at a time, be resilient, serverless, and allow users to upload JSON files to an S3 bucket and store data in DynamoDB.
During the project, I encountered a few errors that took a lot of time to resolve :(
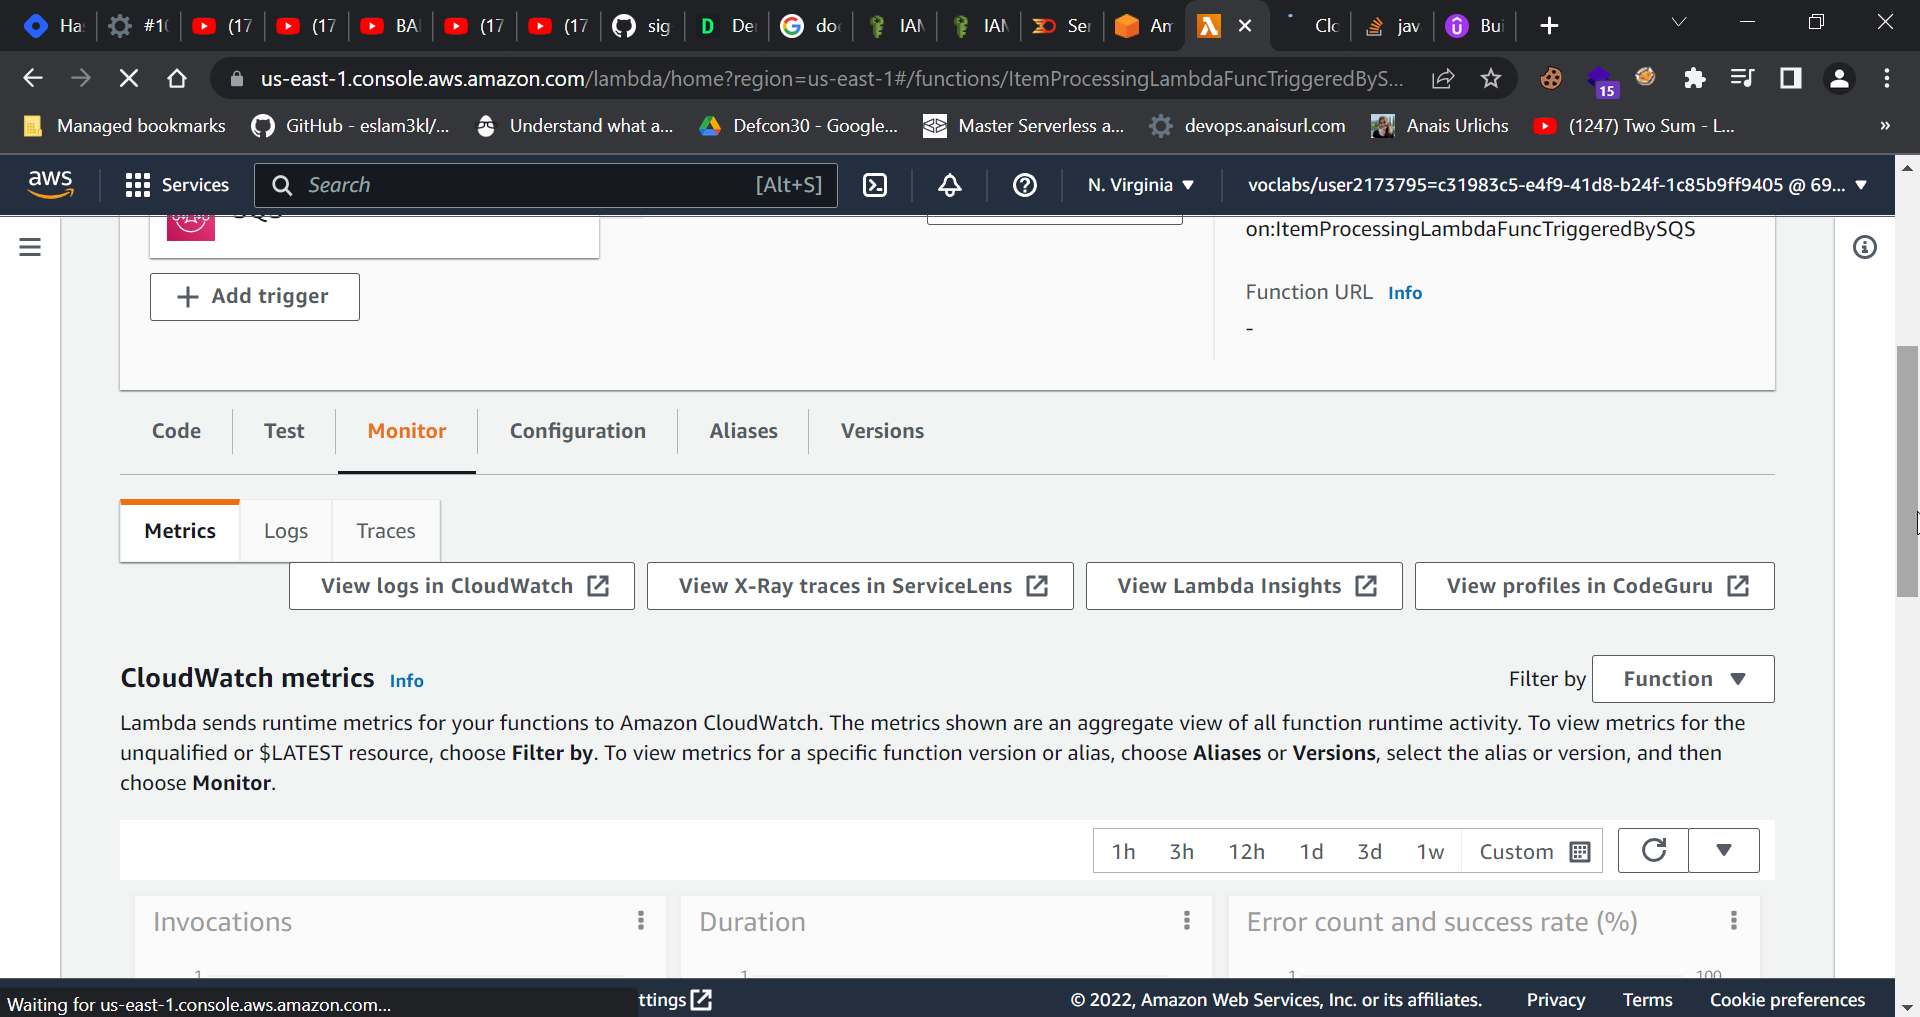
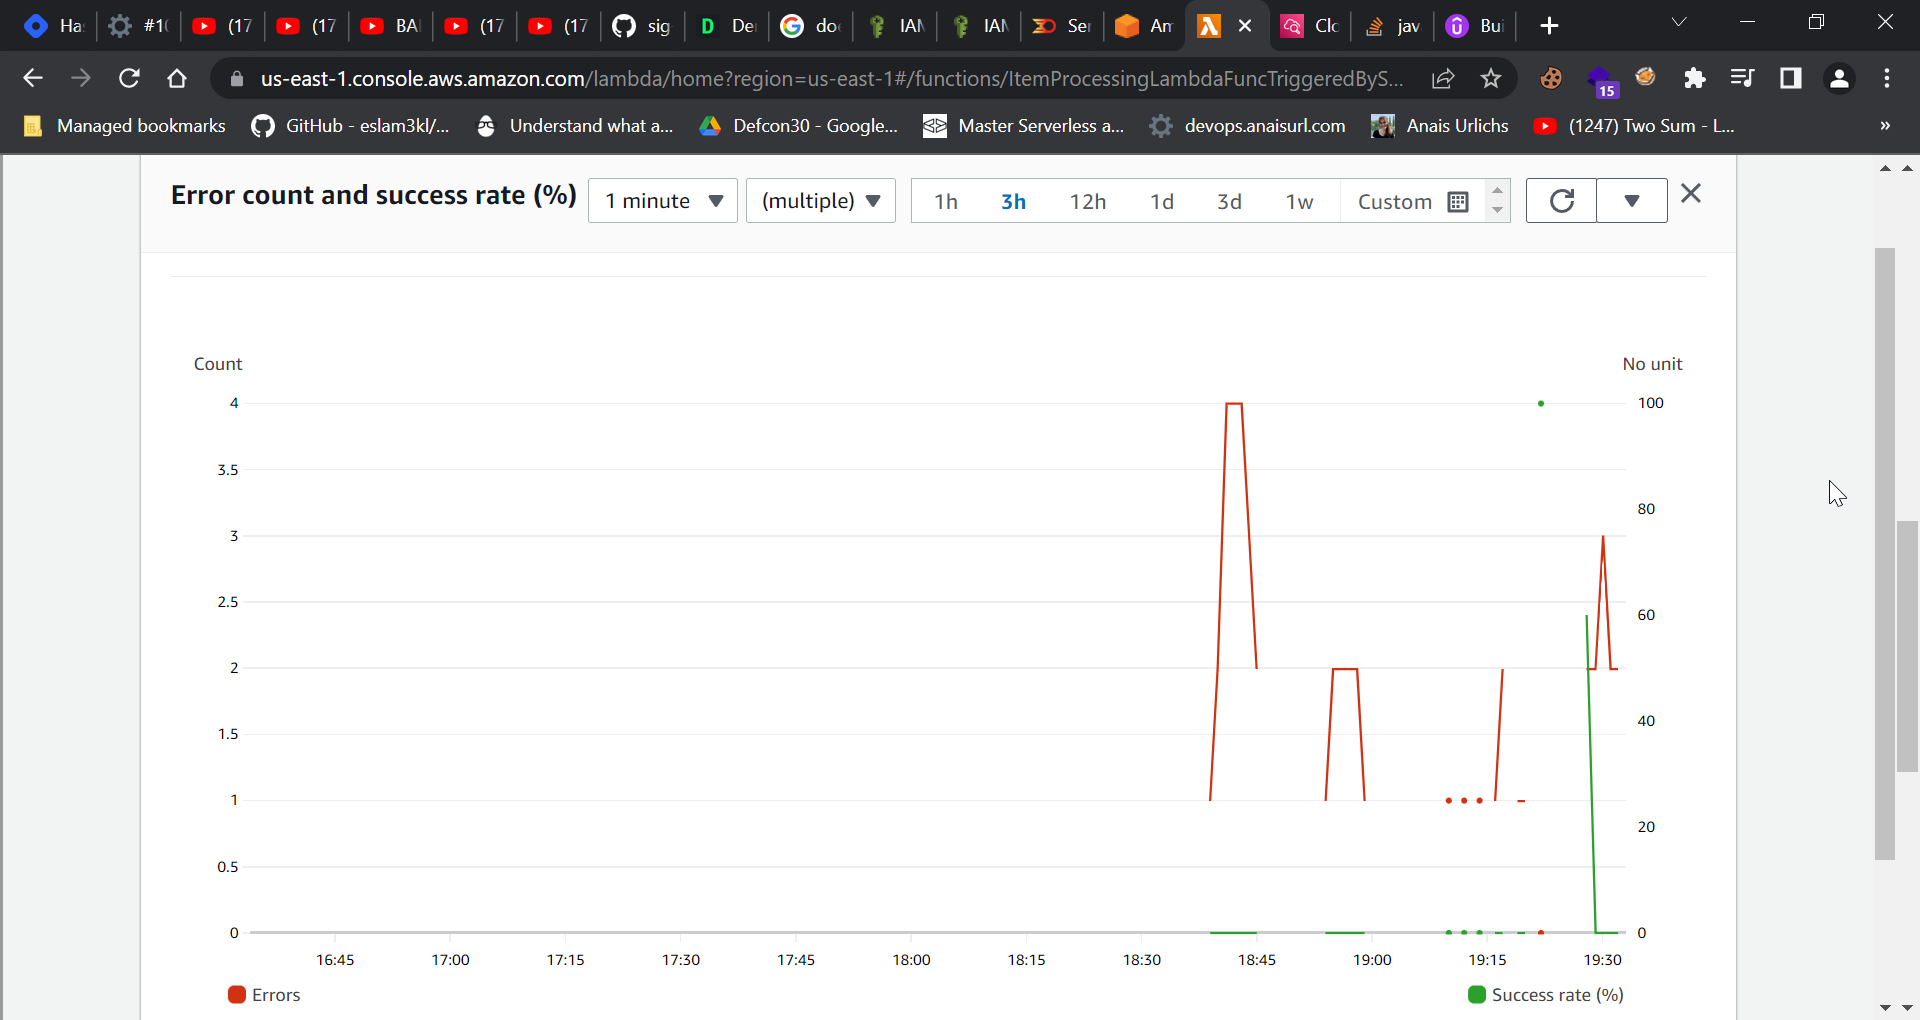
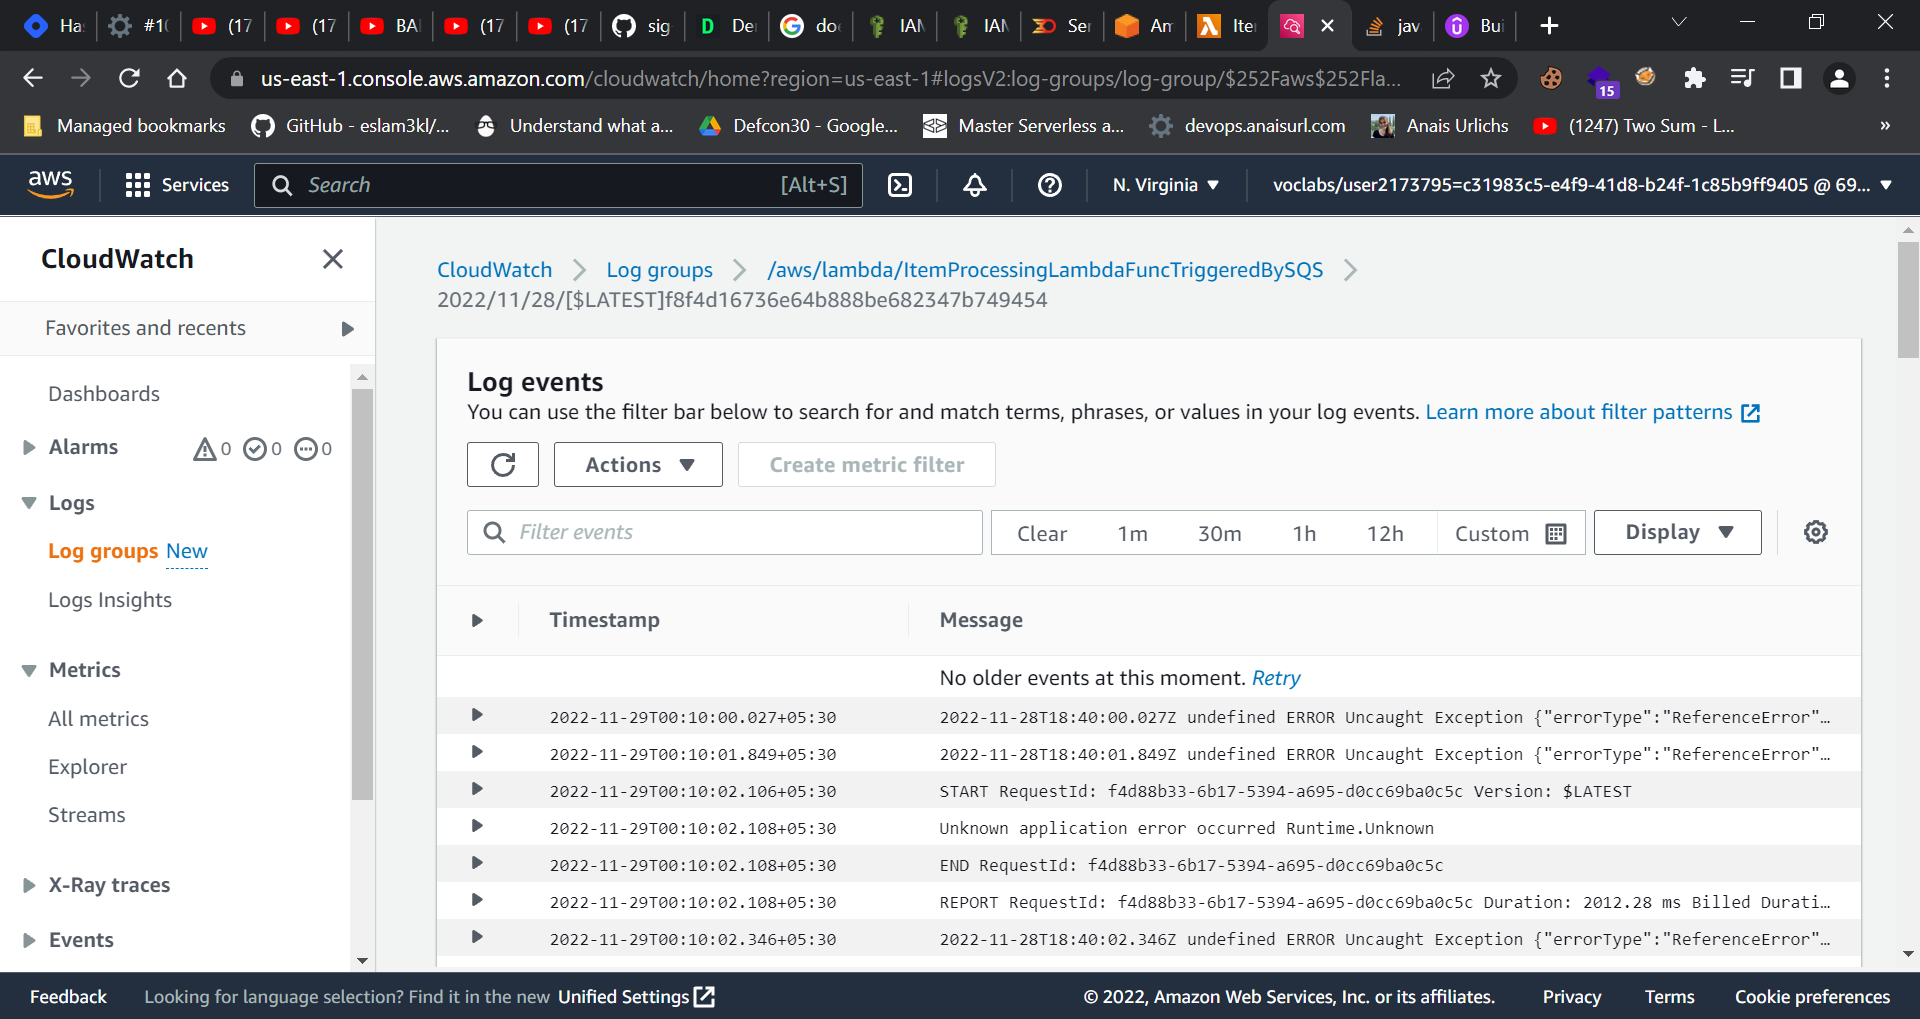
My lambda function was not working, that is, the data was not uploaded to the DynamoDB table, and to find this, I had to go through the following logs:

This image showed that there was an error in the lambda function.
Now I tried to test the lambda function code and found all the errors.
You can also find this in cloudwatch logs
Returning to the issue, why is the lambda function not working?
I discovered that the file name in which we wrote the code was.mjs, and that we needed a.js file instead. Just click on "Create a new javascript file with file name index." This will replace the index.mjs file with an index.js file and use the same code.
Now test this by uploading json files to an S3 bucket, and it will work just fine. Do connect with me if you face any issues.
That is it for this week's AWS Project. Cheers :)


