Building a Private REST API with lambda and Amazon Gateway

Welcome to AWS Project Series, first let us talk about what this project is about
Why this project
This project involves building a REST API for a to-do list management platform. We will follow a serverless approach to keep our operations and costs to a minimum. We will aim to build a private REST API exposing the following operations on a to-do resource: add, delete, update, and retrieve.
REST APIs will be exposed using an Amazon API Gateway but will be accessed only through an endpoint. Business logic will be written in AWS Lambda. Amazon DynamoDB will be the data store.
The system will provide a REST API for managing to-dos. We want to add, delete, modify, and retrieve to-dos. The system would be an auto-scaling and highly resilient serverless REST API using Amazon API Gateway, AWS Lambda, and Amazon DynamoDB as a REST API for our Todo management platform.
Create Lamda function (basic hello world)
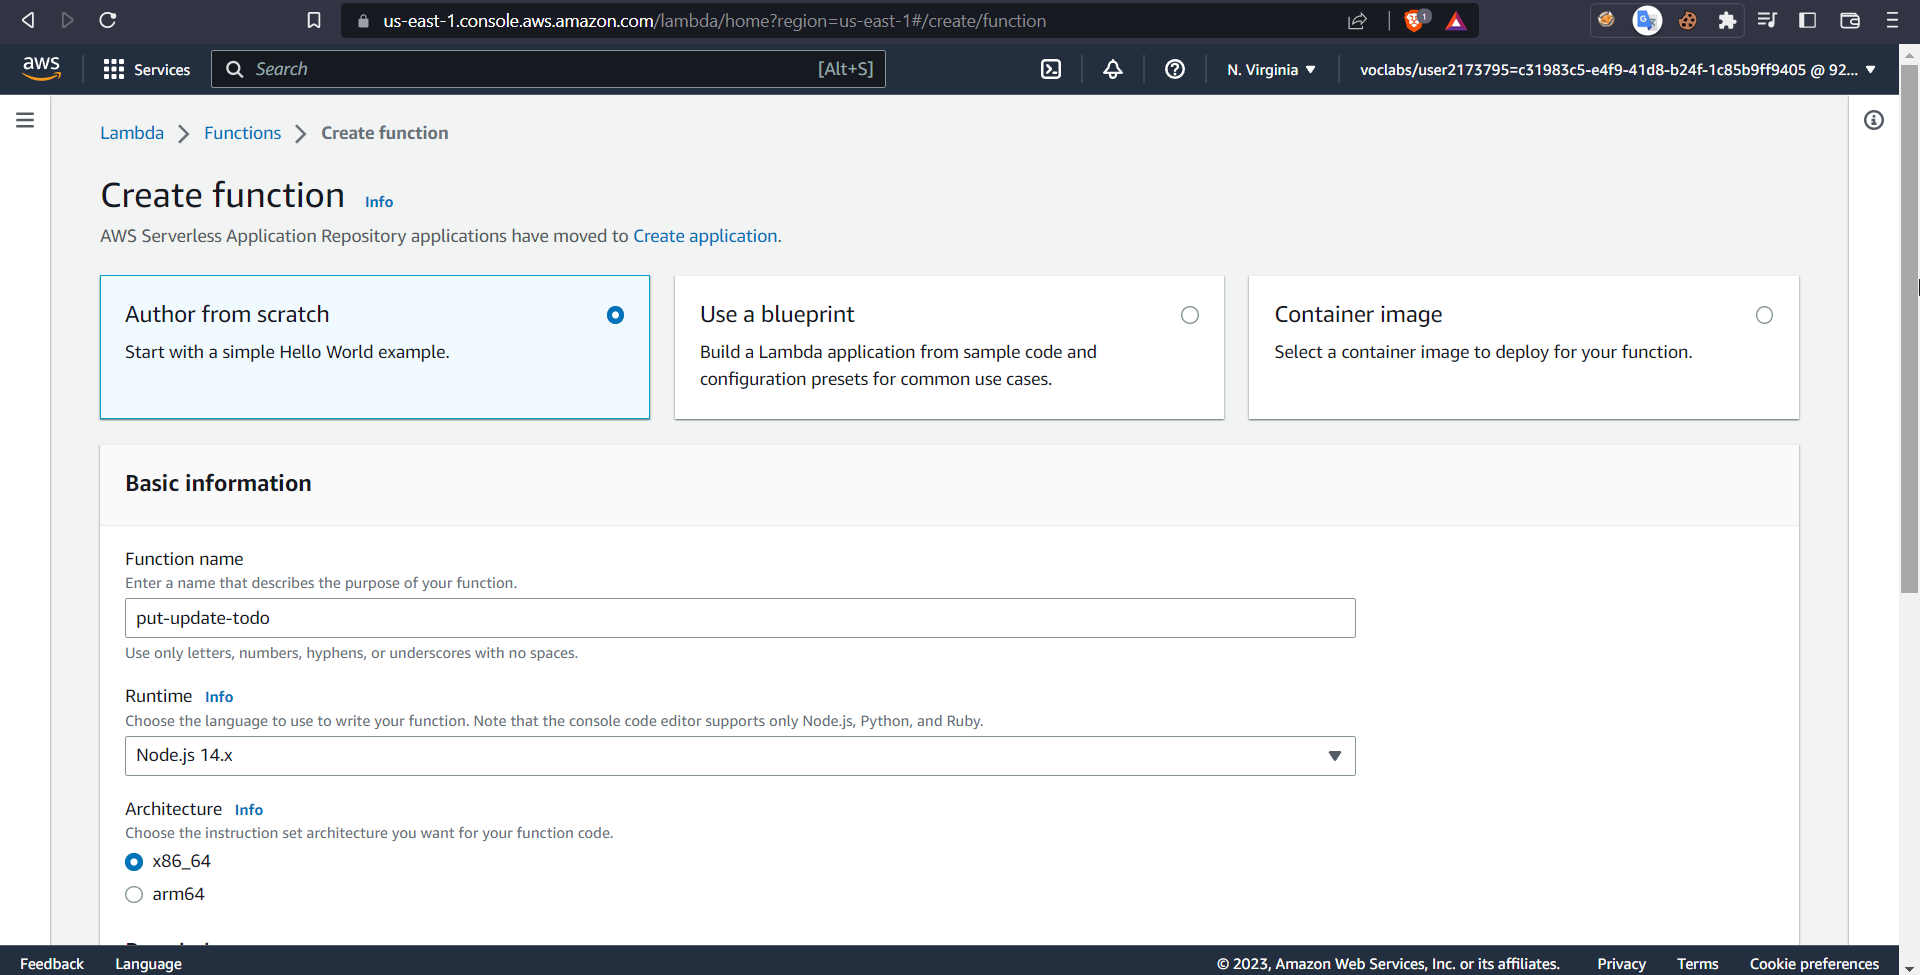
let us start simple with building a basic lambda function, search for lambda in the AWS console and click on create a function
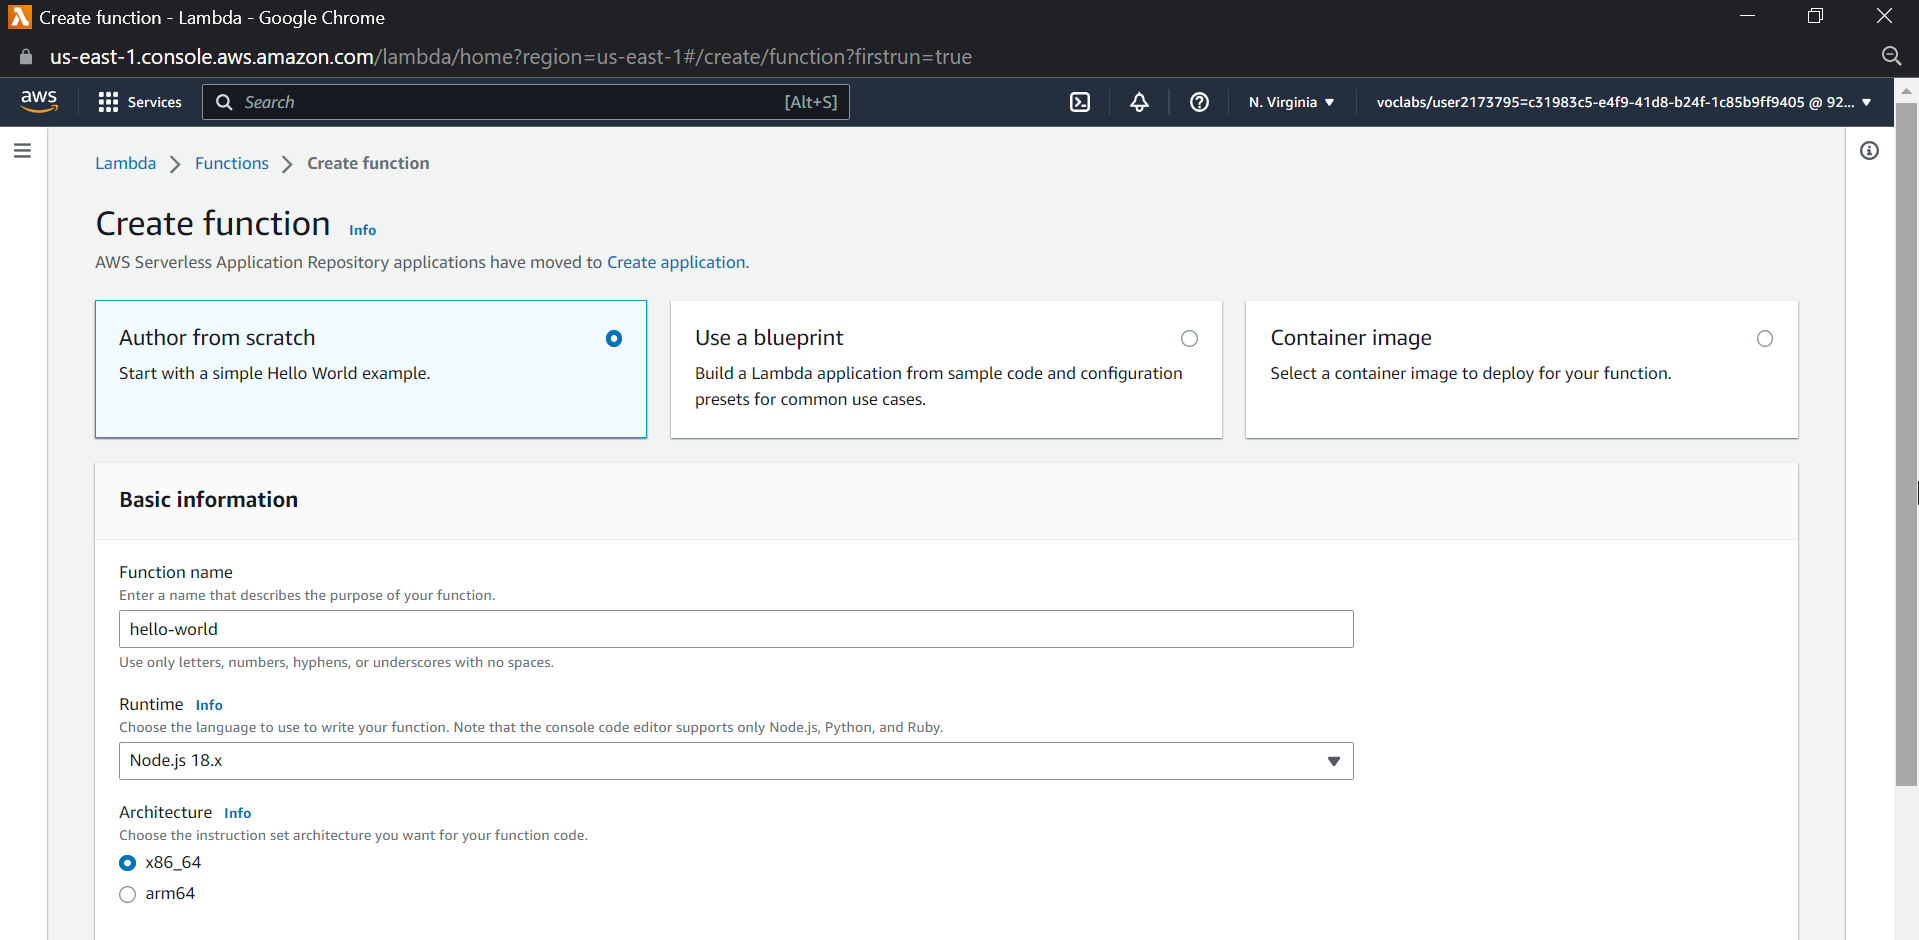
Keep everything to defaults i.e author from scratch, give a name as hello-world and click create function.
You will be further prompted to the code for the lambda function

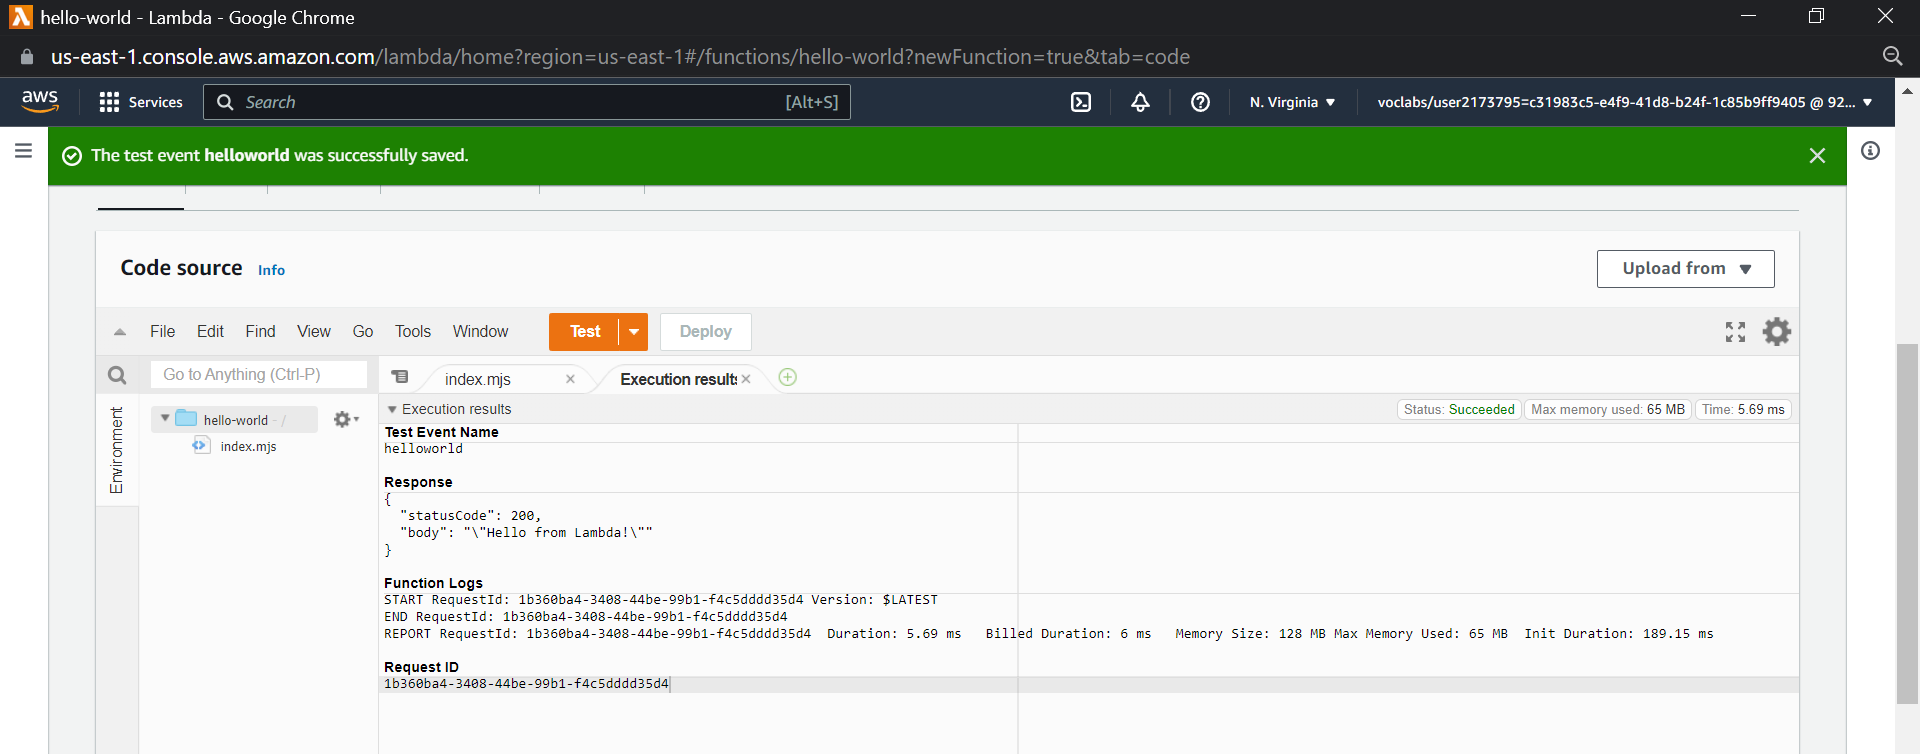
Click on test and give an event name as helloworld, keep the template as hello-world and save.
Now click again on the test button you will see the response with 200 and the string as "Hello from lambda" which confirms the working of the lambda function
We have confirmed the working of a basic lambda function (Hello World)
Creating a private API Gateway
Now let us create a Private API Gateway
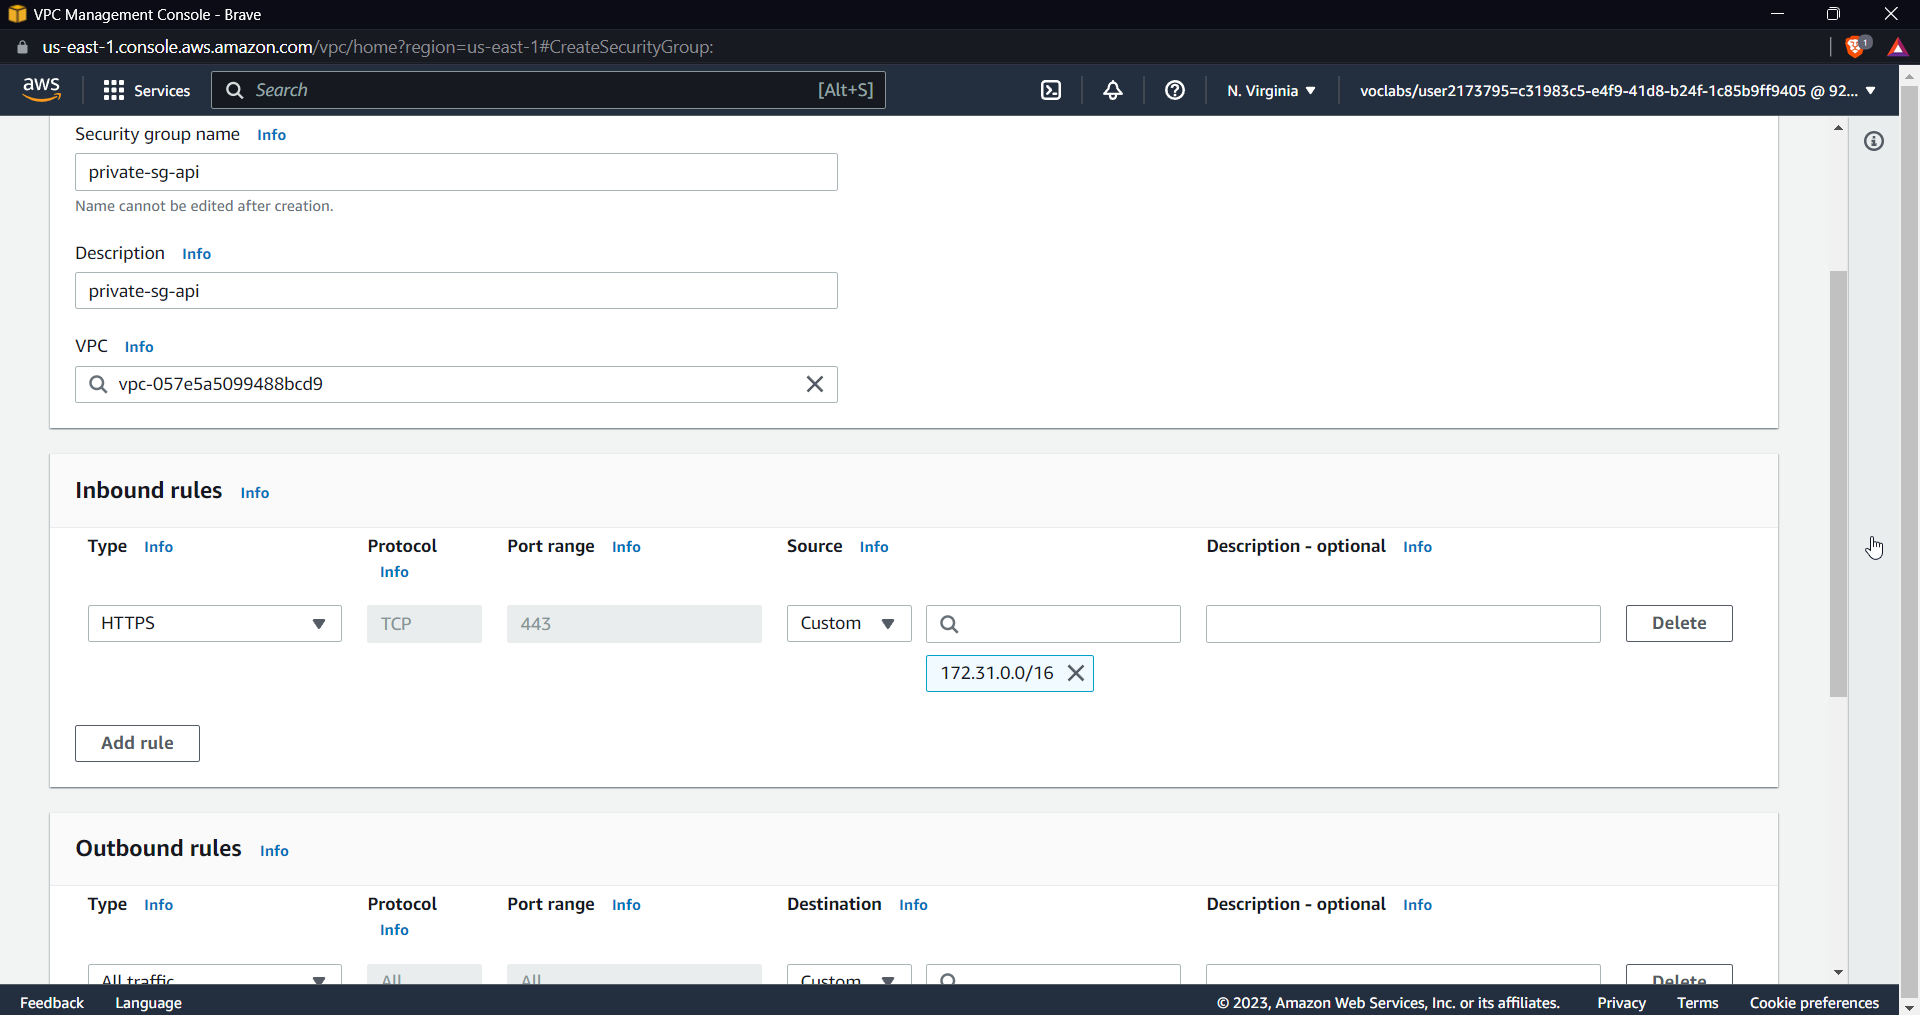
Todo so, we have to first create a security group that will allow only traffic incoming to our private VPC and for outbound rules, we can allow any traffic to go out
Note your VPC CIDR :
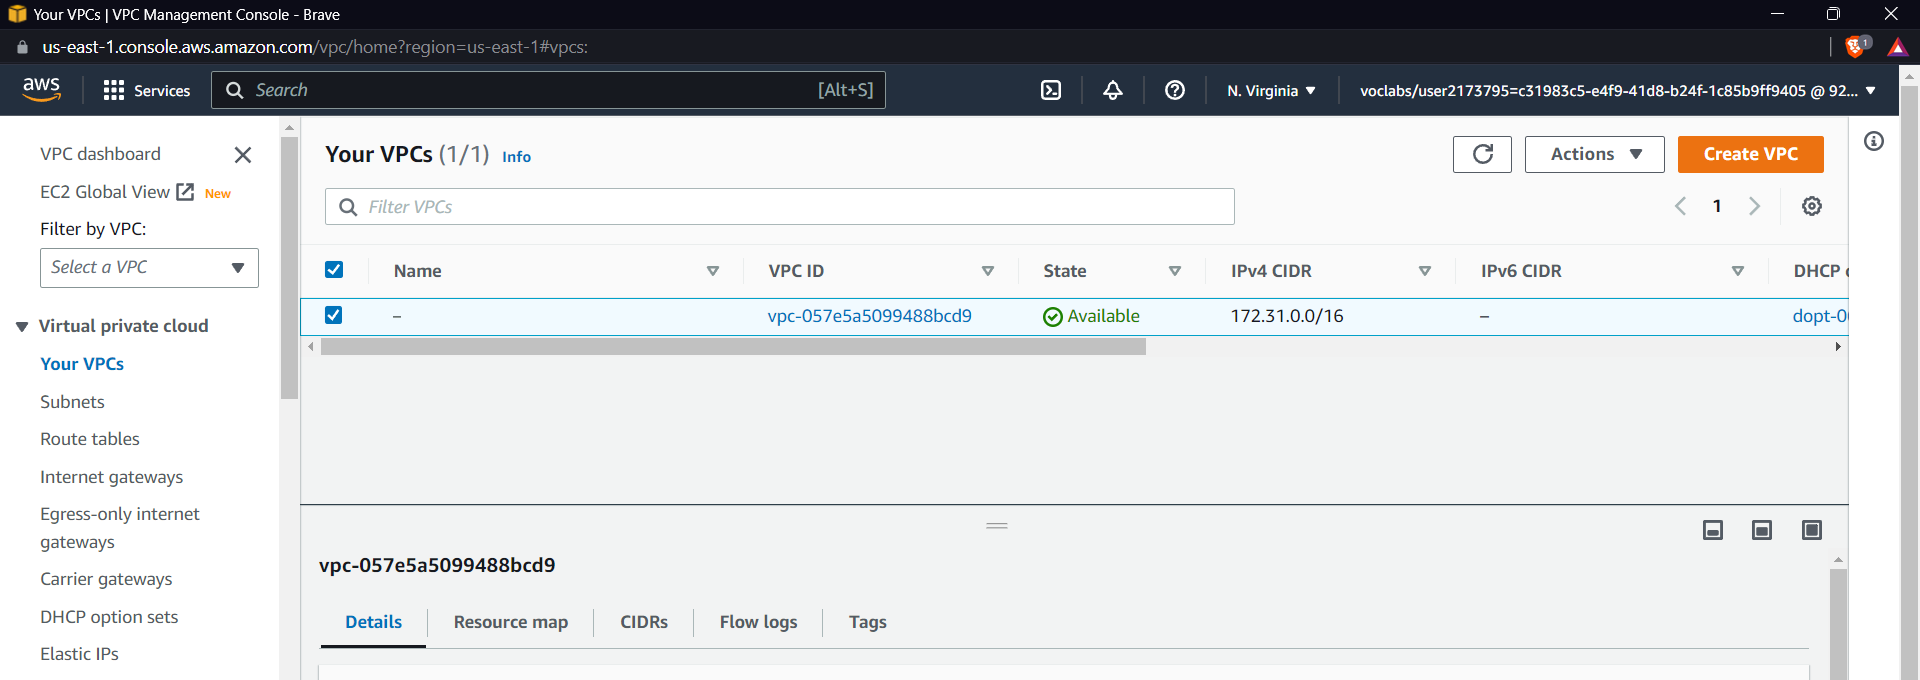
172.31.0.0/16 |
So let's start with a security group, search for VPC in the aws console and select security groups
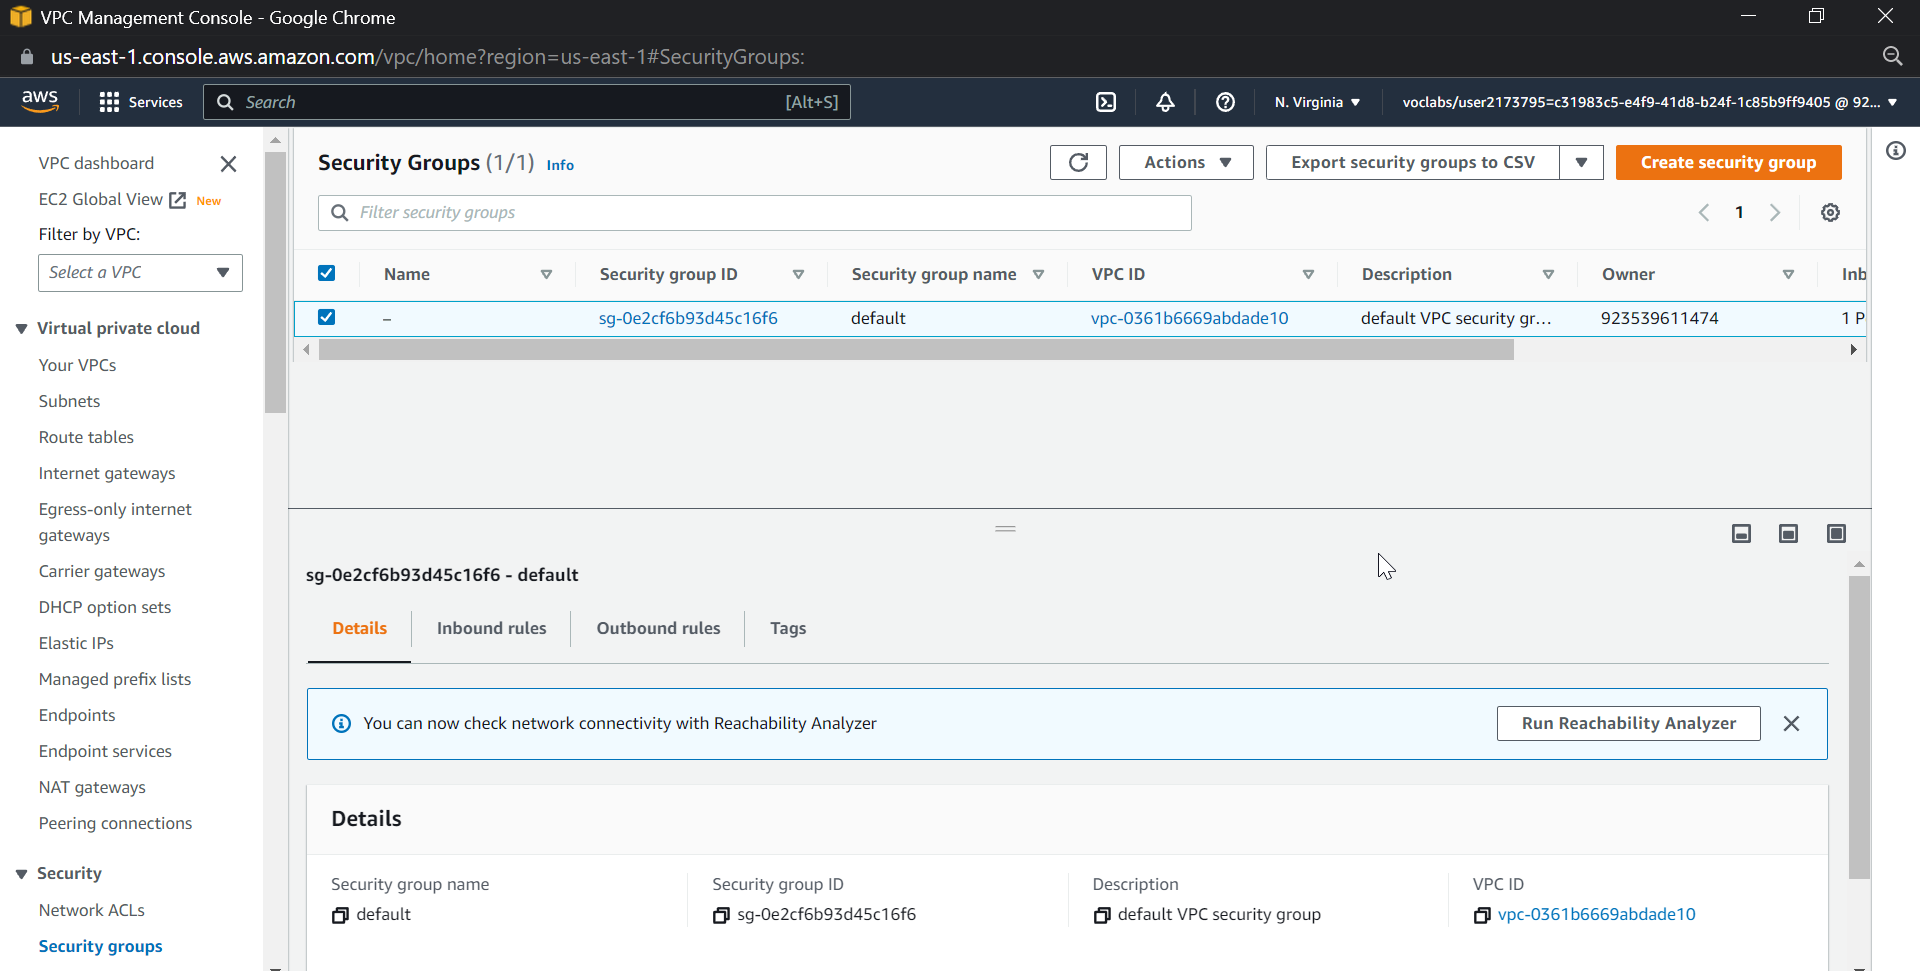
Click on create security group, select inbound as HTTPS and set the CIDR to the VPC of your account
Leave outbound to default as all traffic, our goal would be to make sure traffic goes only to the private vpc.
Click on create a Security group.
Now let us create an endpoint.
The reason to create an endpoint is that we want to make this a private API, By using endpoints, data traffic between a VPC and an AWS service remains within the Amazon network, providing enhanced security and improved performance compared to data transfer over the internet.
Click on the endpoint and create an endpoint, give a name to the endpoint, keep the default aws service and search for execute-API in services
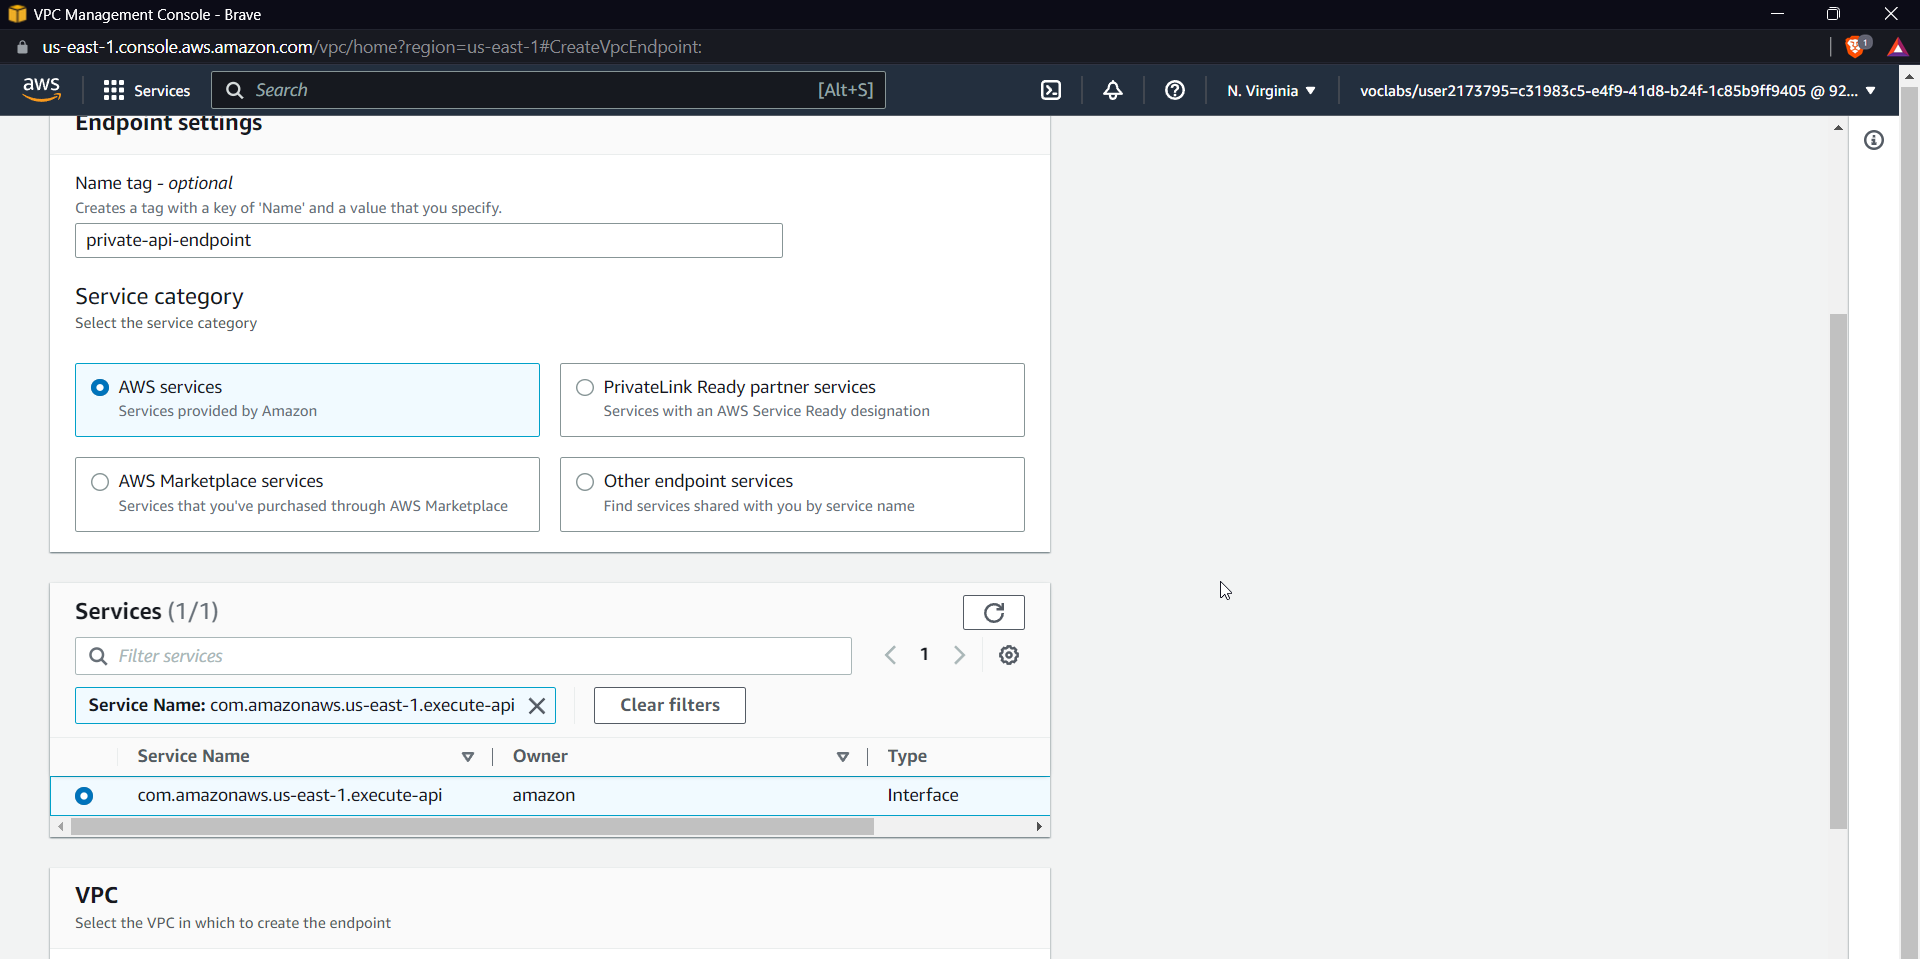
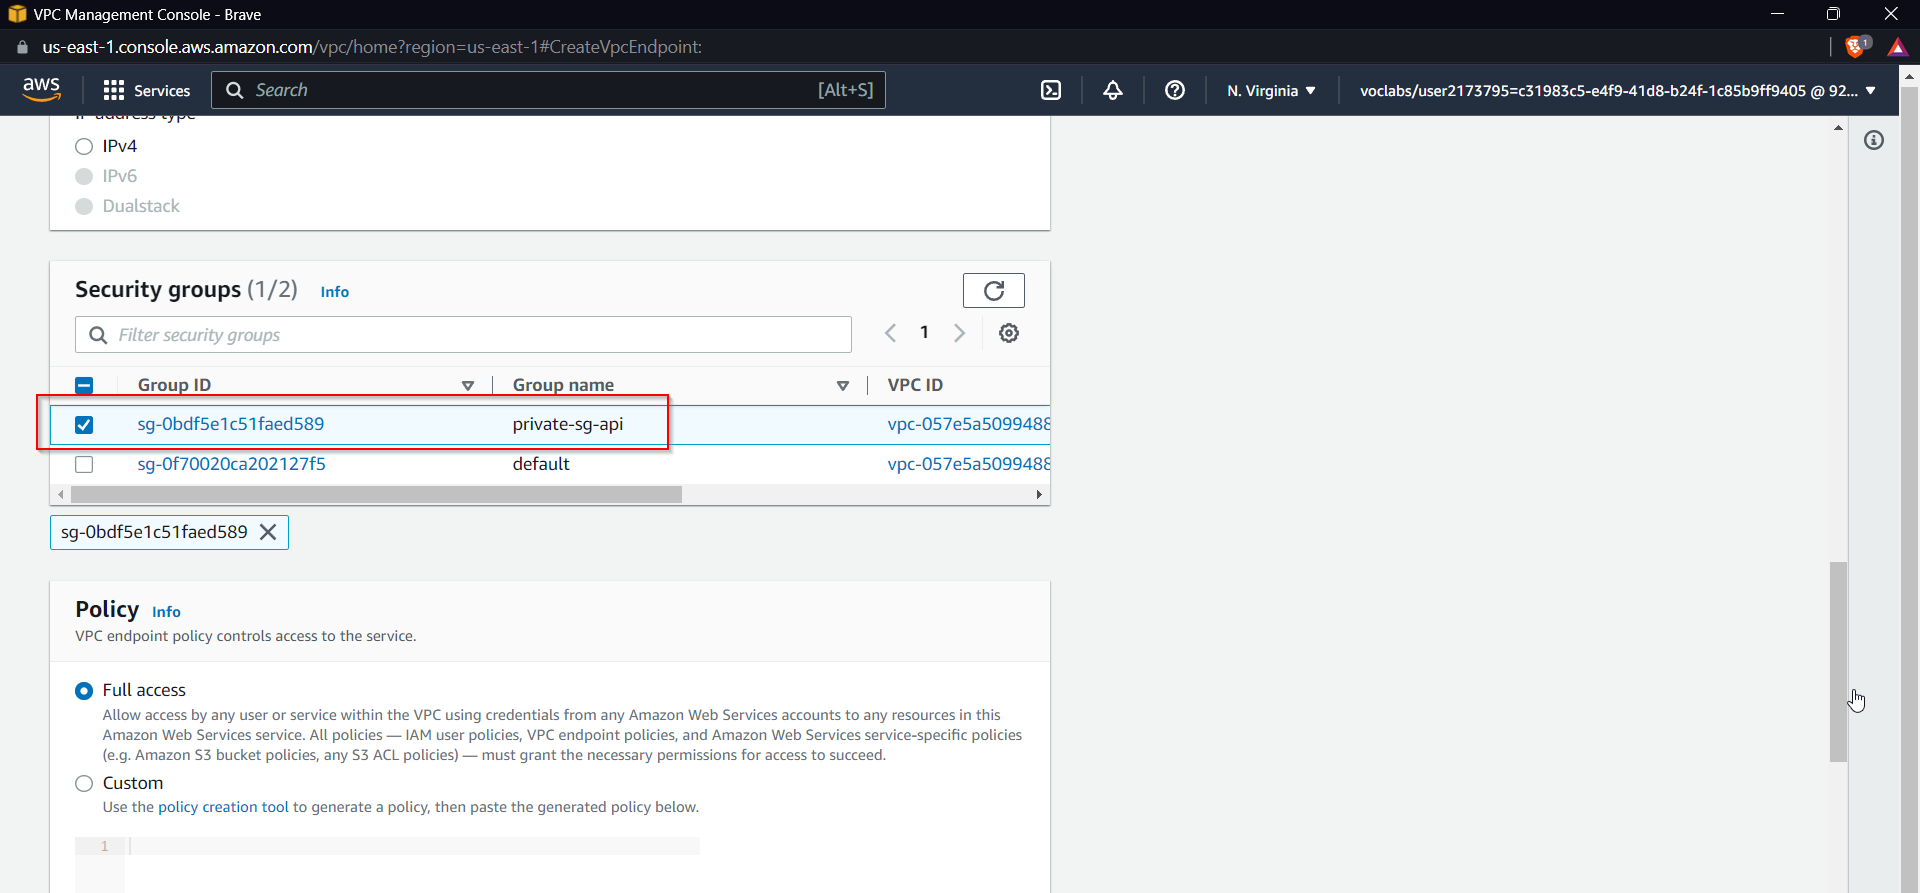
Select the service as seen in the above image, Now select the VPC from the dropdown and select all the subnets
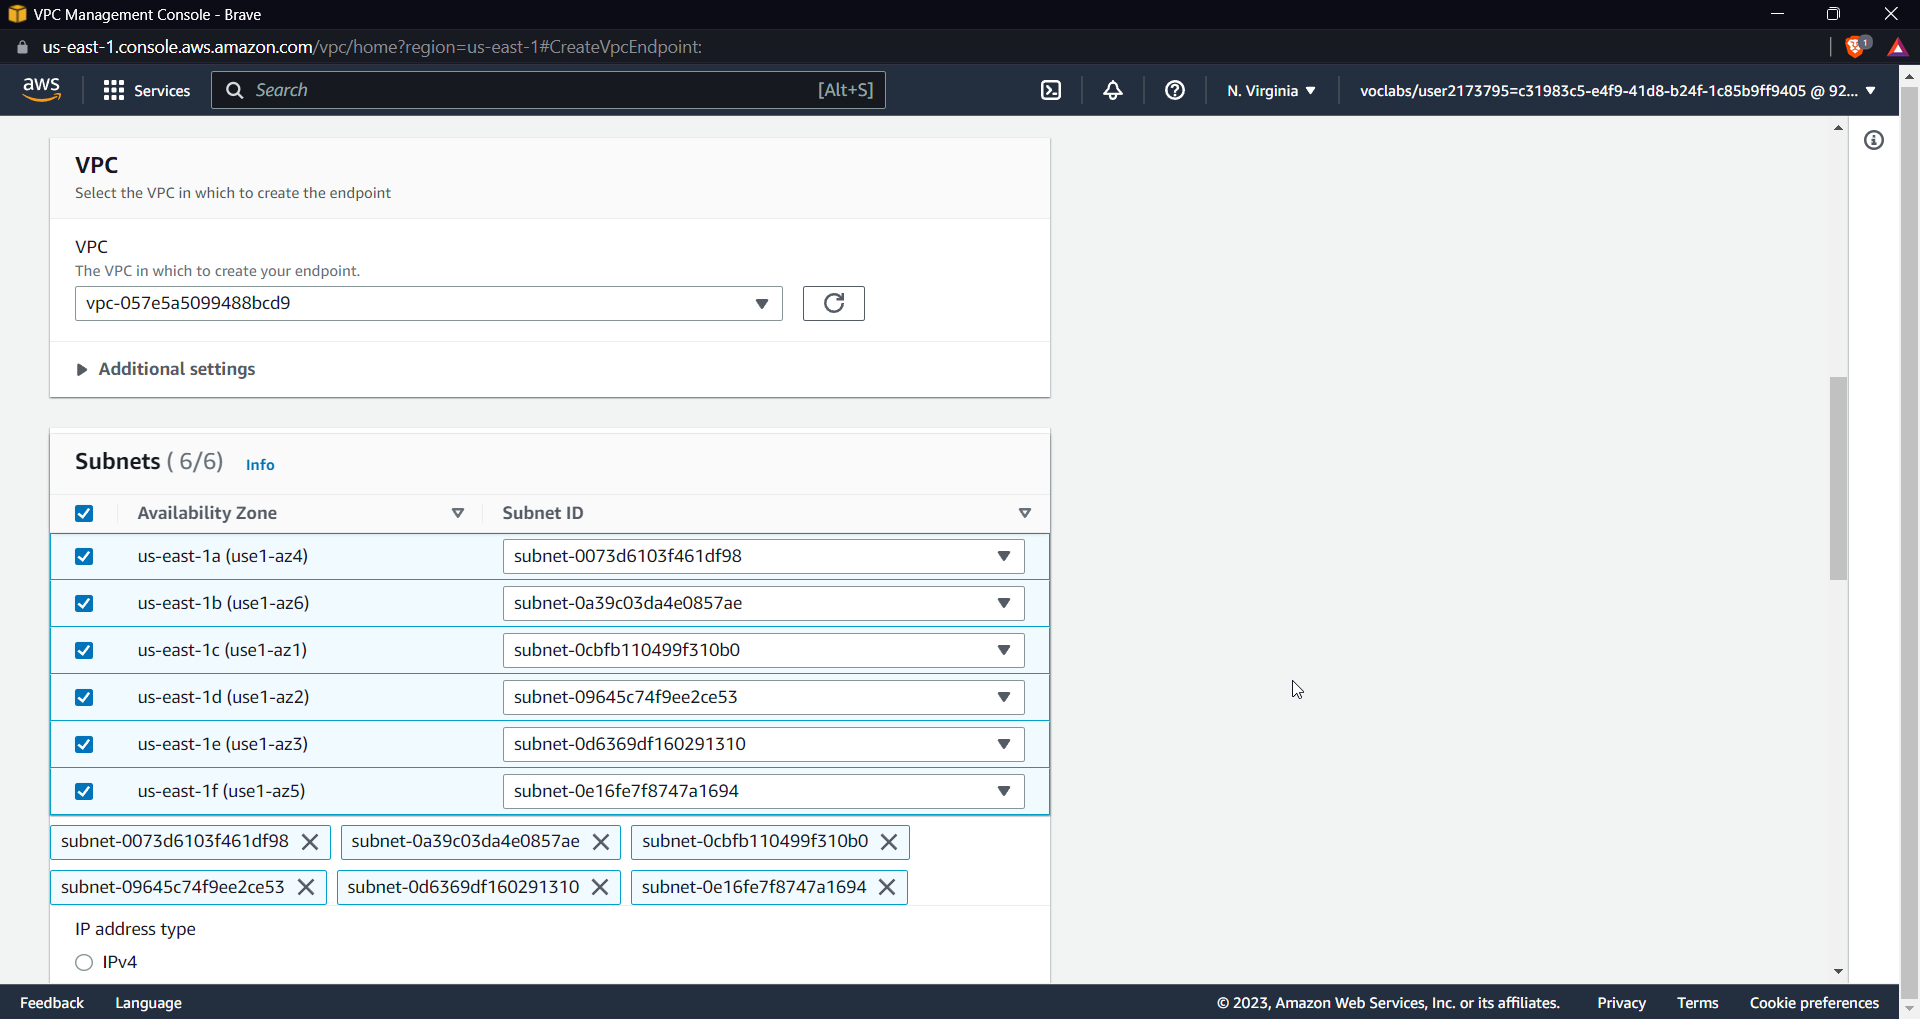
Select the security group as the previously created group and leave the policy at full access.
Finally, click on "Create an Endpoint."
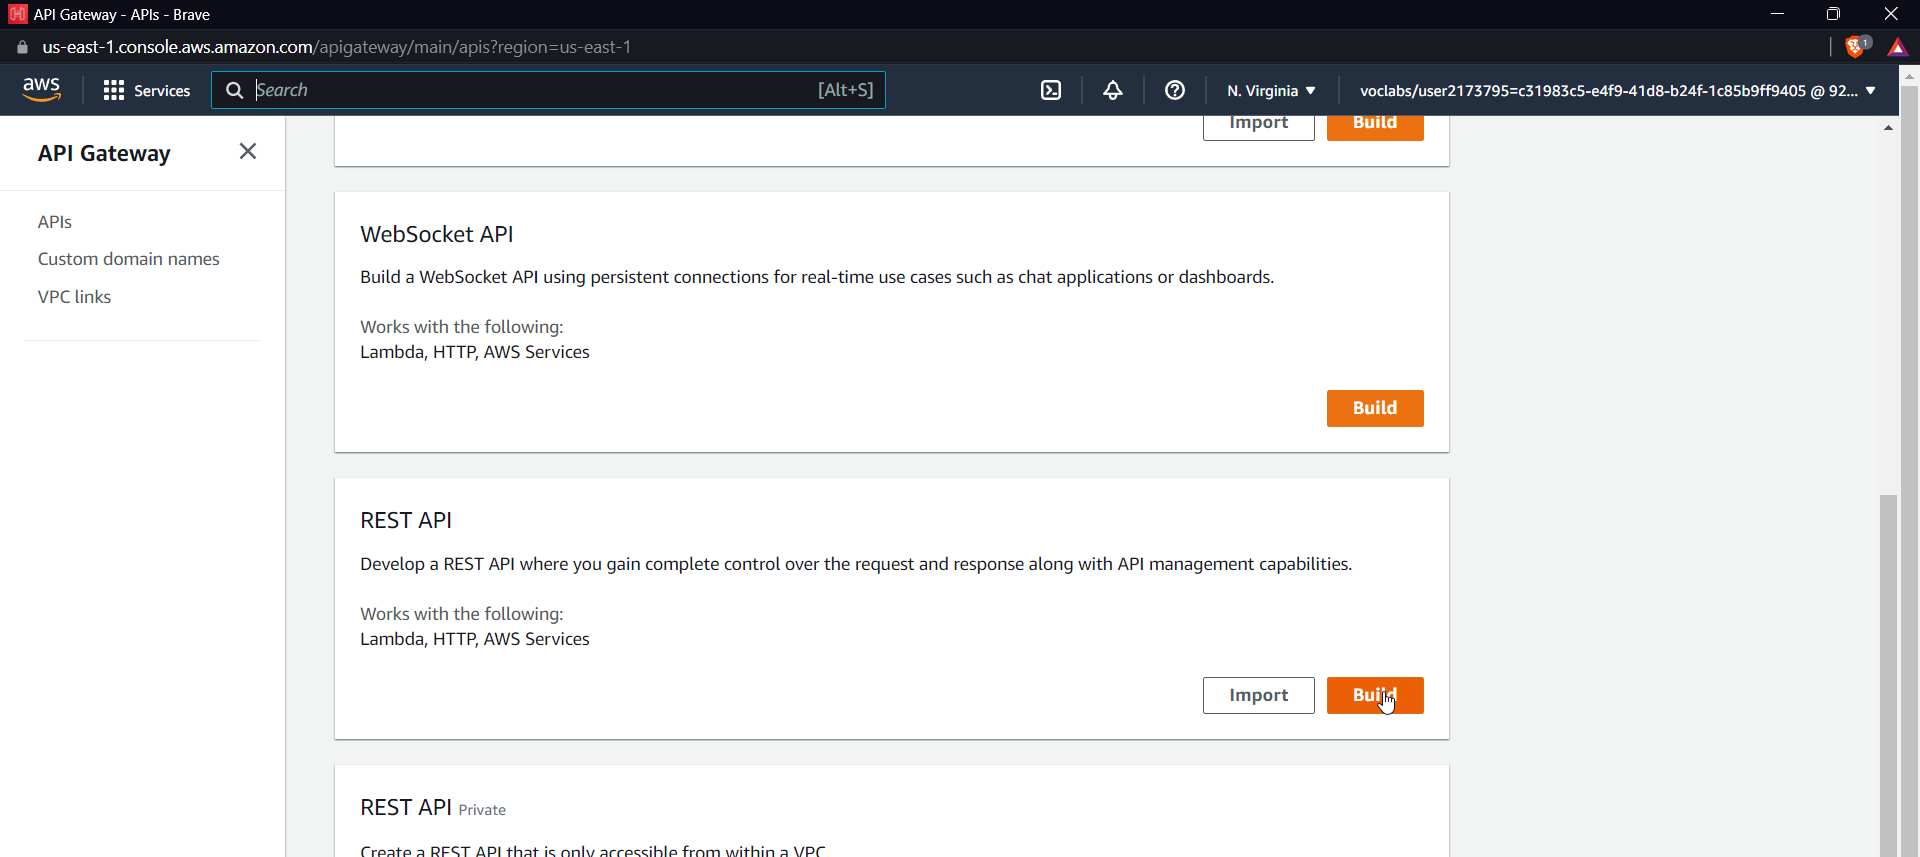
Now search for API Gateway in the AWS console, scroll down to REST API, and click on build.
Now click on "new API," give it a name, select "endpoint as private," get your VPC endpoint ID from the endpoint, and paste it in as shown in the below image.

Now click on create API
You will then be directed to the dashboard.

Connect the lambda function with API Gateway
Go to the API Gateway dashboard and create a resource using the action dropdown as shown in the image.
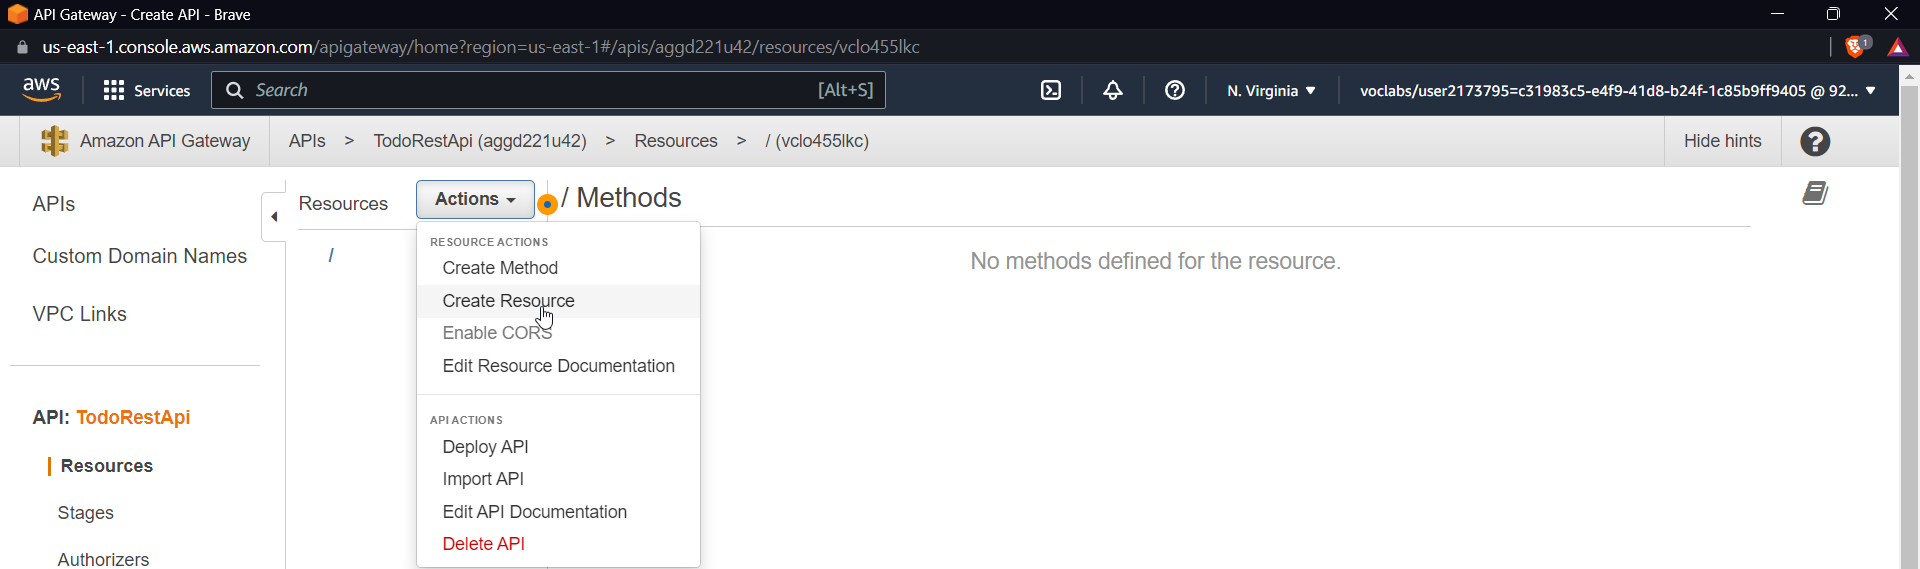
Give it a name and click on Create a resource

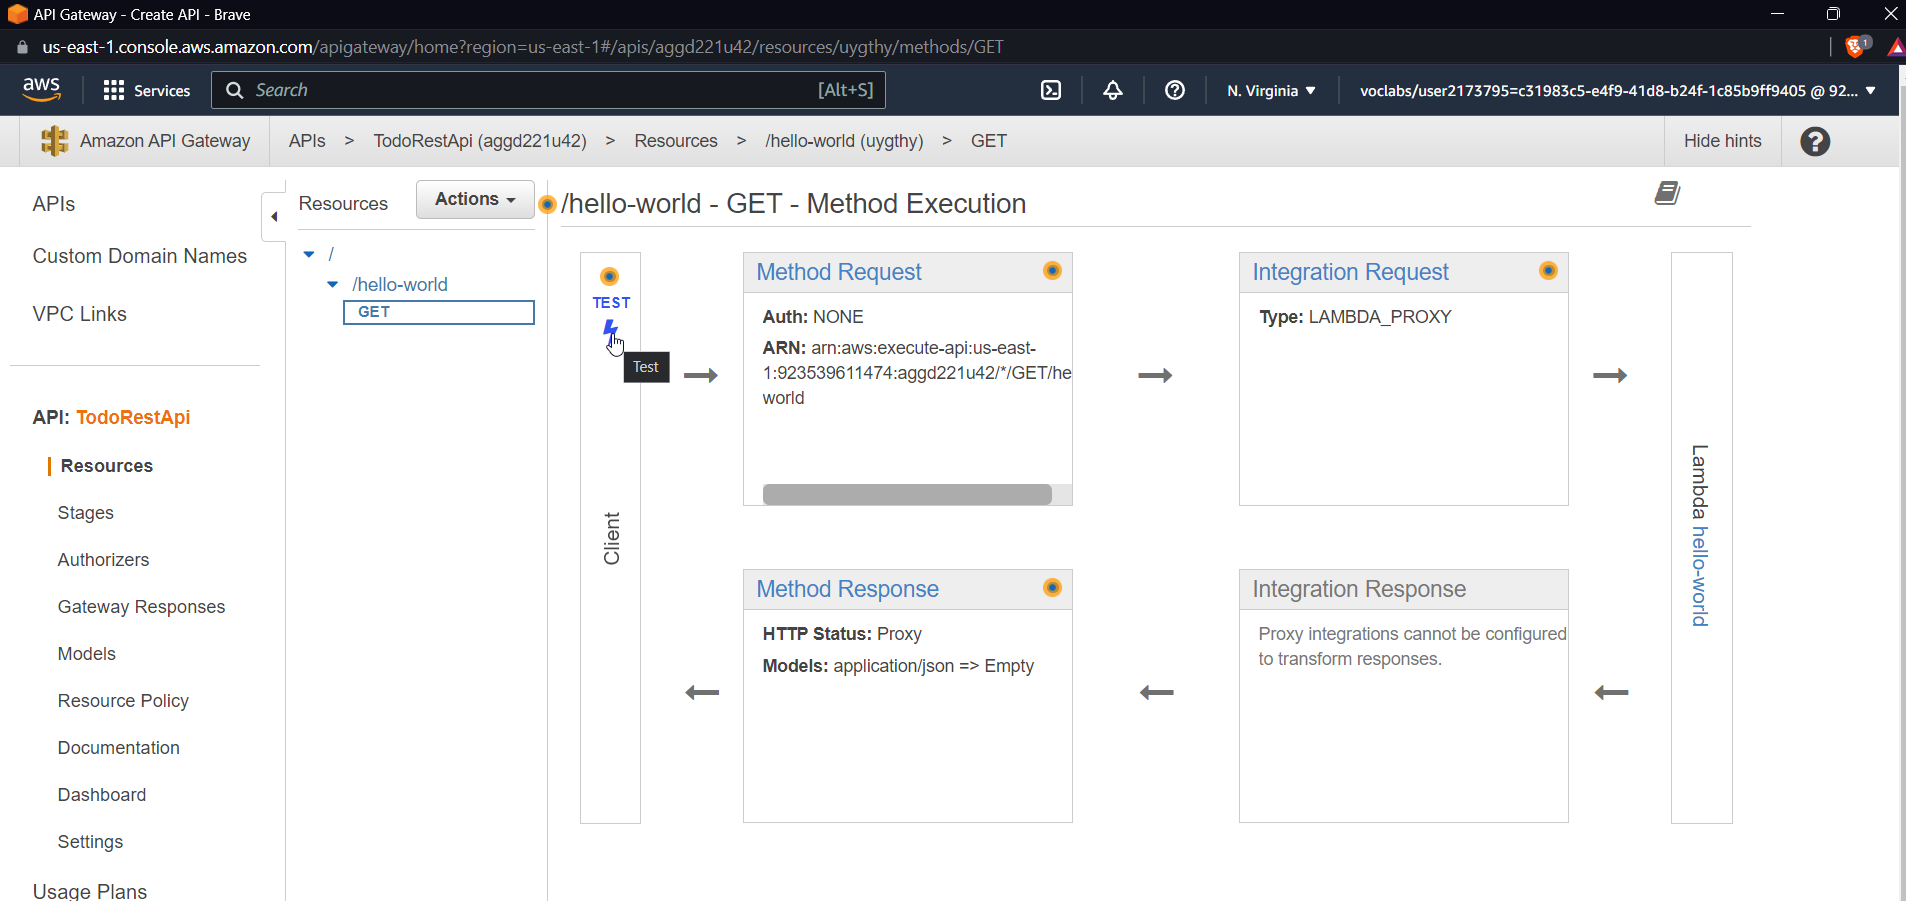
Now let us create a method for this resource. Select create a method using the actions dropdown, click on the GET method, and click on the tick mark.
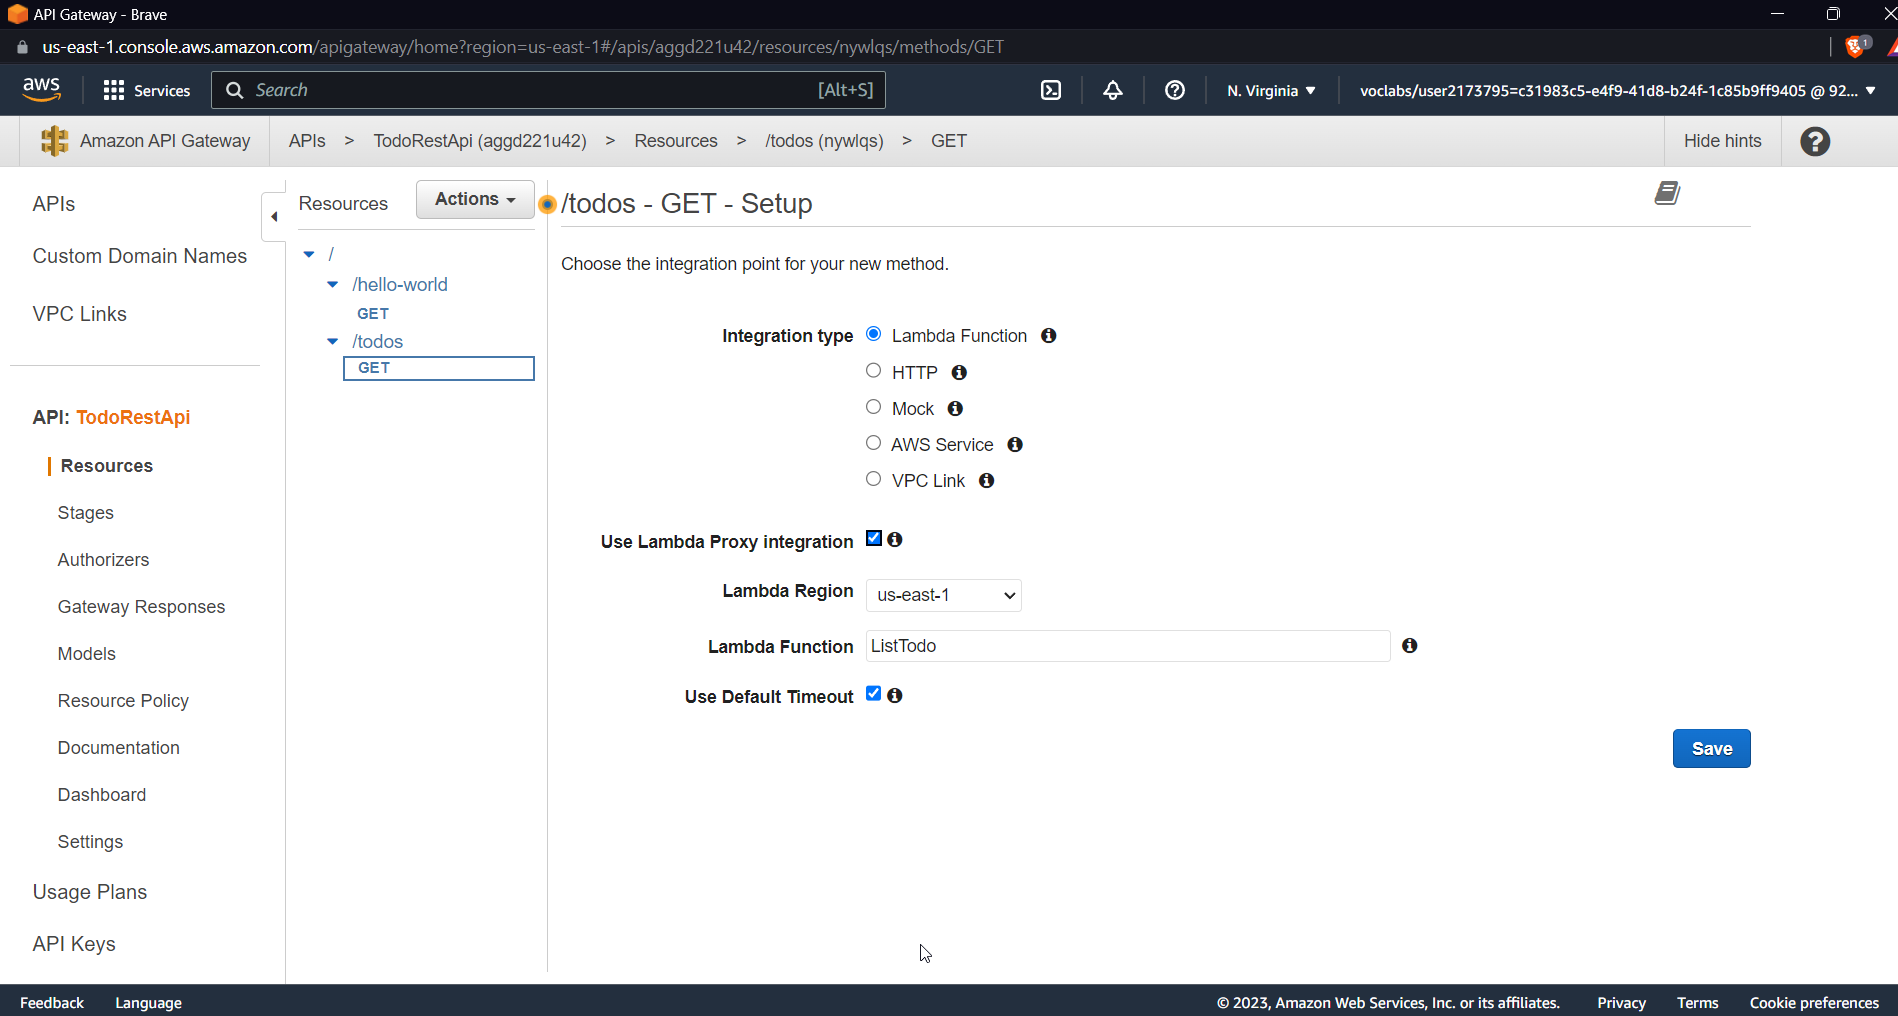
Now you will be prompted with a GET setup. Give the name of a previously created lambda function. Check the checkbox for lambda proxy integration.
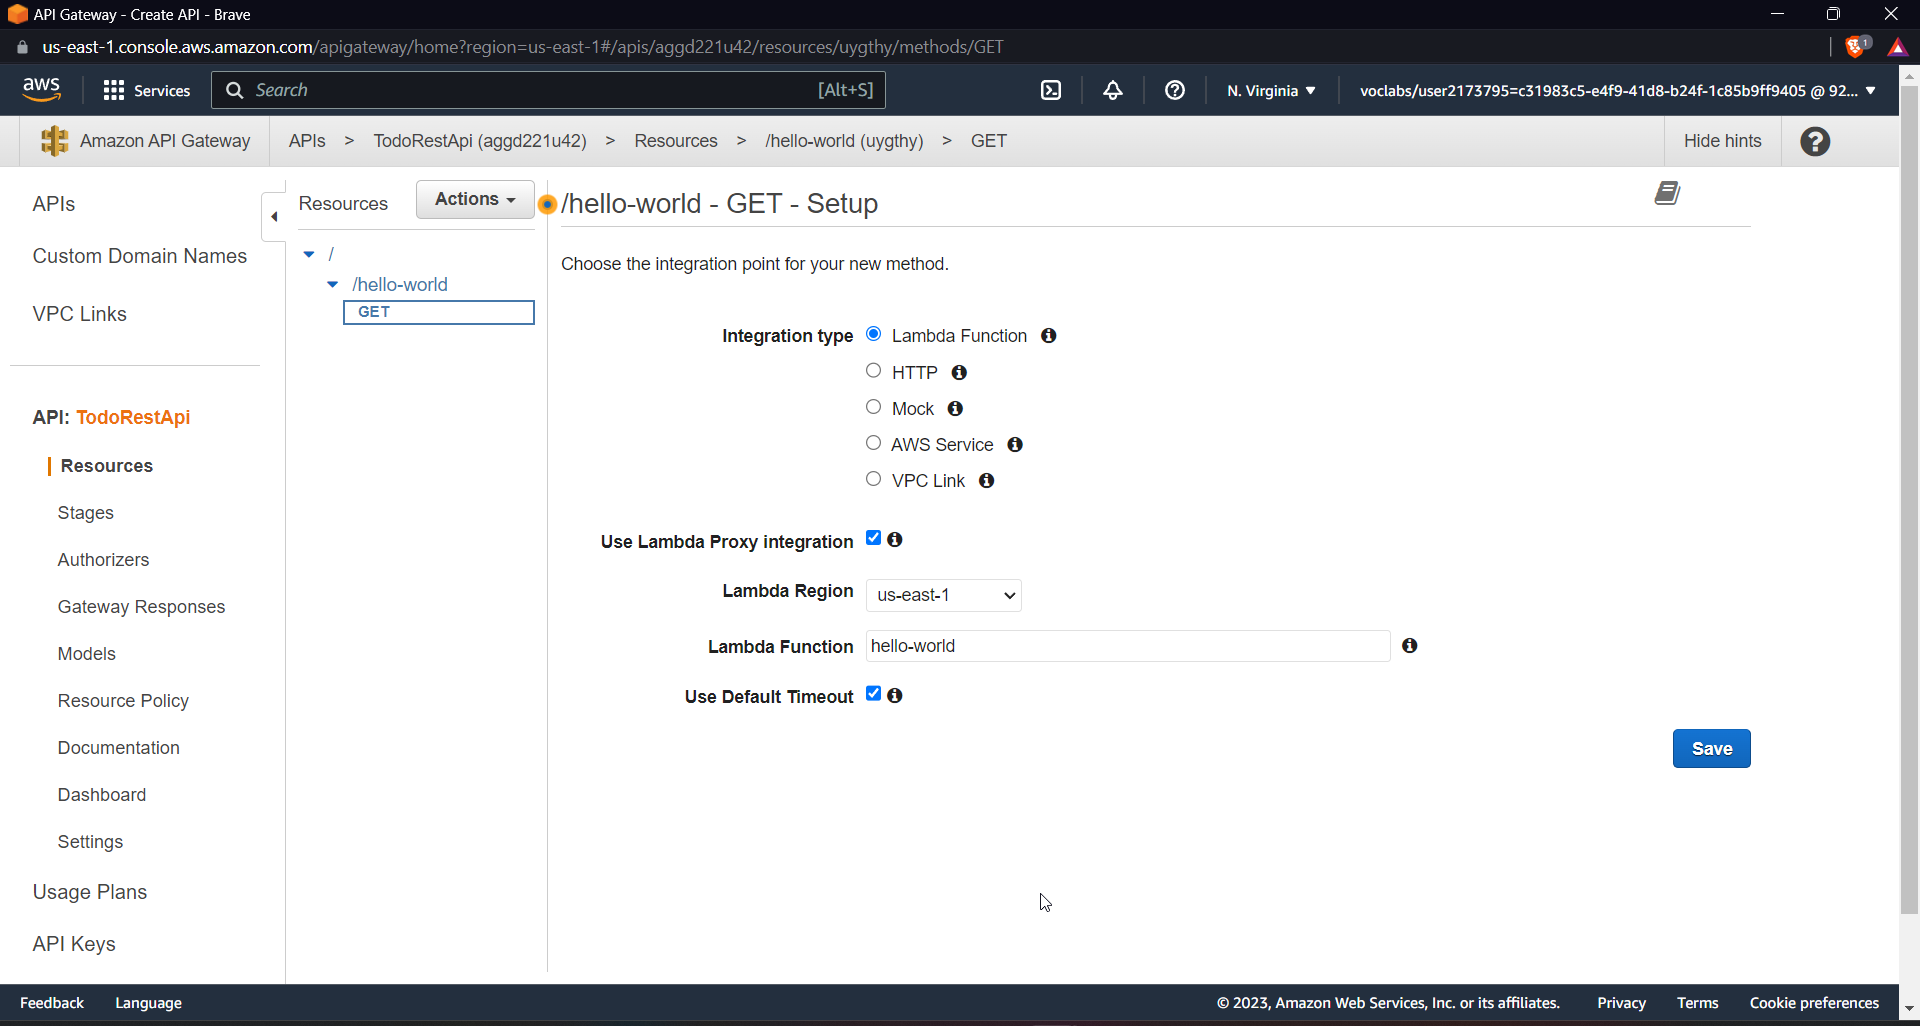
Permit API Gateway to invoke the lambda function by clicking OK.
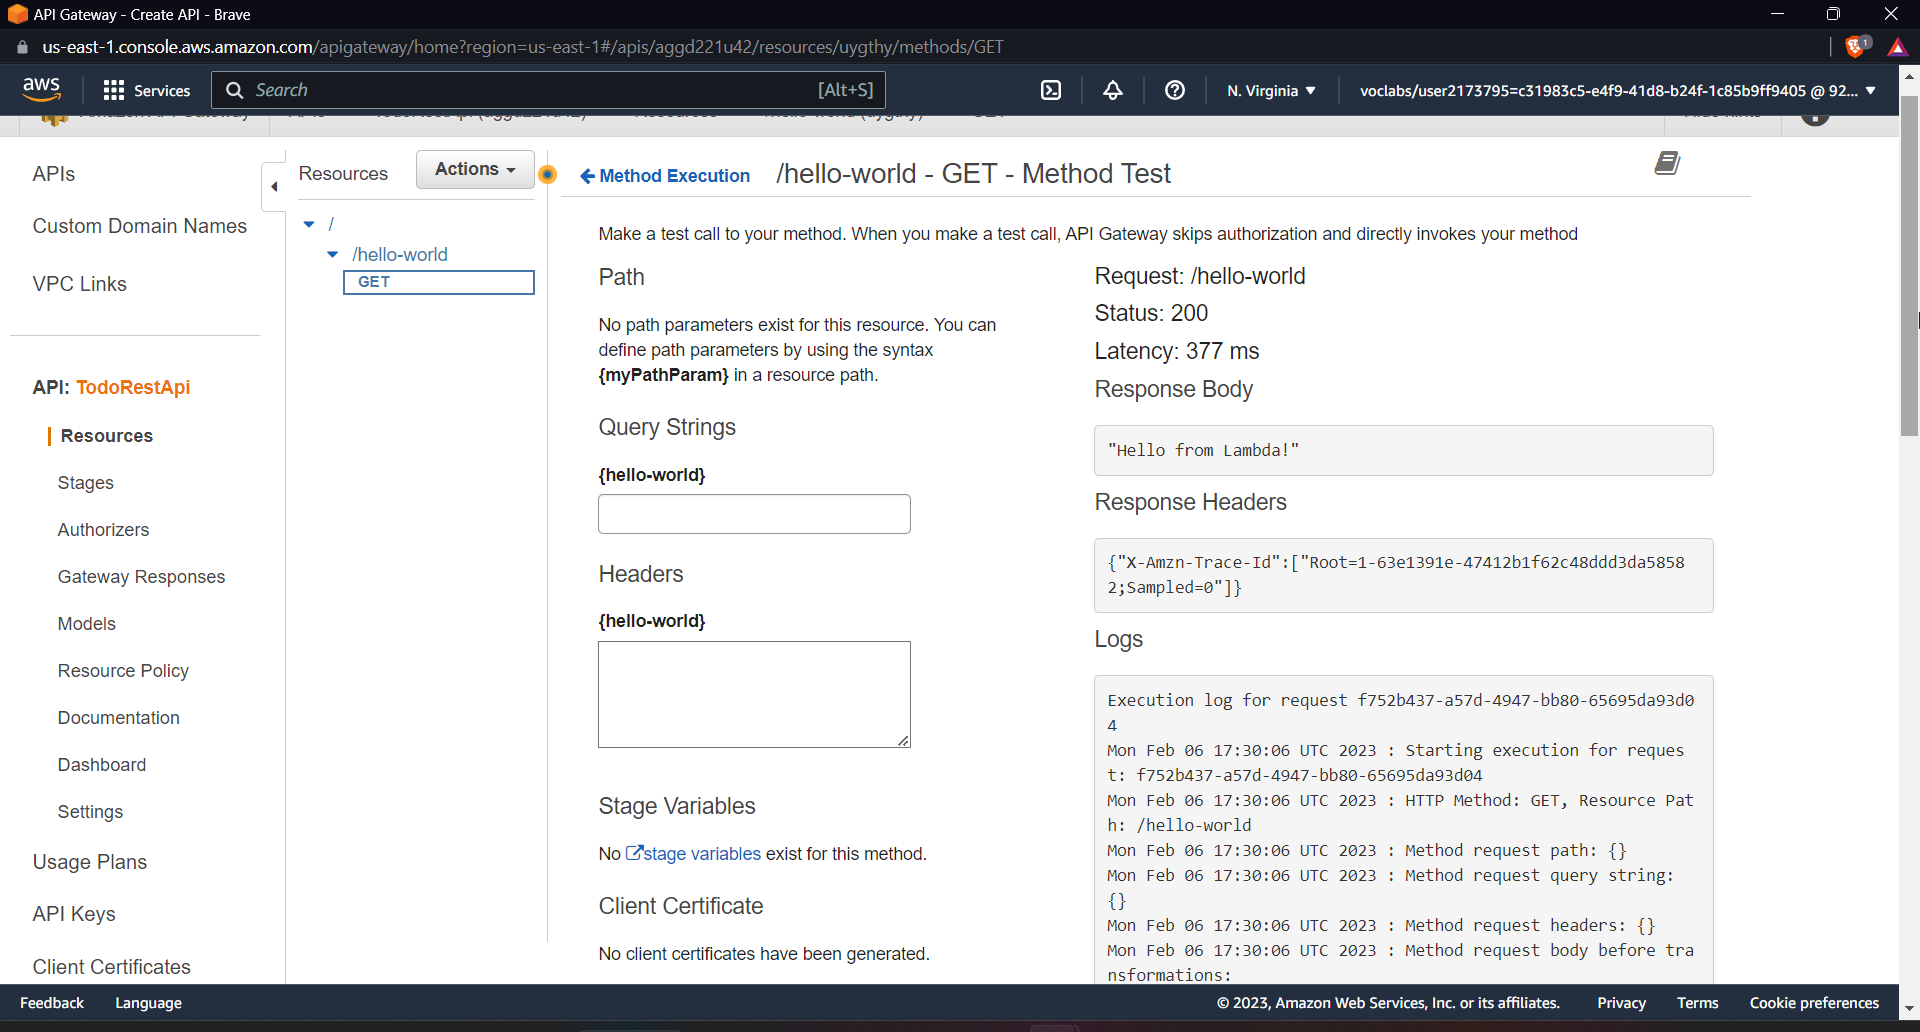
Time to test our integration, click on test
Don't add any parameters or query strings and move on with the test; you'll get a 200 OK response and the message "Hello from lambda."
Create a DynamoDB Table
Now let us create a table in DynamoDB that will have an ID and a description of our to-do list.
In the AWS console, look for DynamoDb, then create a table, name it, and create a partition key.

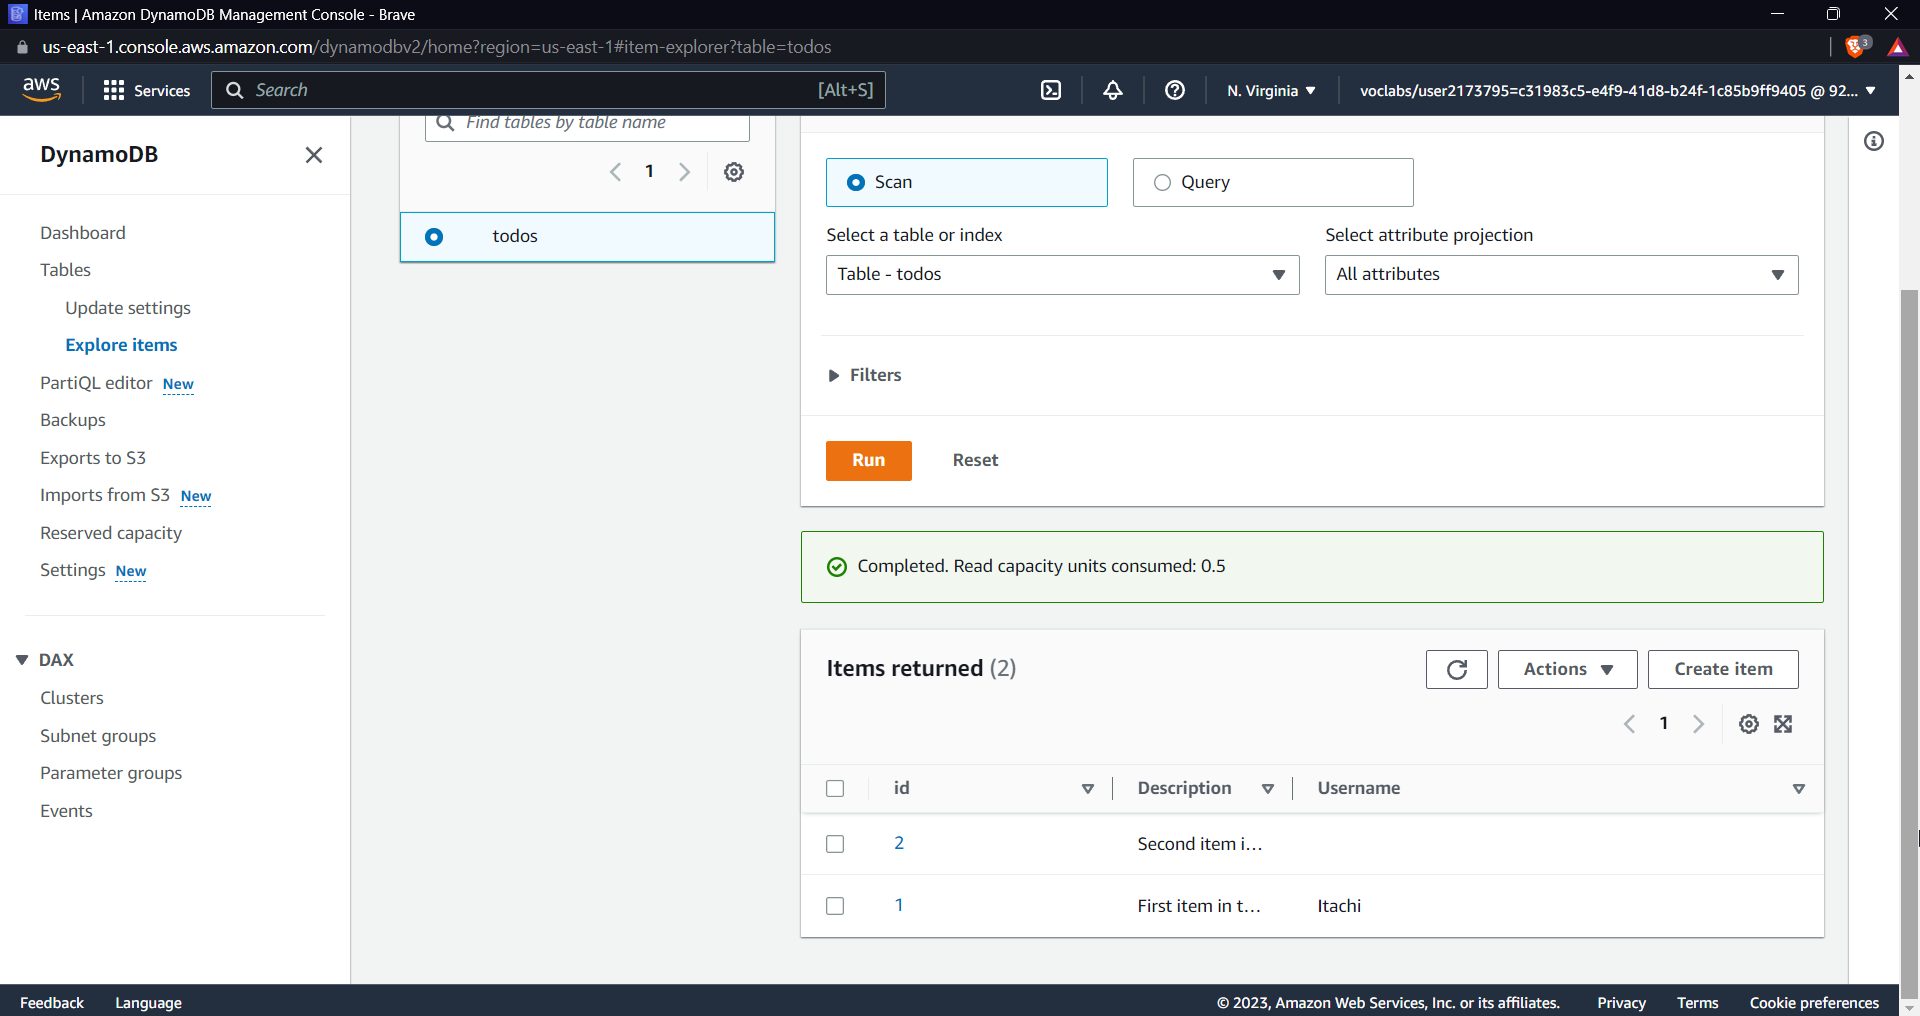
Click on "create table." After the table is created, let's add two IDs, that is, items, to the table to test out different things later.
Click on "table create," then "explore items," and "create item," as shown below, to add new attributes.
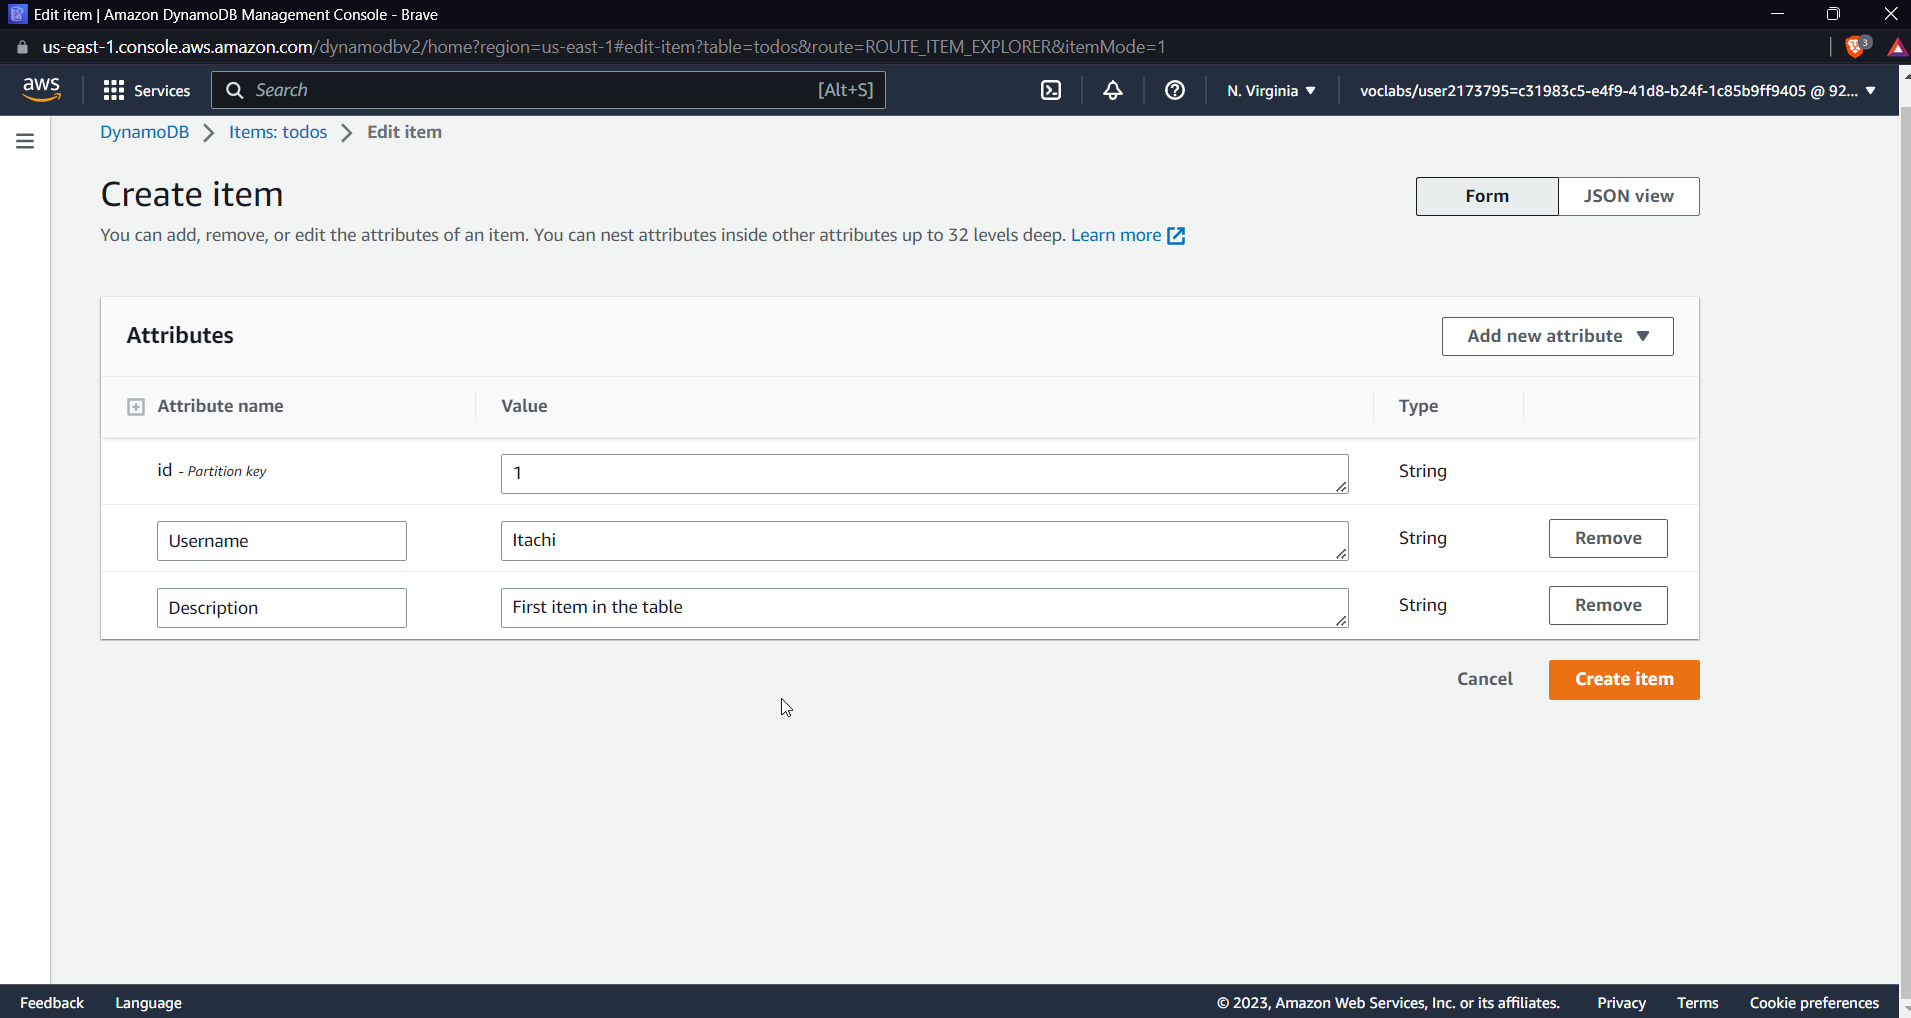
Now click on "create item," similarly create a second id, and later you'll be able to see both in the items of the table.
Create an IAM Role for the lambda function
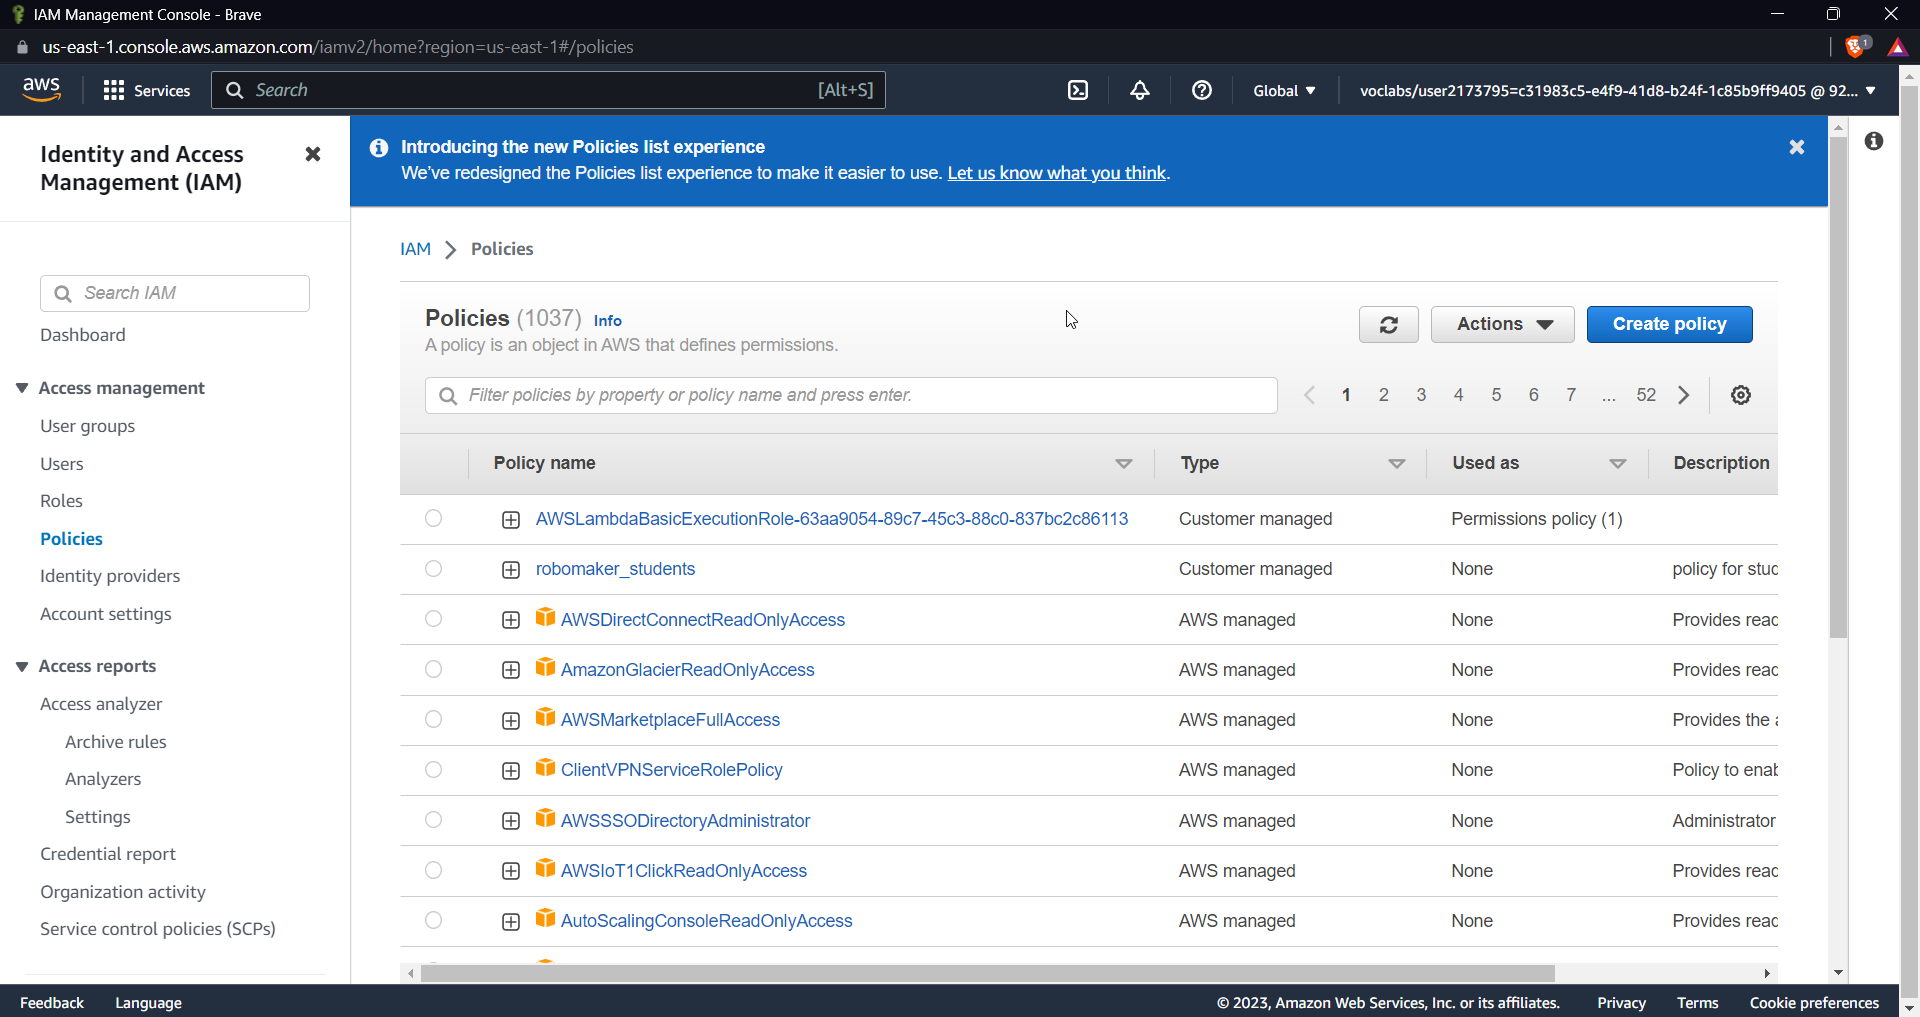
Go to IAM and click on create policy
The goal for creating a role would be for a lambda function to assume a role and execute operations on DynamoDB.
Select service as DynamoDB
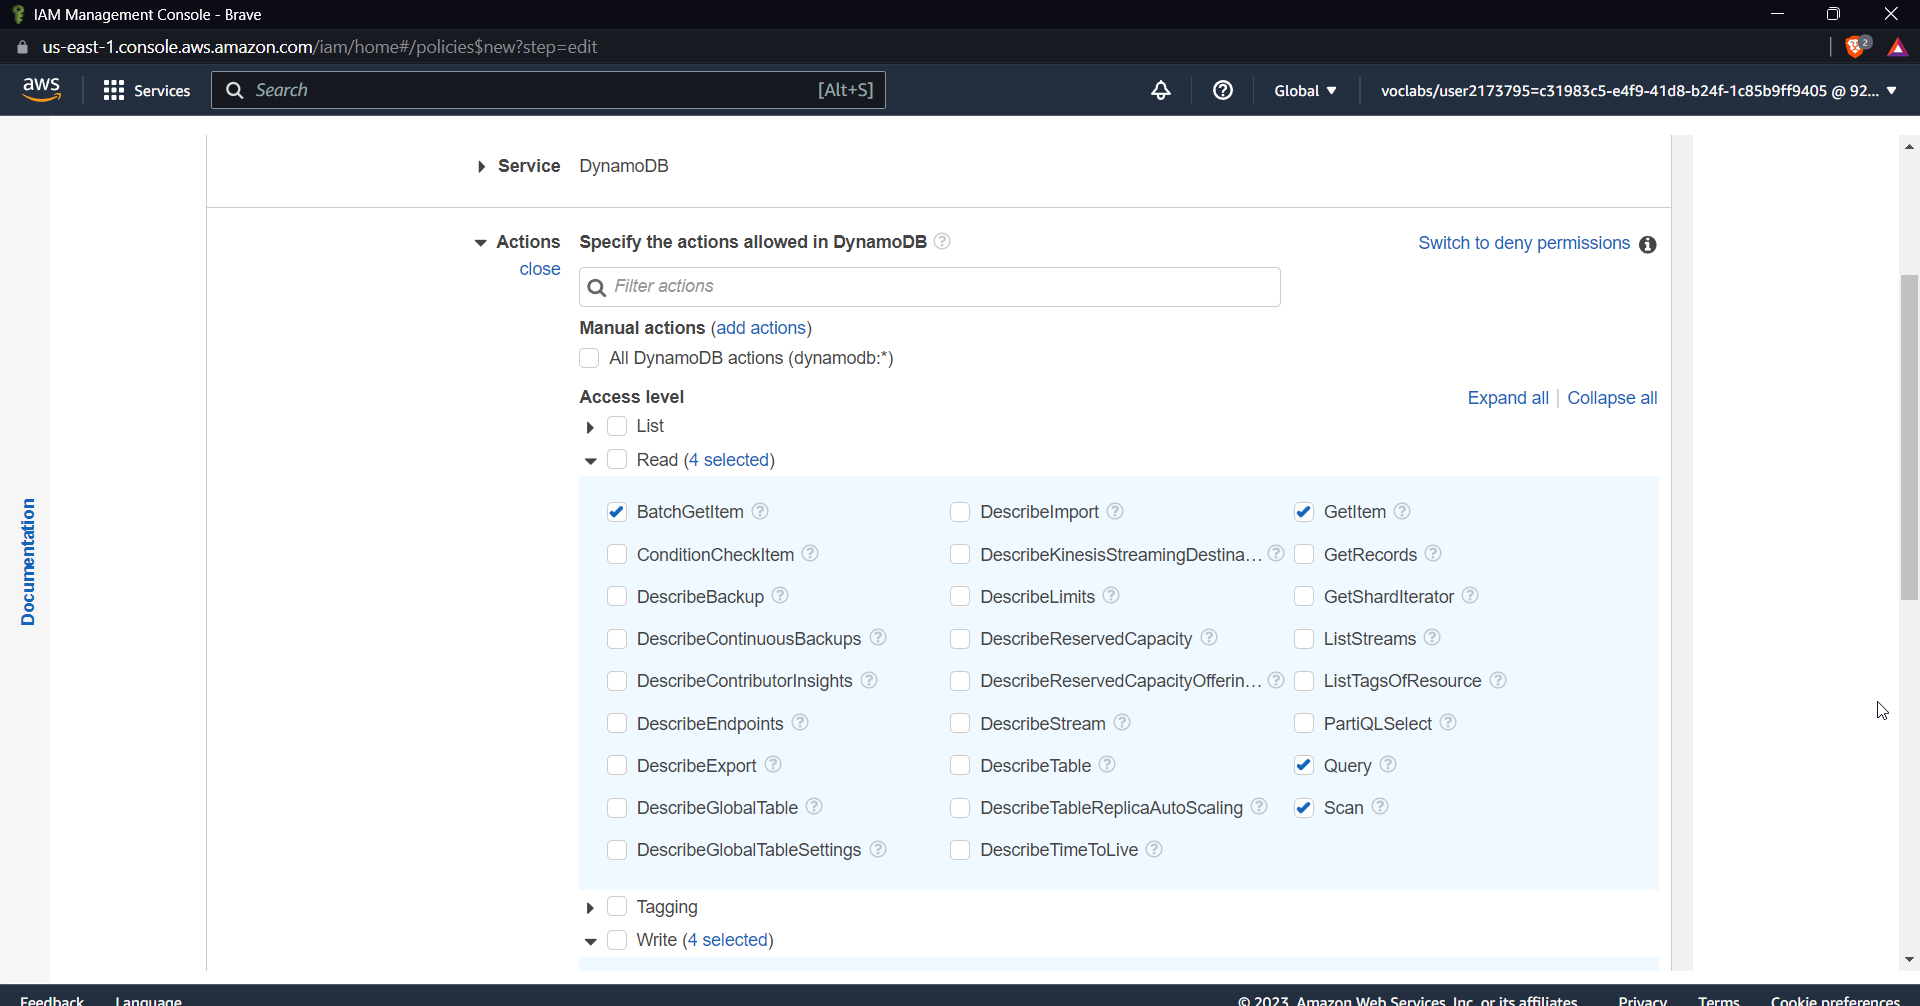
Add the following items to the read-and-write list
for read select the following permissions:
BatchGetItem
GetItem
Query
Scan
for write select the following permissions:
BatchWriteItem
UpdateItem
PutItem
DeleteItem
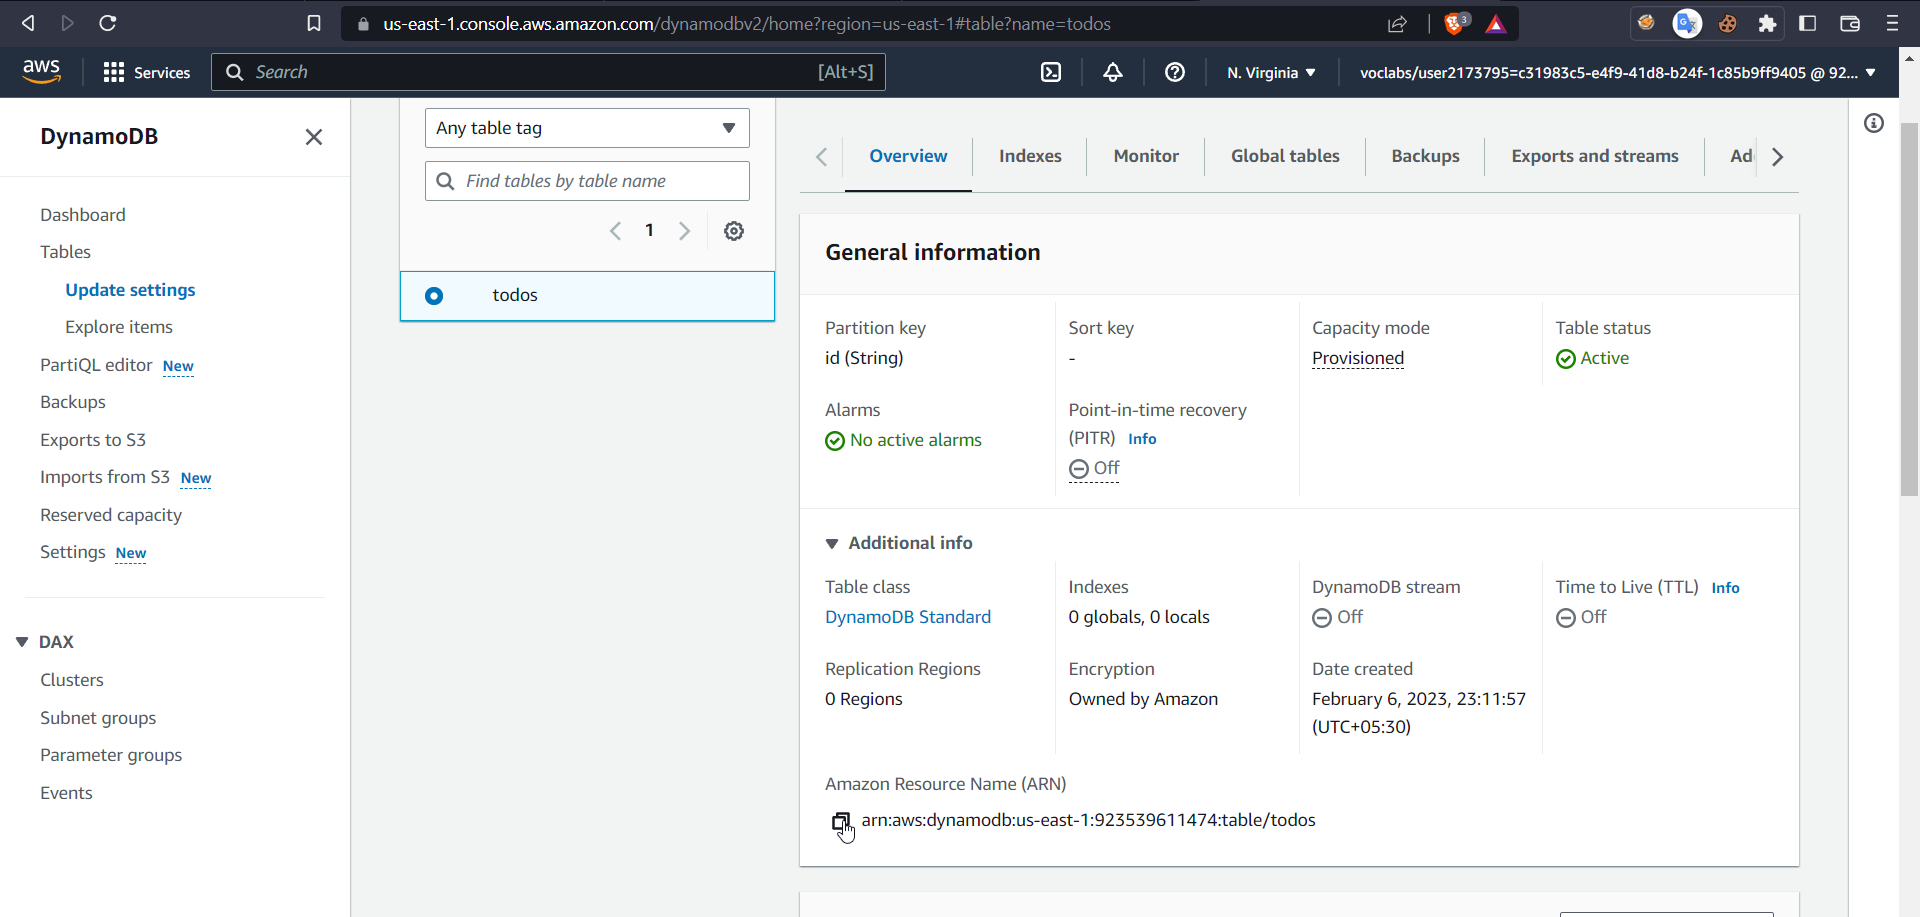
Now get the ARN of the table created
After adding table ARN, next click on tags, next review, and then give a policy name and click on create policy. Now it's time to create a role for our lambda function.
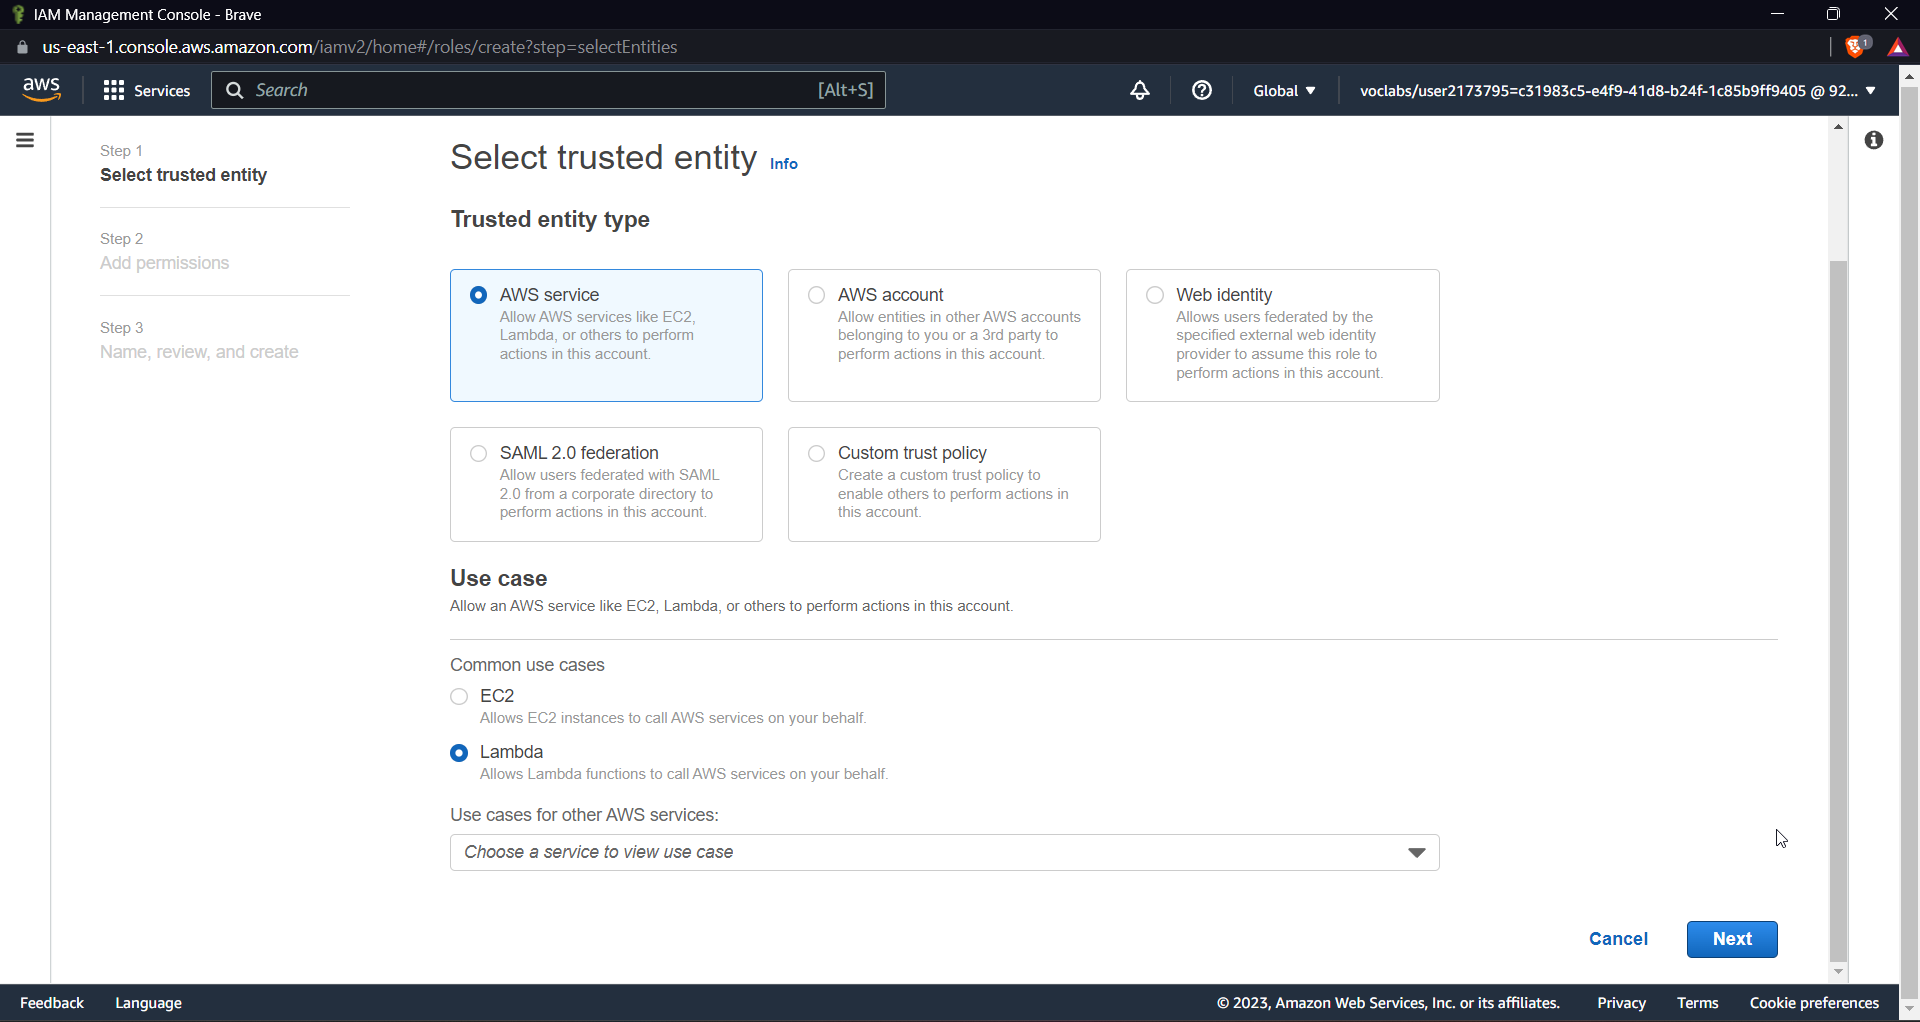
Click on roles and then create a role; keep everything as default; select lambda; and click next.
Select the policy created before and basiclambda execution policy

Click Next, Give a name to the role and click finally create a role.
Now create all the methods required according to the requirements.
Remember, as we did in our hello-world lambda, similarly for each method we will create a lambda function and add a resource or method to the API Gateway.
GET method for all todo items.
This method will be used to get all the items of the table. I will be taking the help of chatgpt and let us try to understand the code later too.
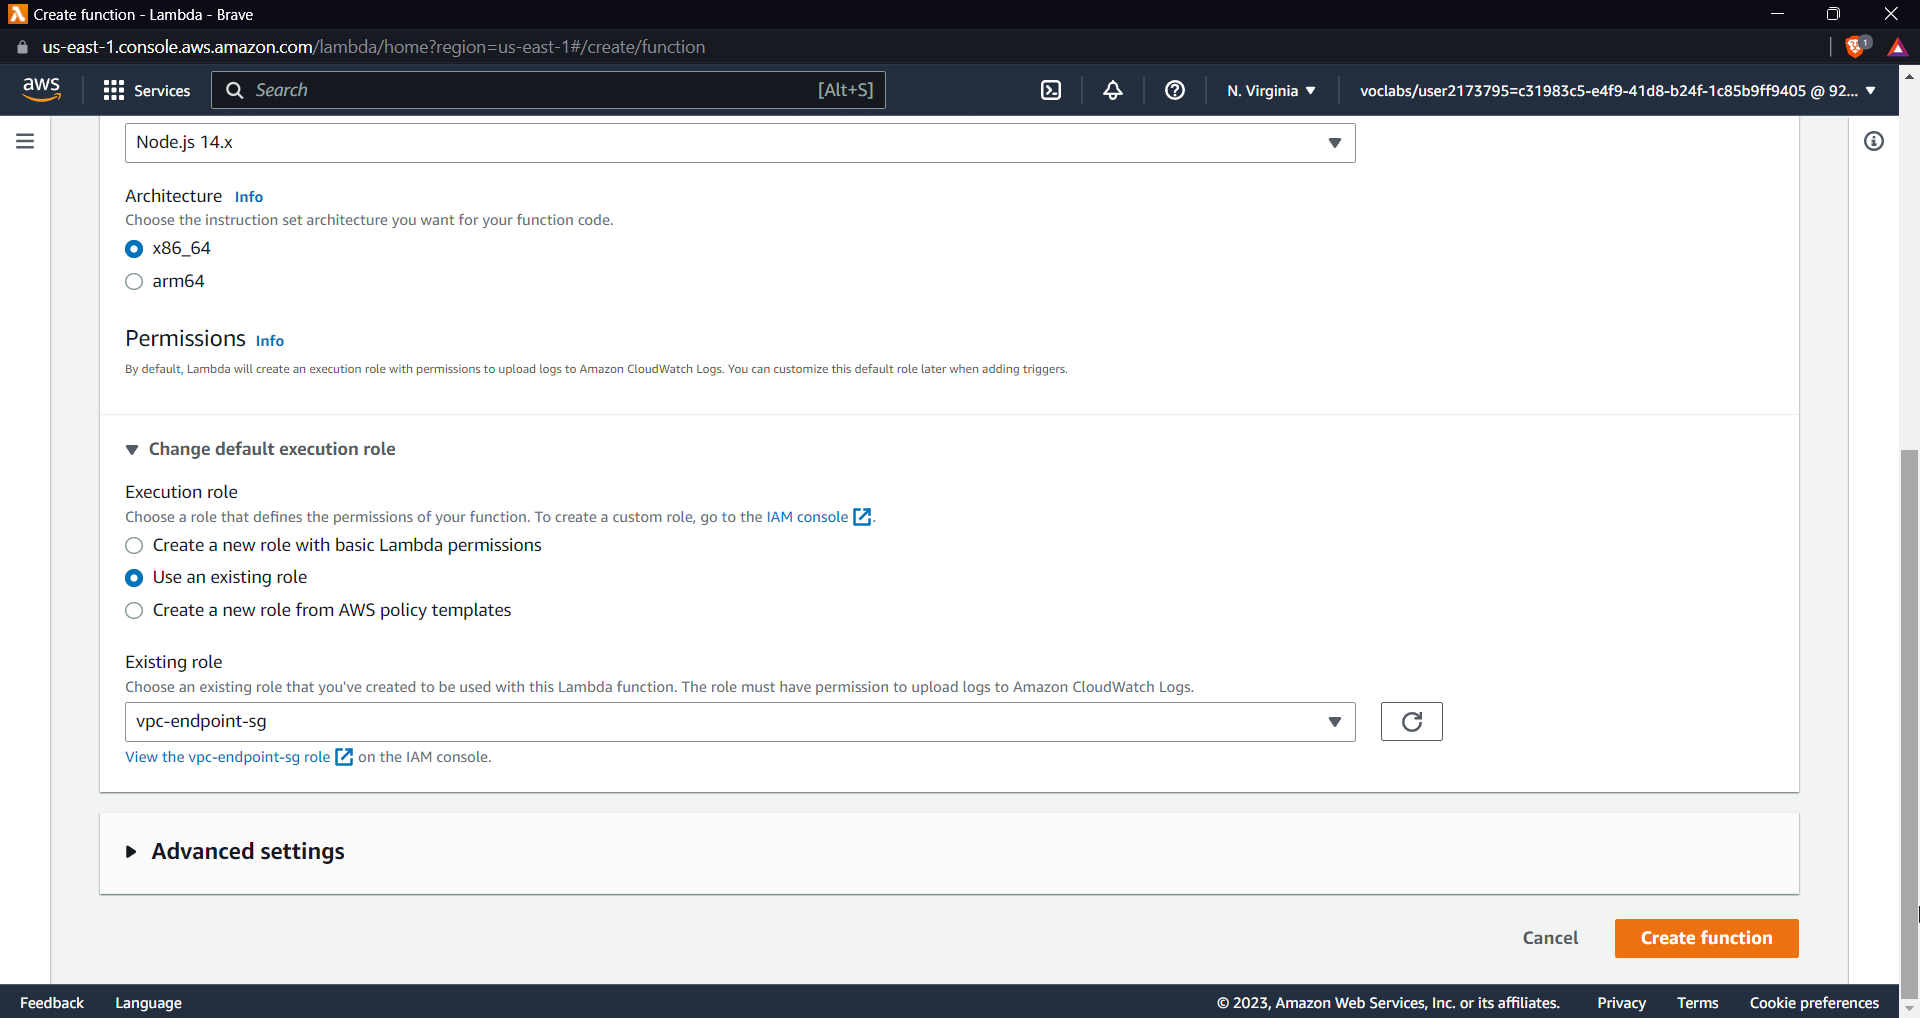
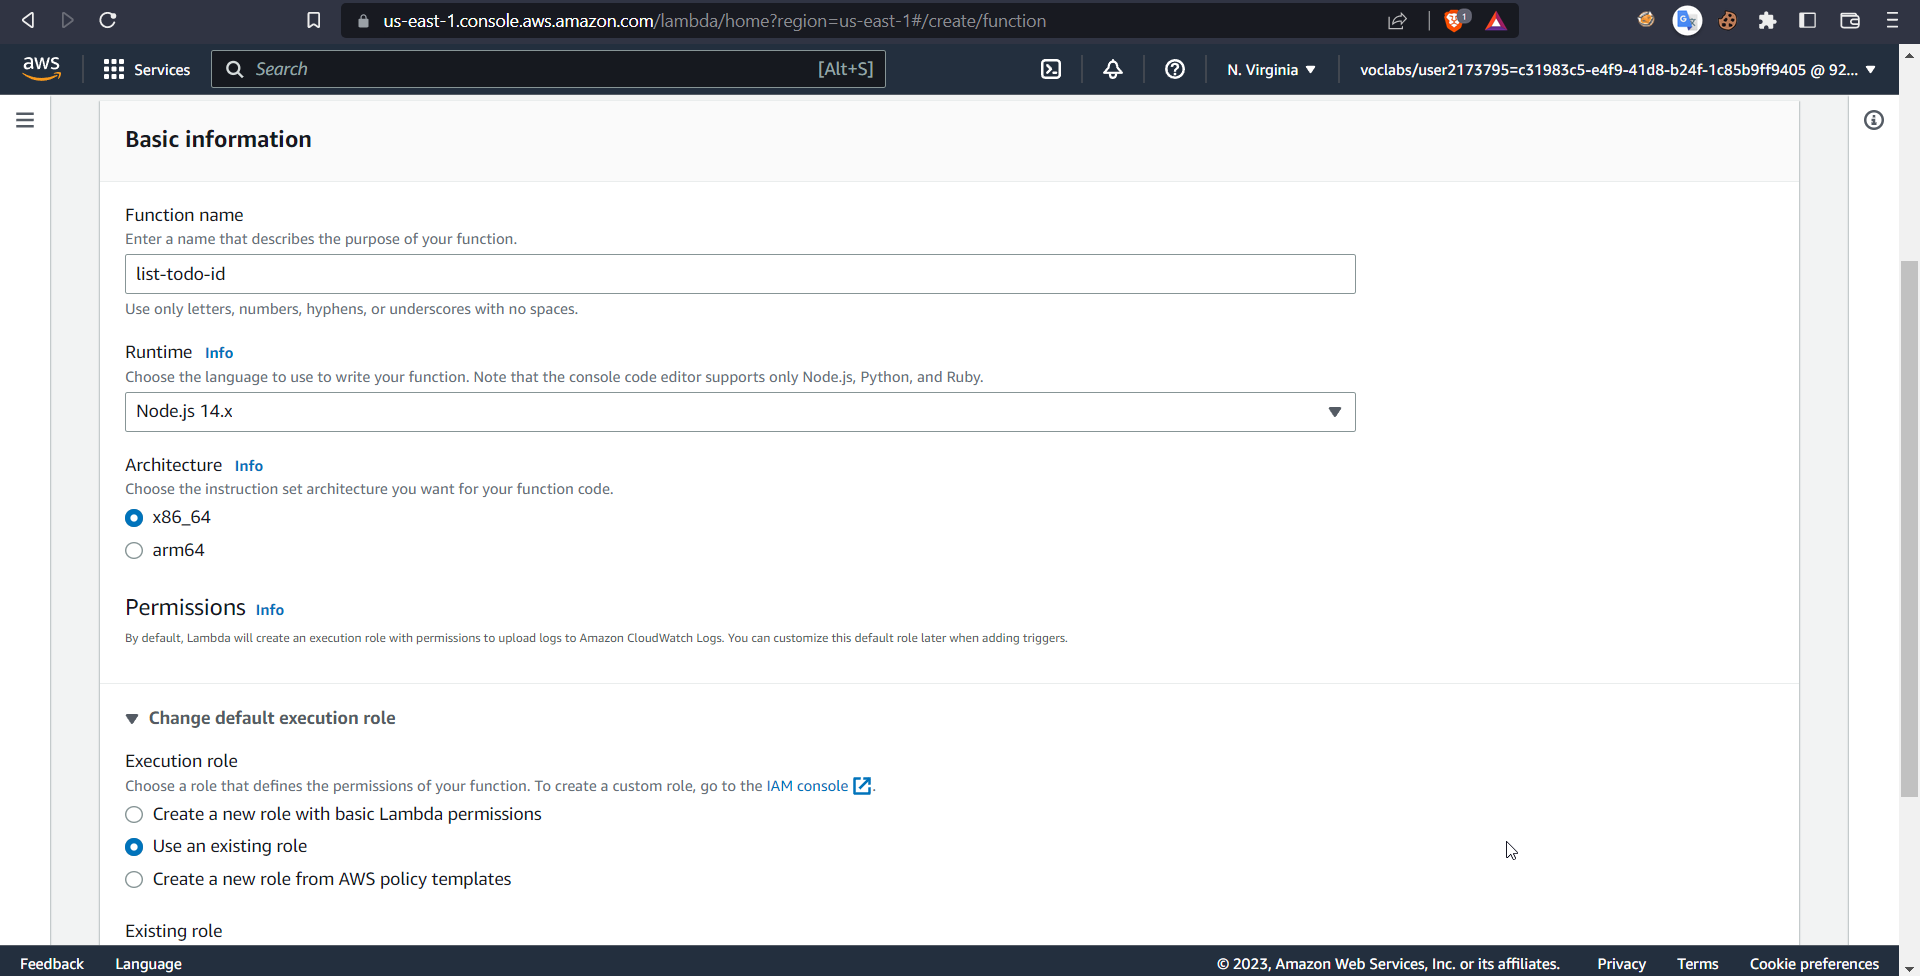
Go to lambda and create a new function, do everything the same way we did for hello-world lambda function, just remember to select Node.js 14.x version here
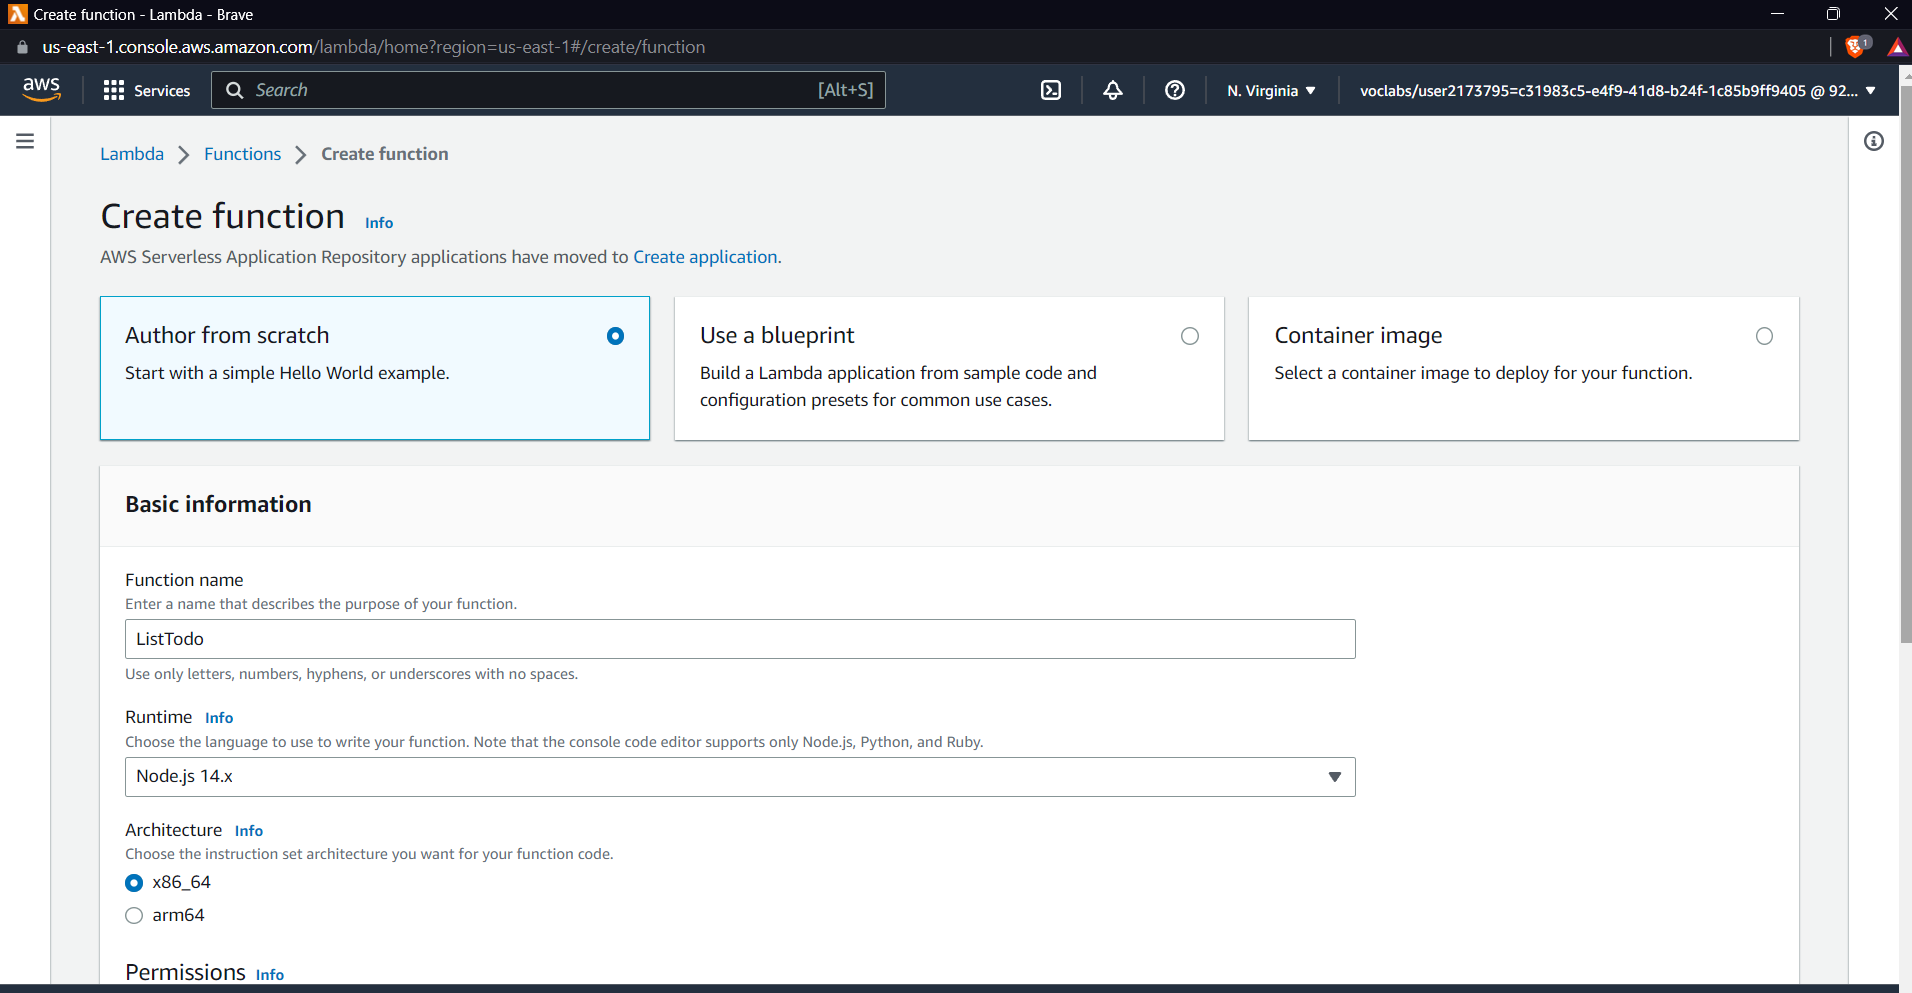
Also do remember to select an existing role and select this to the role that we created for our lambda function
We want to write a js file that will get all items from our table that we previously created and show a 200 Ok response.
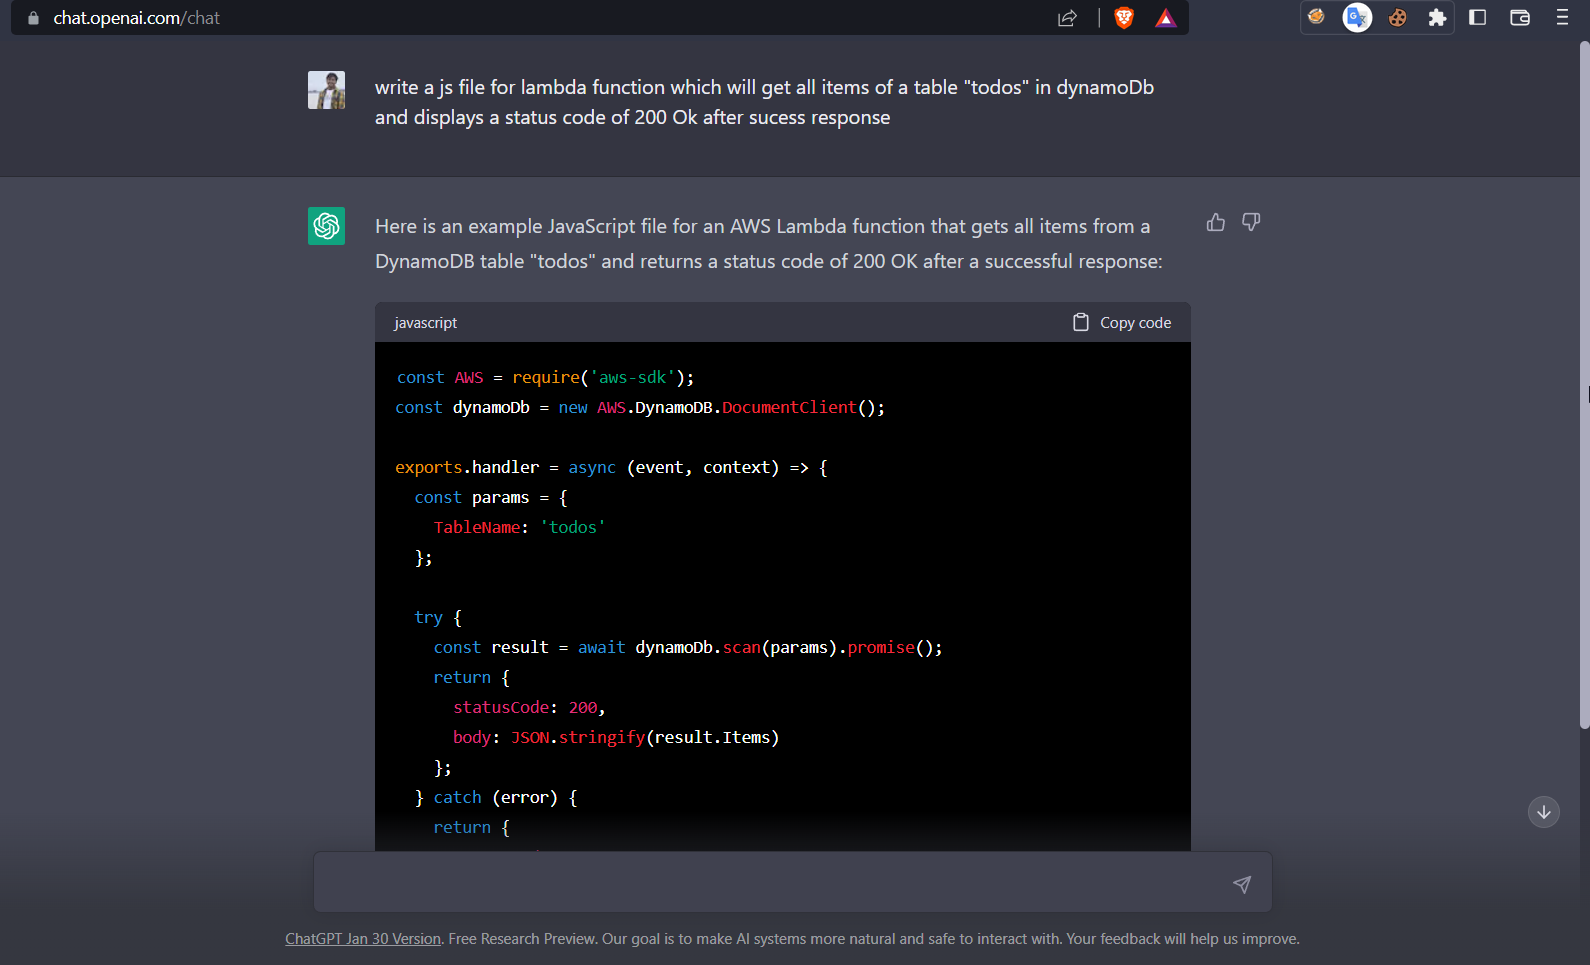
 const AWS = require('aws-sdk');
 const dynamoDb = new AWS.DynamoDB.DocumentClient();

 exports.handler = async (event, context) => {
   const params = {
     TableName: 'todos'
   };

   try {
     const result = await dynamoDb.scan(params).promise();
     return {
       statusCode: 200,
       body: JSON.stringify(result.Items)
     };
   } catch (error) {
     return {
       statusCode: 500,
       body: JSON.stringify(error)
     };
   }
 };
After looking at the code it is easier to understand this, the code imports the AWS SDK for JavaScript and uses it to create an instance of the Amazon DynamoDB Document Client, which is used to interact with the DynamoDB service.
The handler function performs a scan operation on the 'todos' table in DynamoDB and returns the result as a JSON string in the response body of an HTTP response.
If the scan operation is successful, the function returns an HTTP response with status code 200 and the result of the scan operation in the body.
If an error occurs during the scan operation, the function returns an HTTP response with status code 500 and the error message in the body.
Now go to API Gateway and select our previously created API Gateway i.e. TodoRestApi. Use Actions, select create the resource and give it a name todos. Now select todos and click on create method GET click on tick now it will show you the following prompt.
check for use lambda proxy integration and use the lambda function that we just created for the GET method. Click on Save
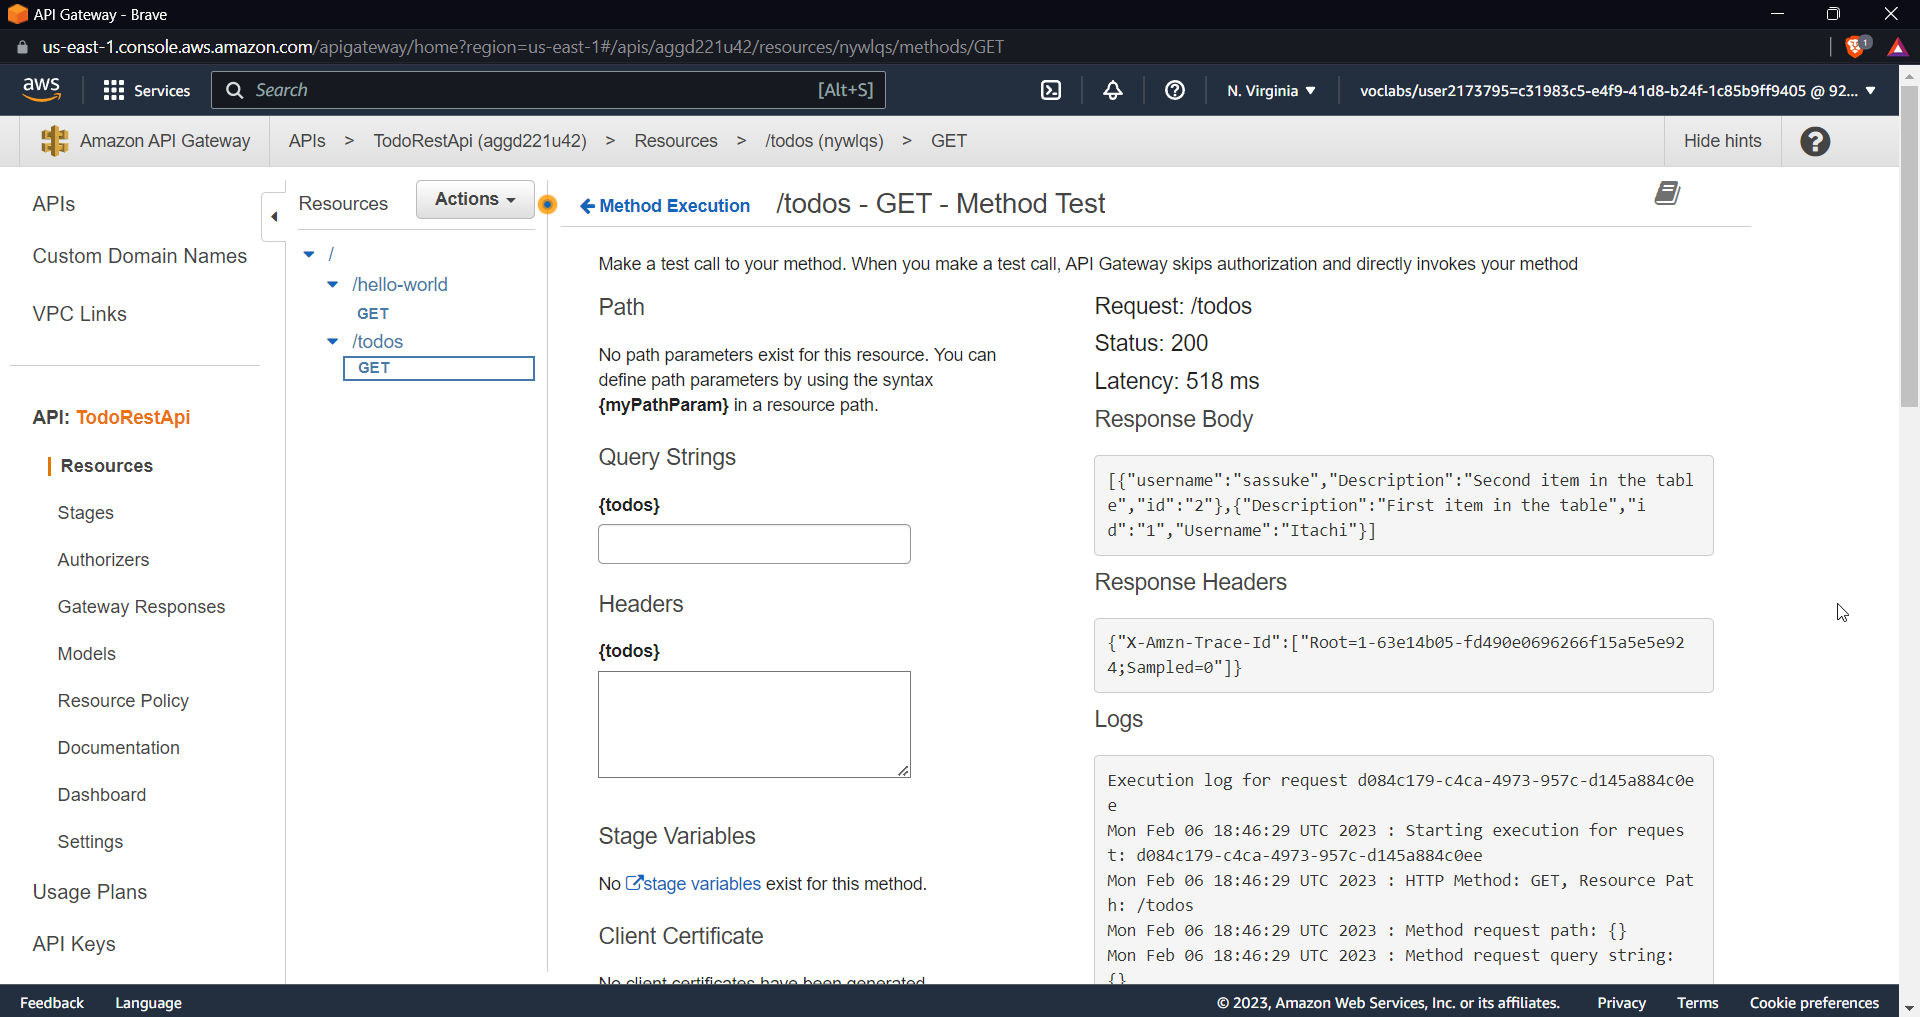
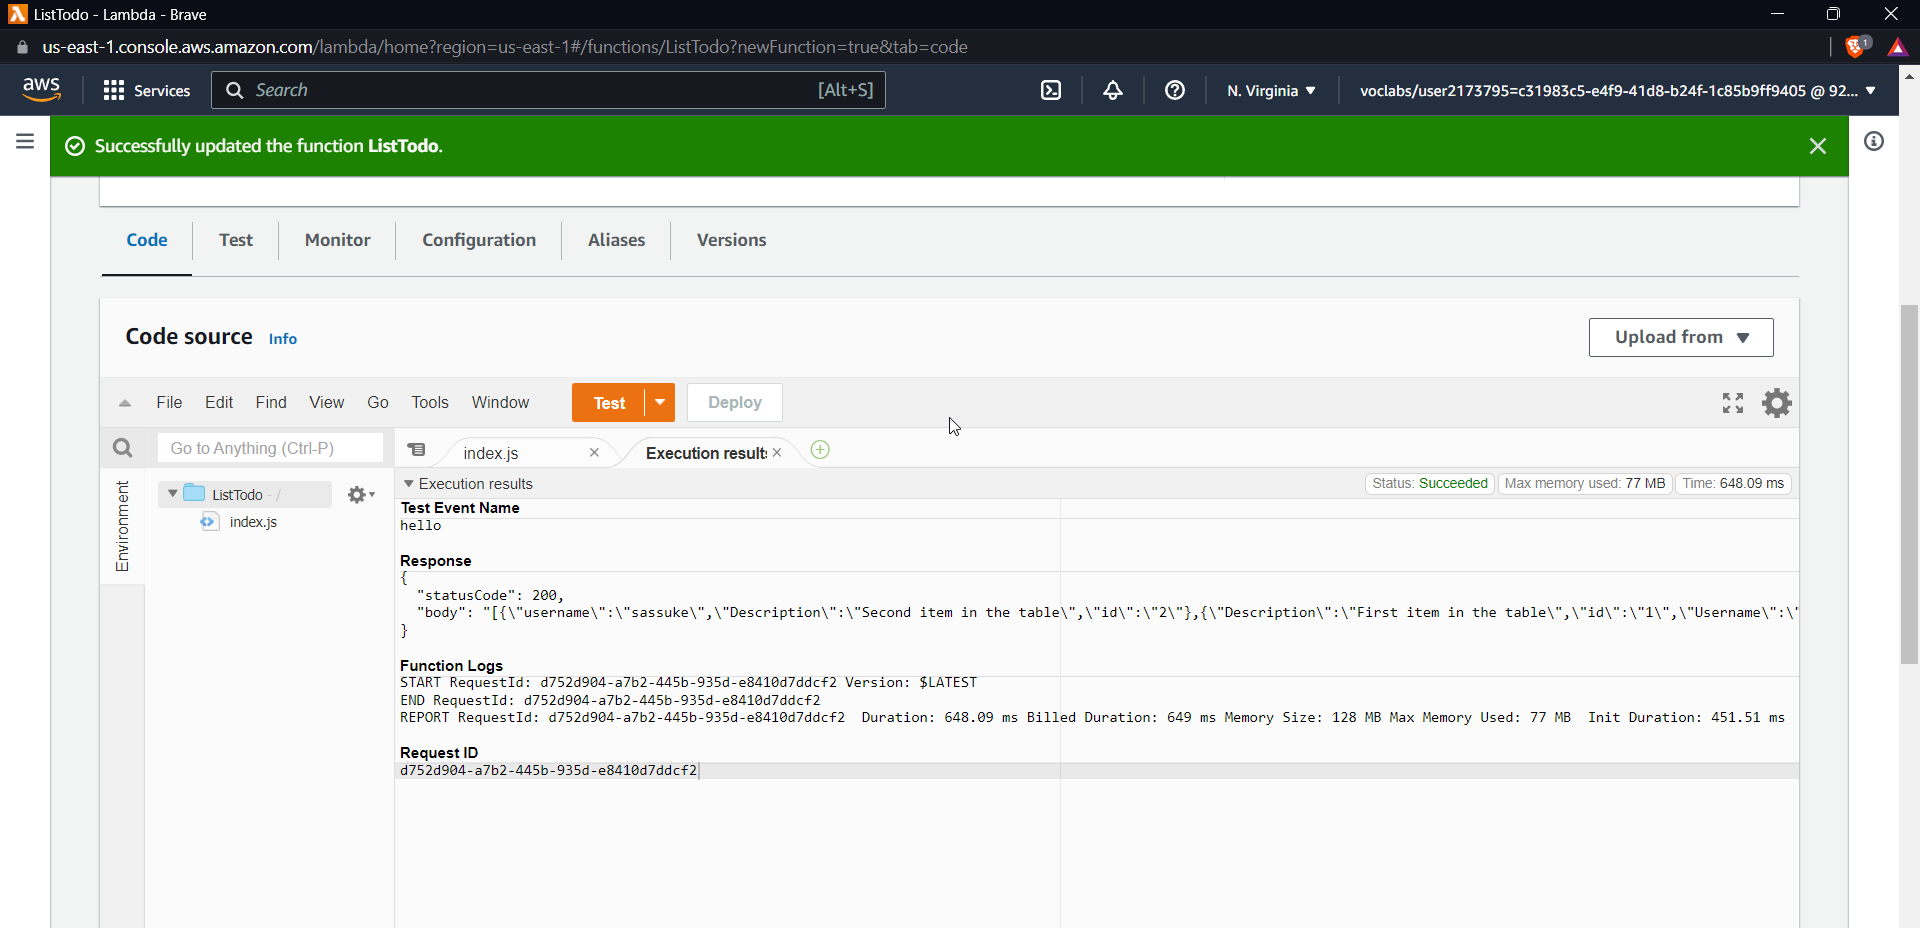
Now it's time to test our integration, click on test and don't add any query strings or requests, you should get the above response, it gives all data of our table in the response.
GET method for a single id
Now let us try to make a API that will get the data using a specific id
 const AWS = require('aws-sdk');
 const dynamoDb = new AWS.DynamoDB.DocumentClient();

 exports.handler = async (event, context) => {
   const params = {
     TableName: 'todos',
     Key: {
       id: event.pathParameters.id
     }
   };

   try {
     const result = await dynamoDb.get(params).promise();
     if (!result.Item) {
       return {
         statusCode: 404,
         body: JSON.stringify({ error: 'Item not found' })
       };
     }
     return {
       statusCode: 200,
       body: JSON.stringify(result.Item)
     };
   } catch (error) {
     return {
       statusCode: 500,
       body: JSON.stringify(error)
     };
   }
 };
Using this code will help you to query the details of the item using a specific id given and will return details along with 200 Ok response but if the id is not found in the table it will return a 404 OK with message-id not found
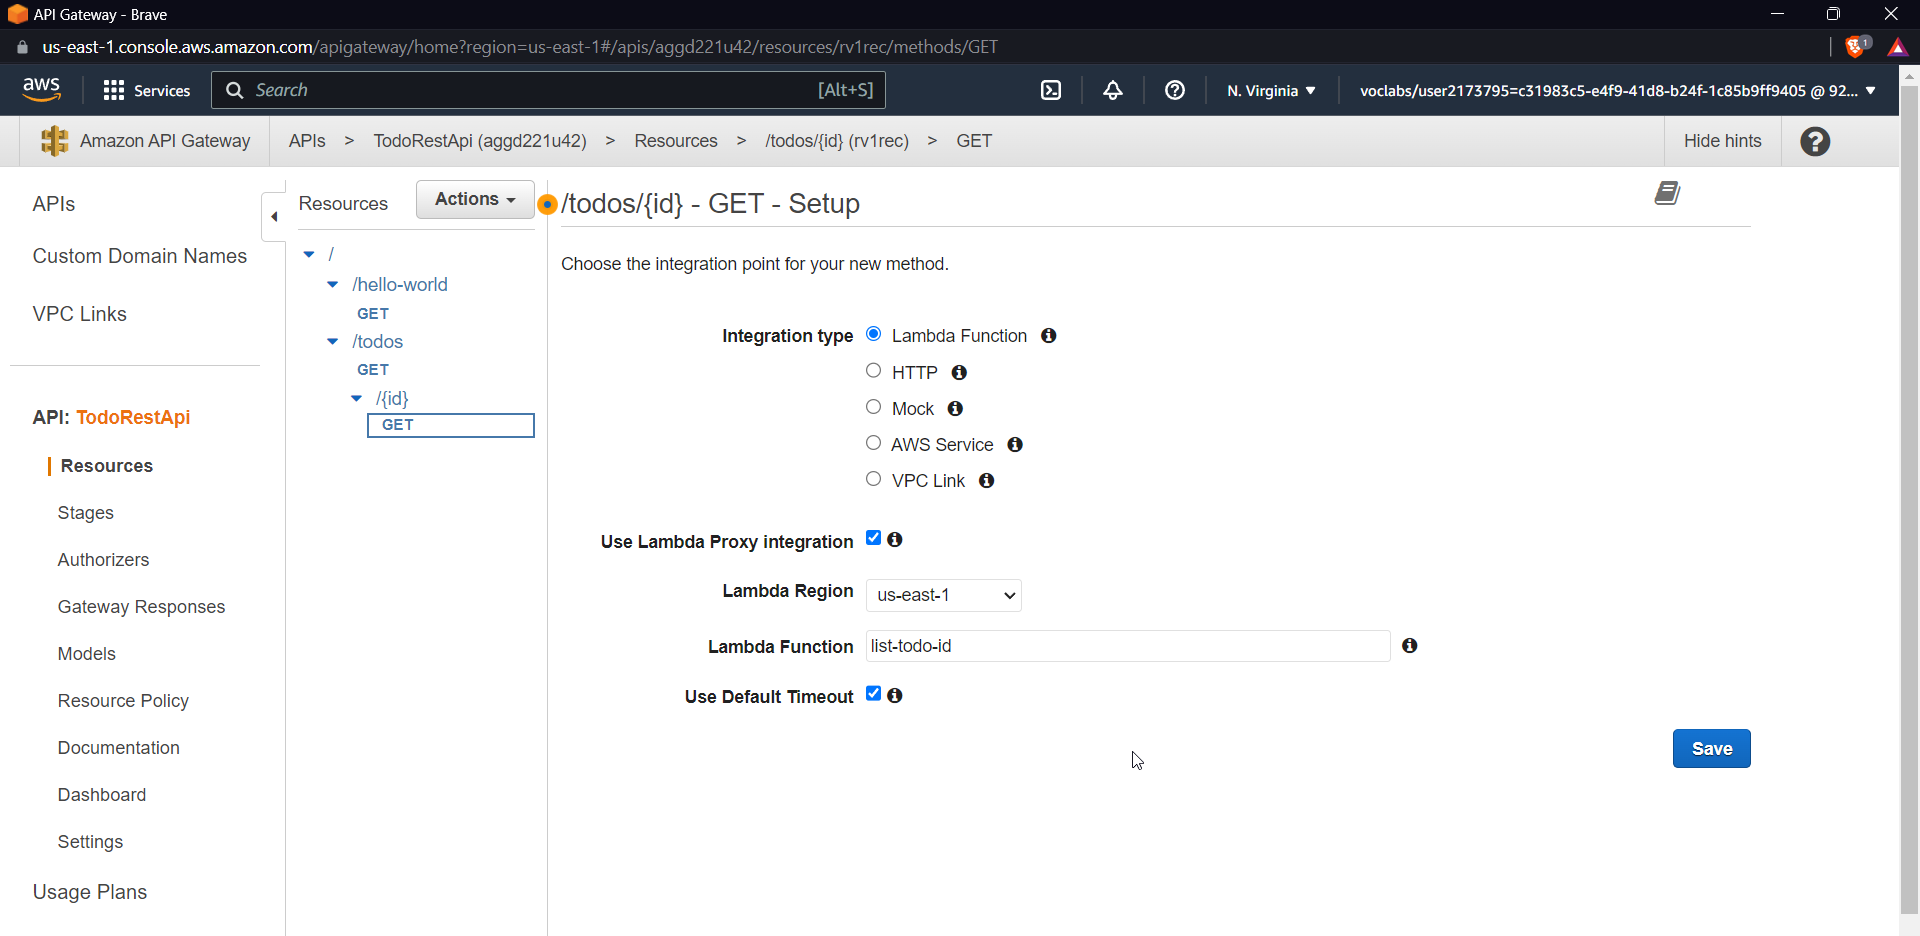
Now create a lambda function similar to previously created function and add the above code .
Click on /todos and using actions click on create a method give a resource name and for resource, path keep this as {id}
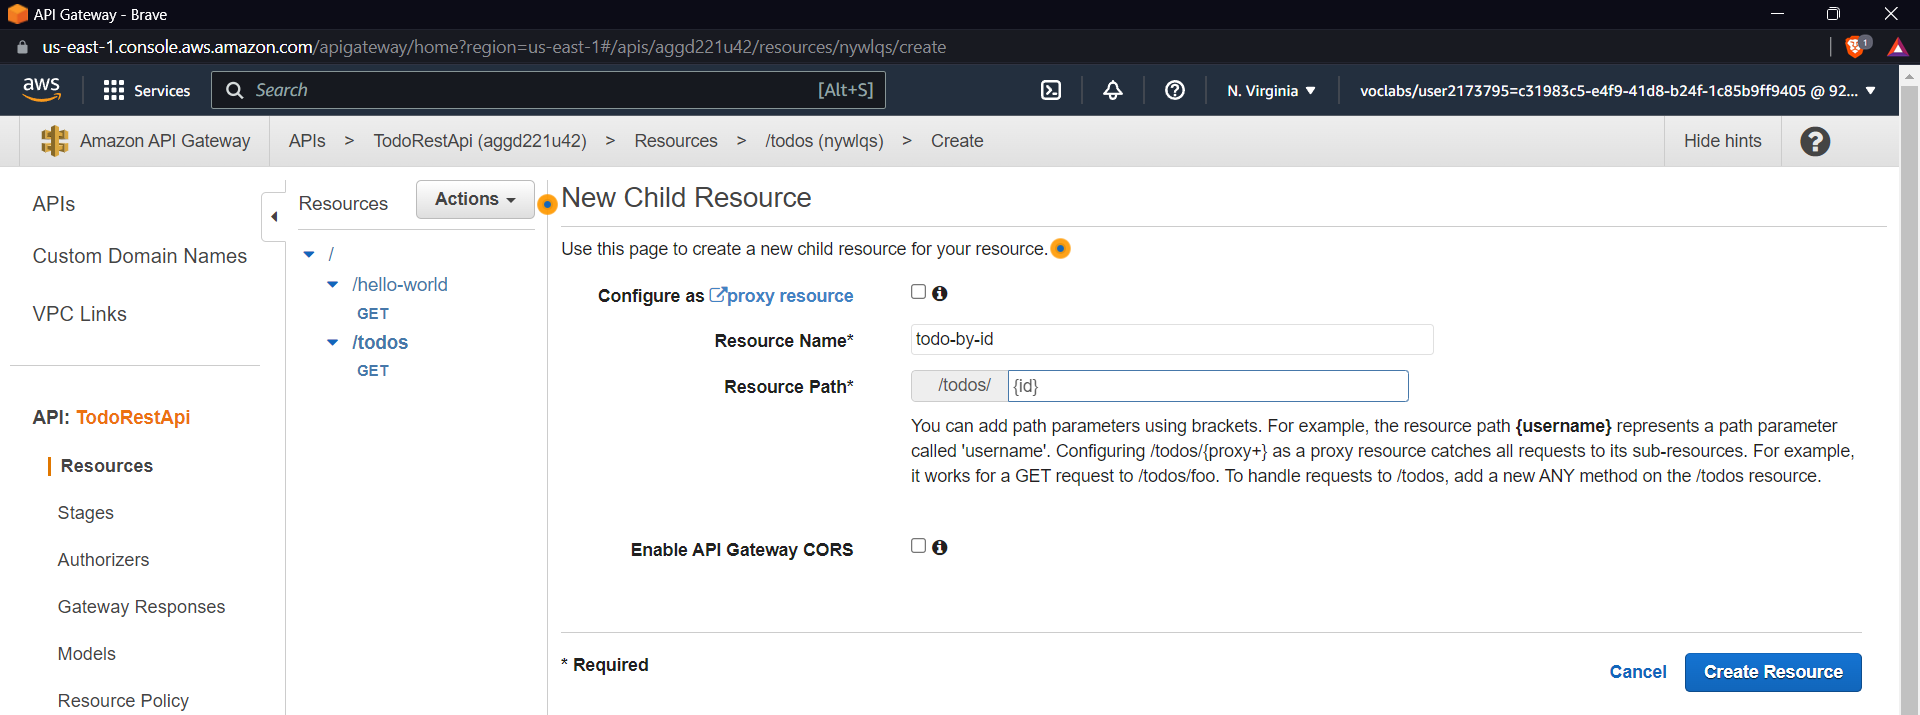
Check the checkbox for lambda proxy integration
Using lambda proxy integration helps us in a way that the API Gateway will treat the Lambda function as a reverse proxy, forwarding the client's request to the function, and then returning the response from the function to the client. This integration model makes it easy to use Lambda functions as the backend for RESTful APIs, as it eliminates the need to write additional code to extract relevant data from the incoming request and format the response.
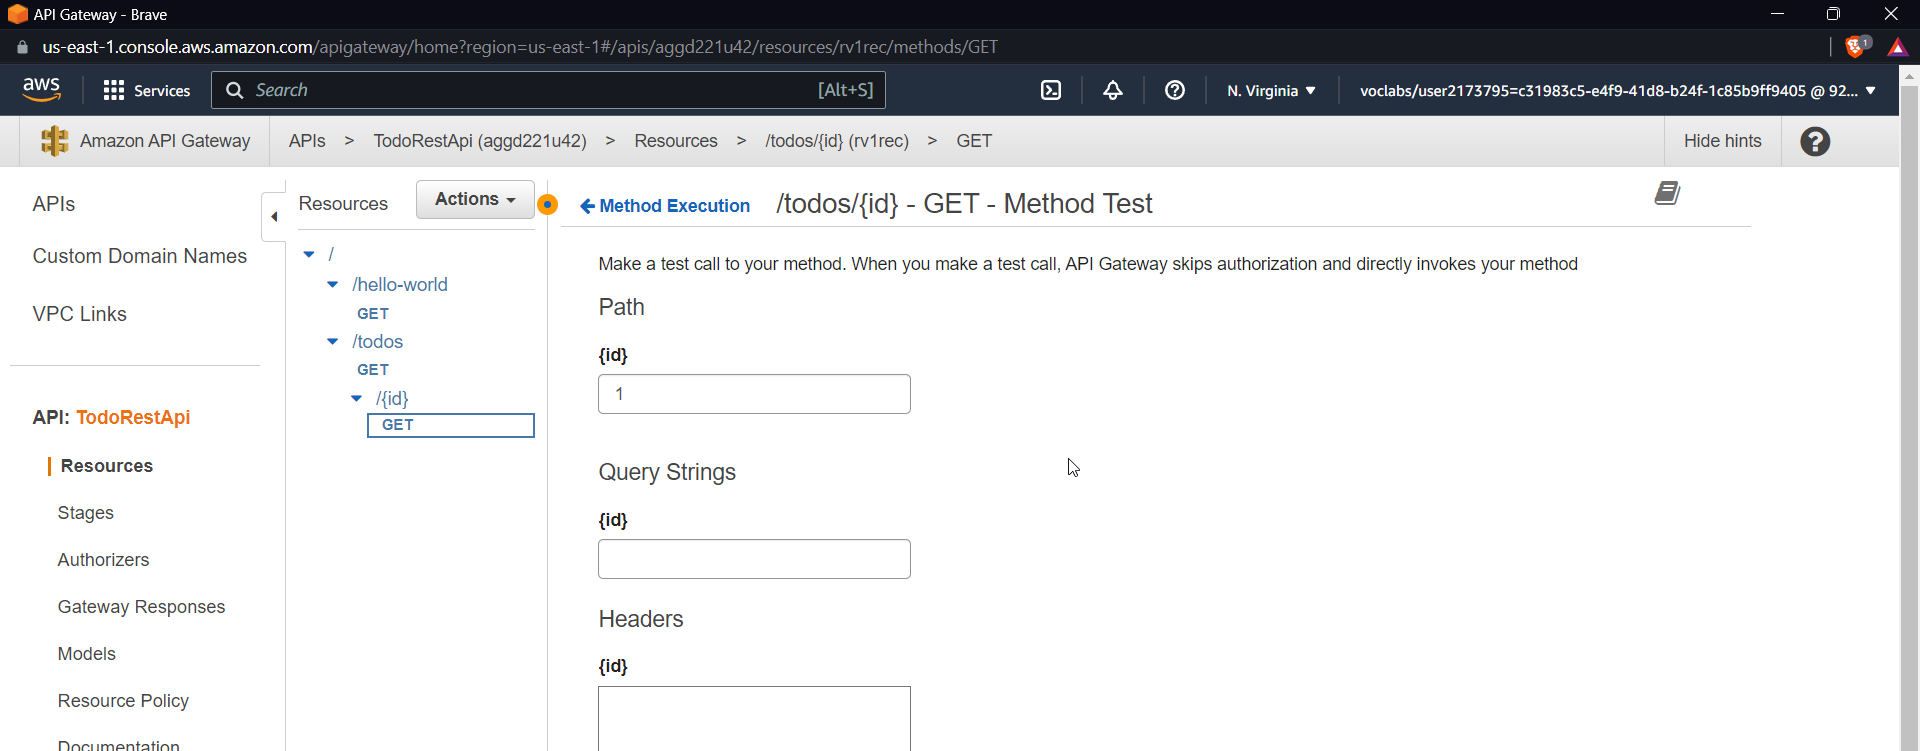
Now to test this use an id of the already created item
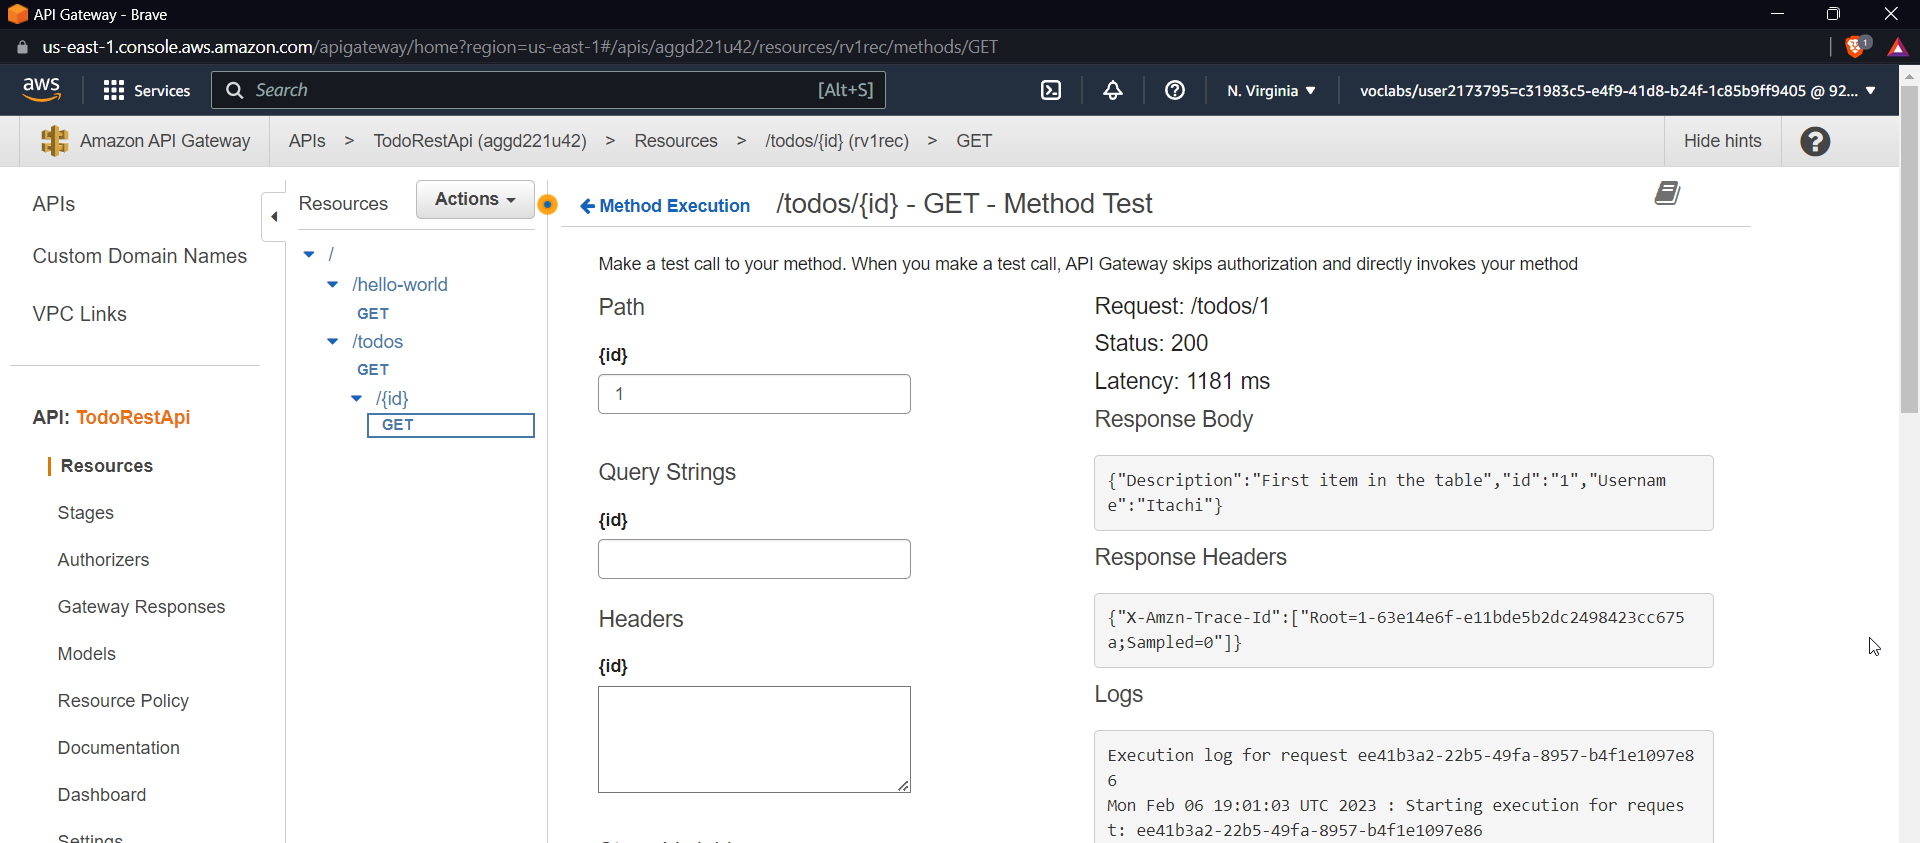
As you can see in the response we are able to see the description for id "1" in the response body.
 const AWS = require('aws-sdk');
 const dynamoDb = new AWS.DynamoDB.DocumentClient();

 exports.handler = async (event, context) => {
   const params = {
     TableName: 'todos',
     Key: {
       id: event.pathParameters.id
     }
   };

   try {
     await dynamoDb.delete(params).promise();
     return {
       statusCode: 200,
       body: JSON.stringify({ message: 'Item deleted successfully' })
     };
   } catch (error) {
     return {
       statusCode: 500,
       body: JSON.stringify(error)
     };
   }
 };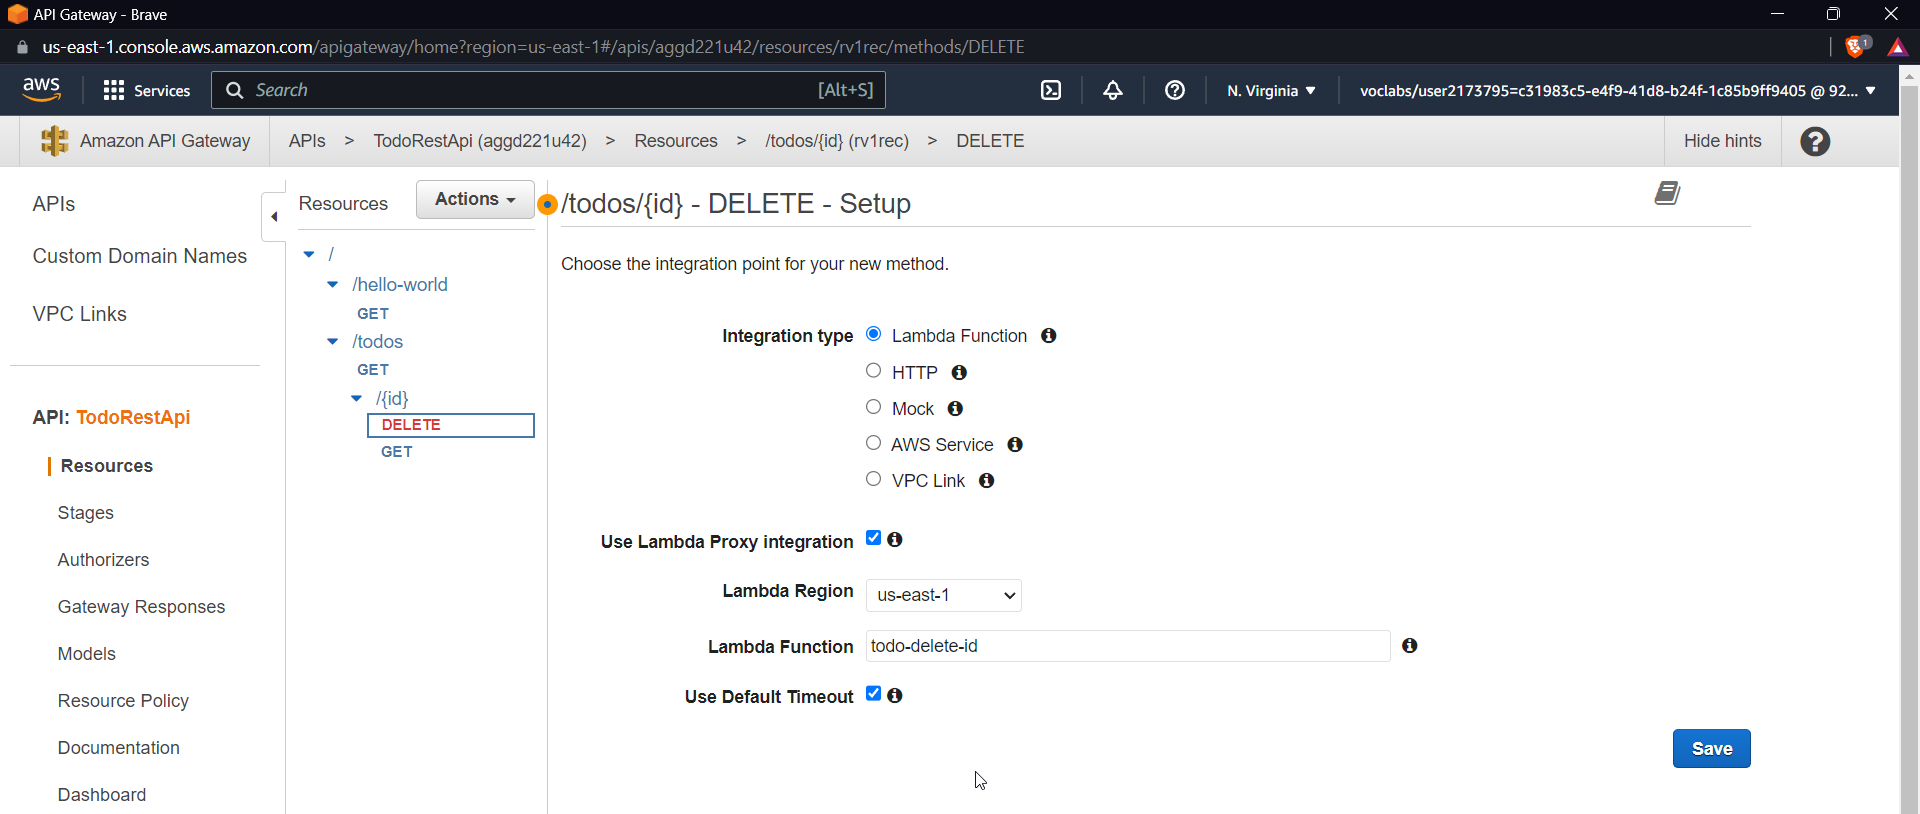
DELETE method to remove an item from the table
Using this method we will be able to delete any item from a table by providing an Id
 const AWS = require('aws-sdk');
 const dynamoDb = new AWS.DynamoDB.DocumentClient();

 exports.handler = async (event, context) => {
   const params = {
     TableName: 'todos',
     Key: {
       id: event.pathParameters.id
     }
   };

   try {
     await dynamoDb.delete(params).promise();
     return {
       statusCode: 200,
       body: JSON.stringify({ message: 'Todo deleted successfully' })
     };
   } catch (error) {
     return {
       statusCode: 500,
       body: JSON.stringify(error)
     };
   }
 };
Like above-described methods follow similarly for the DELETE method too, create a function give it a delete-todo name and paste the above code, then
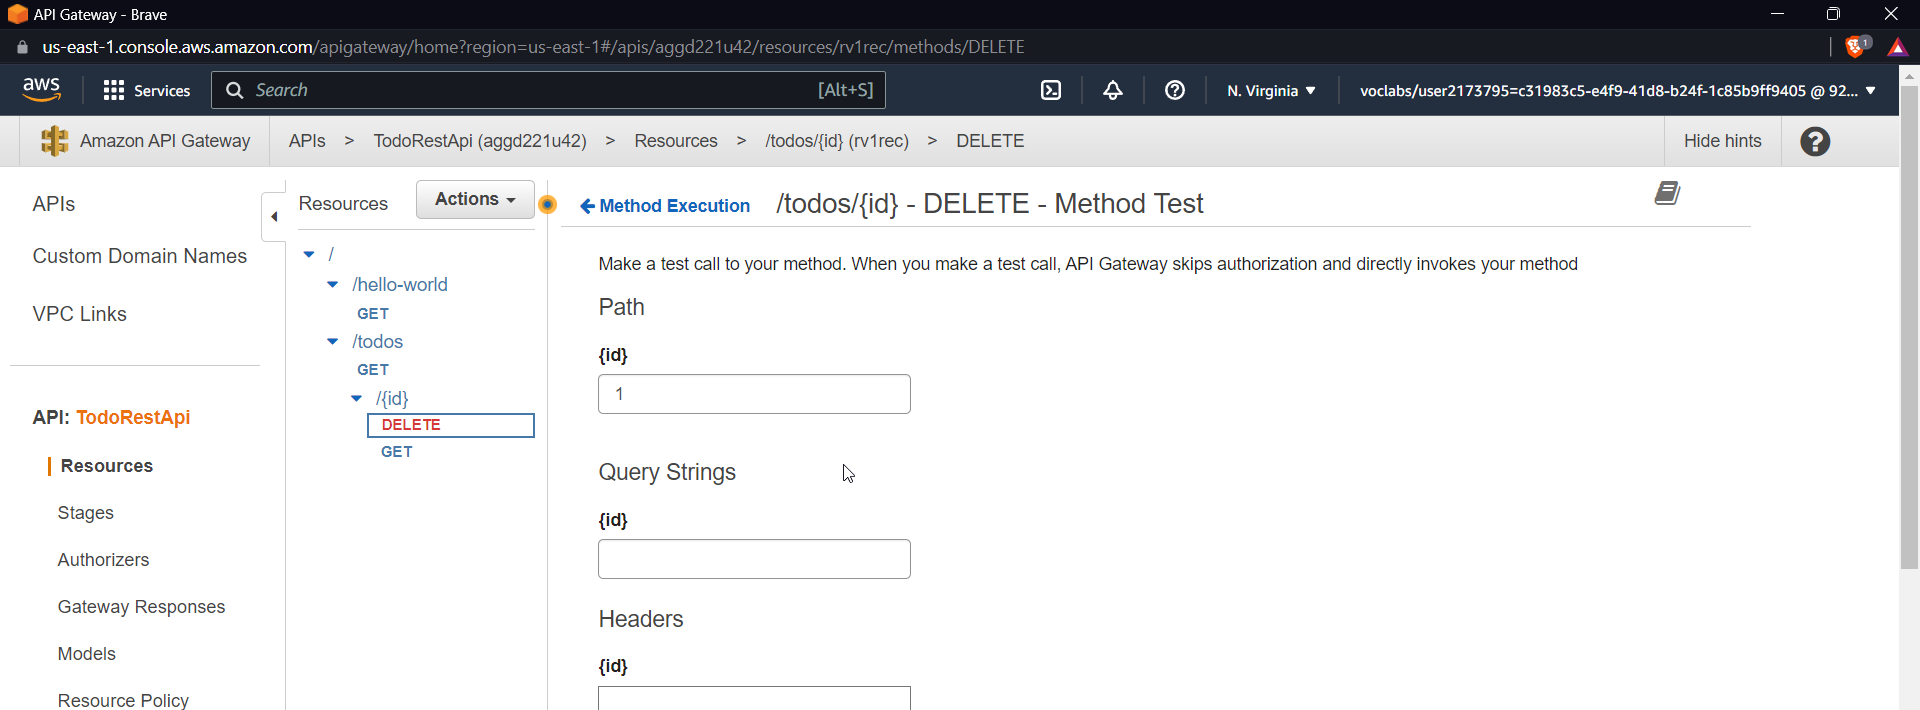
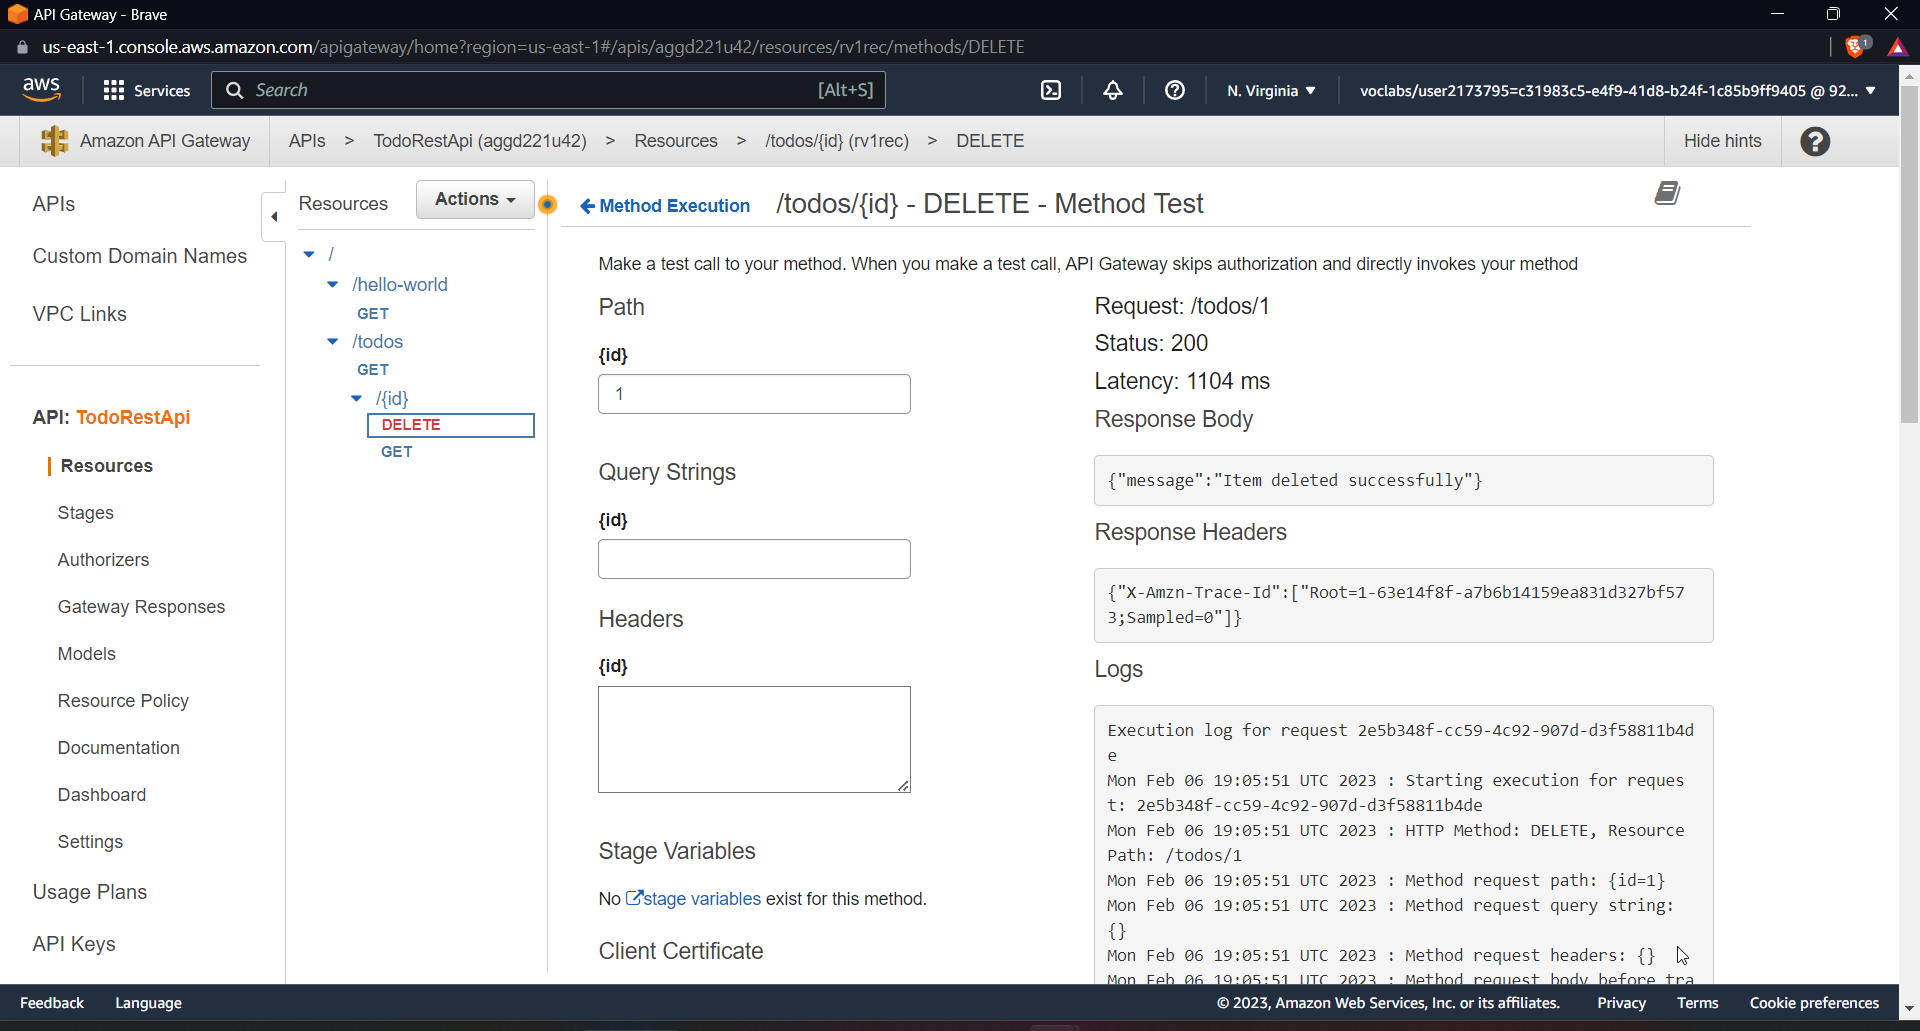
inside API Gateway create a new method inside {id} , DELETE method and further test it using id as 1 in the query parameter.
It will show a 200 OK response
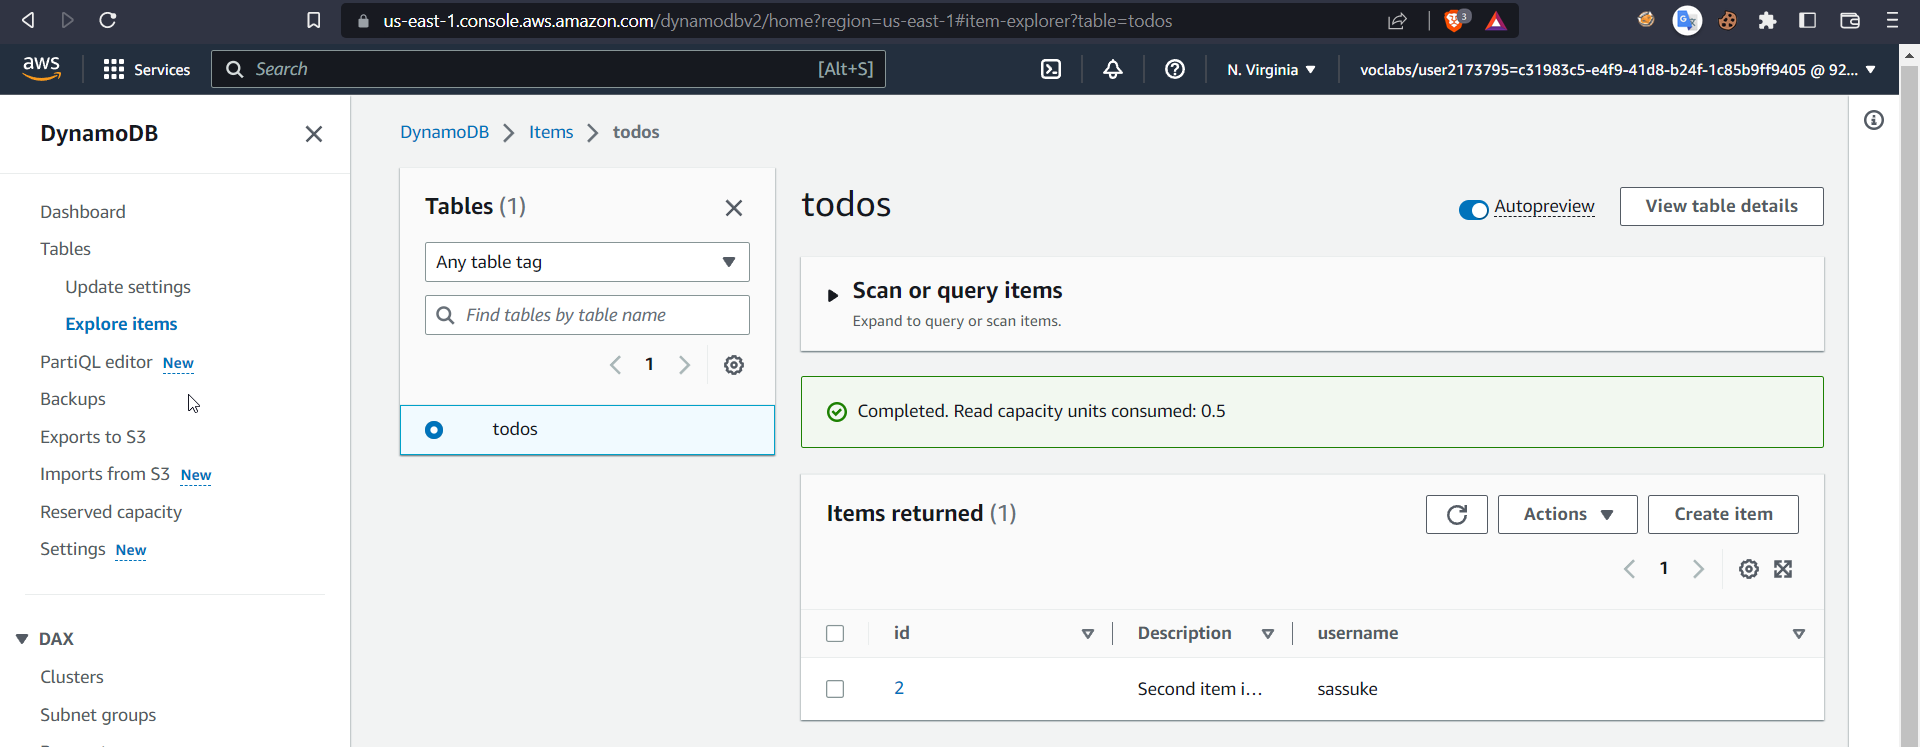
Now we can also check this in the dashboard of our table, item 1 has been successfully deleted.
PUT (Update) Method
This method will be used to update a certain item within the table using its id
  const AWS = require('aws-sdk');
  const dynamo = new AWS.DynamoDB.DocumentClient();

  exports.handler = async (event) => {

      const todo = JSON.parse(event.body)

      /*Calculate (random) and set id for todo */
      if(!todo.id || todo.id === '-1')
          todo.id = Math.random() * Math.pow(10,16) + ''

      var params = {
        TableName : 'todos',
        Item: todo
      };

      /*Insert todo */
      const result = await dynamo.put(params).promise();

      const statusCode = 200

      const headers = { "Access-Control-Allow-Origin":"*" }

      const response = { statusCode, body:'', headers };

      return response;
  };
From the above code, we will be able to update a certain item within our todos table, create a function and deploy the above code.

Now go to API Gateway and add a PUT method inside {id} using the above lambda function
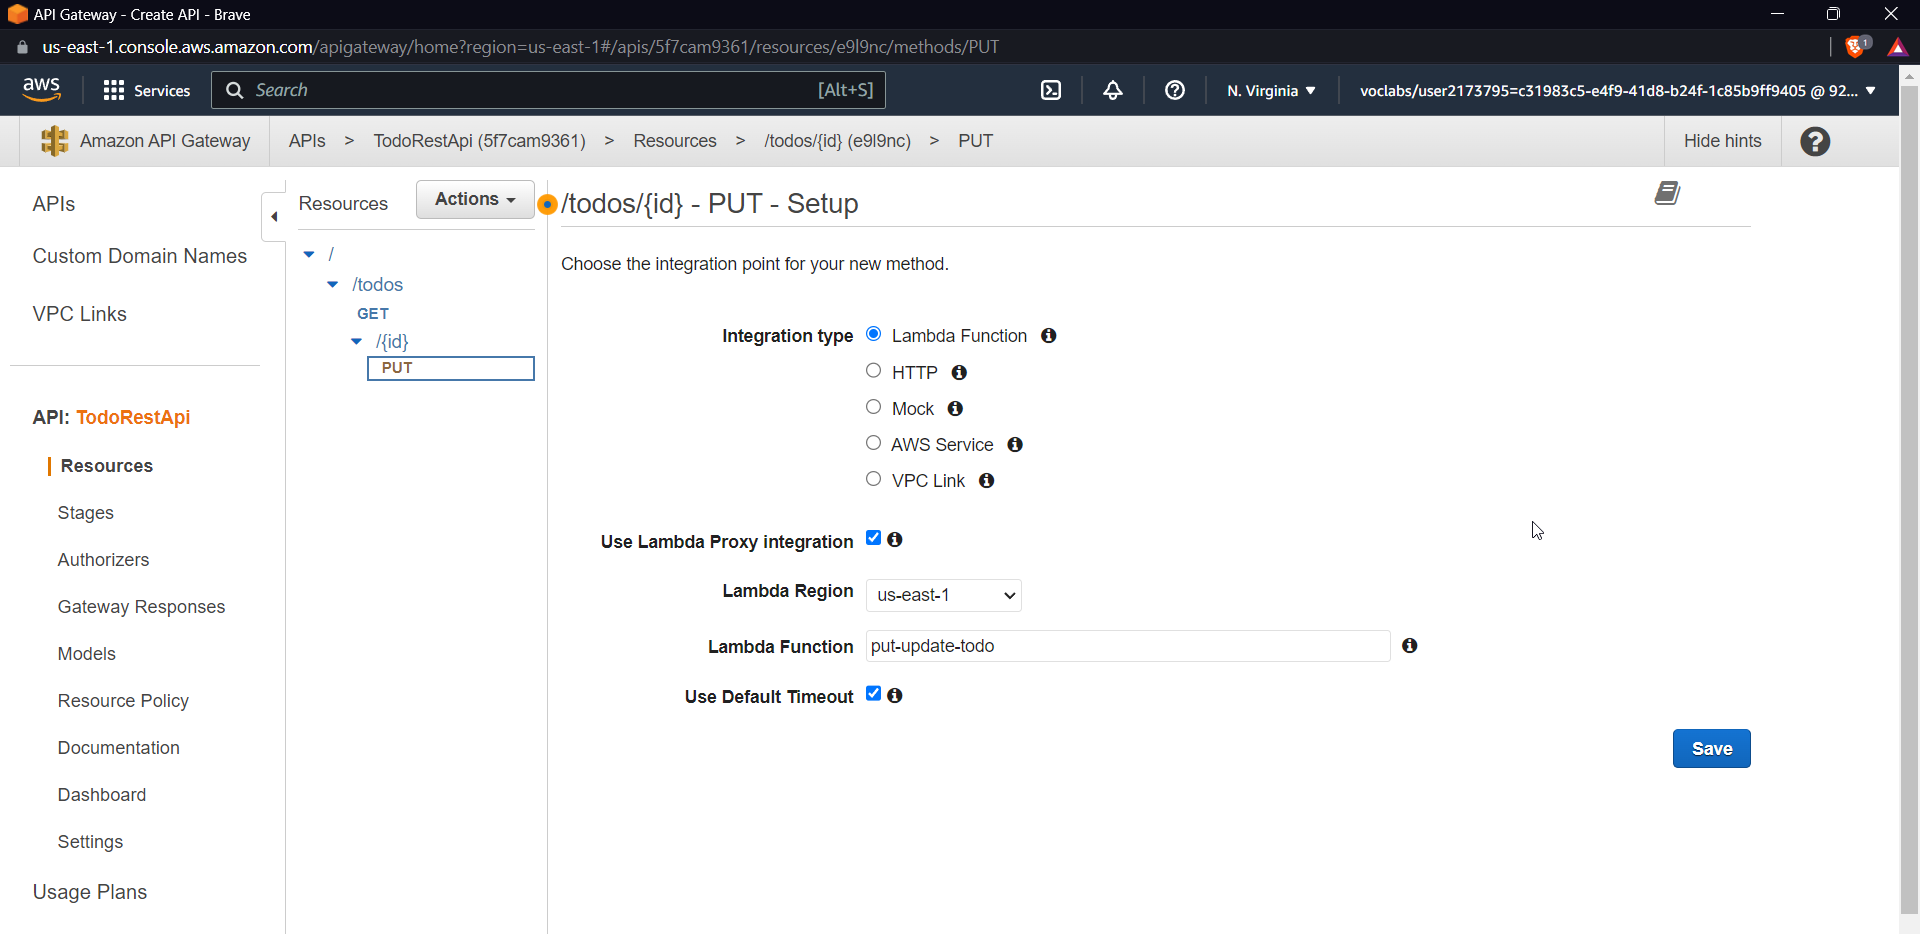
To test the PUT method we need to add a request body that will have an id, username and description.
{
   "id":"4",
   "username":"jinx",
   "description":"PUT sucess"
}
Add the above code to the request body
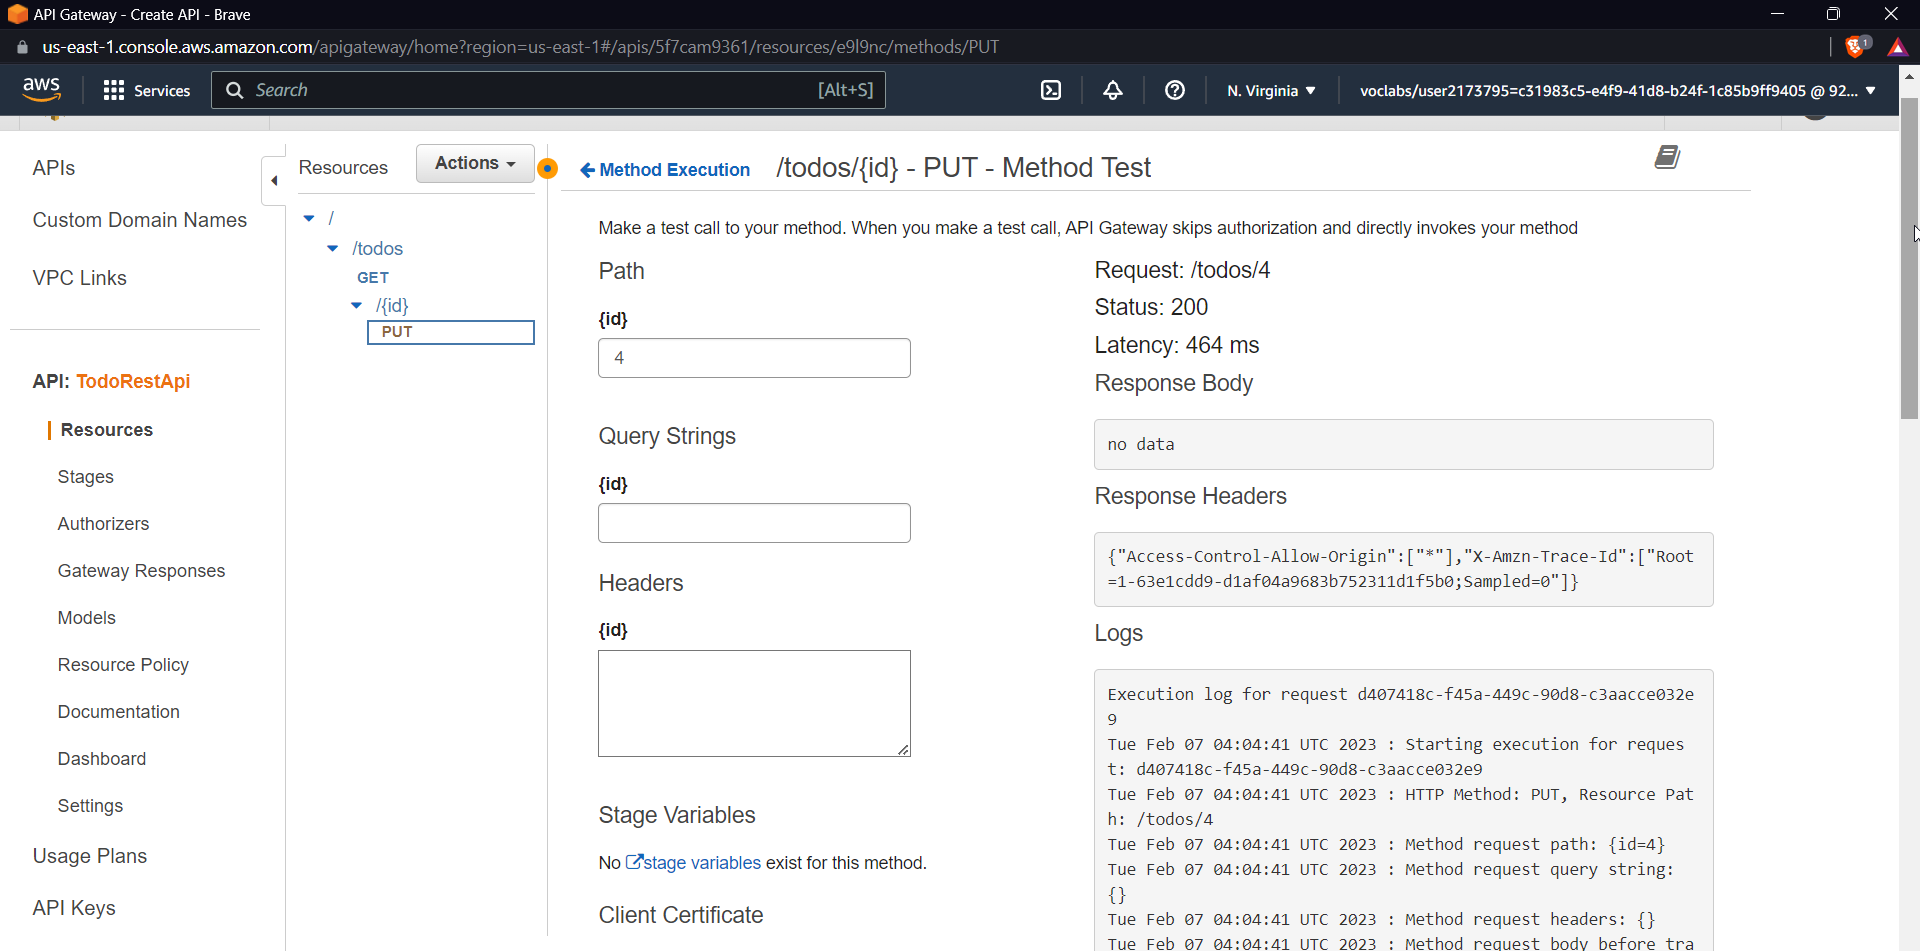
You will see that the item is successfully updated with a 200 OK
Finally, you can also try a POST method which will upload any new item which we can add to the request body
Deploy and test REST API
For FInal step deploy the API and now we can test our Private API
Use to resource policy inside our API Gateway dashboard use the following access policy
{
    "Version": "2012-10-17",
    "Statement": [
        {
            "Effect": "Allow",
            "Principal": "*",
            "Action": "execute-api:Invoke",
            "Resource": [
                "execute-api:/*"
            ]
        },
        {
            "Effect": "Deny",
            "Principal": "*",
            "Action": "execute-api:Invoke",
            "Resource": [
                "execute-api:/*"
            ],
            "Condition" : {
                "StringNotEquals": {
                    "aws:SourceVpce": "vpce-0645479dff6d52cb7"
                }
            }
        }
    ]
}
Click on Actions and deploy API, Select deployment stage as New Stage and Stage name as Dev
You will get a unique invoke url

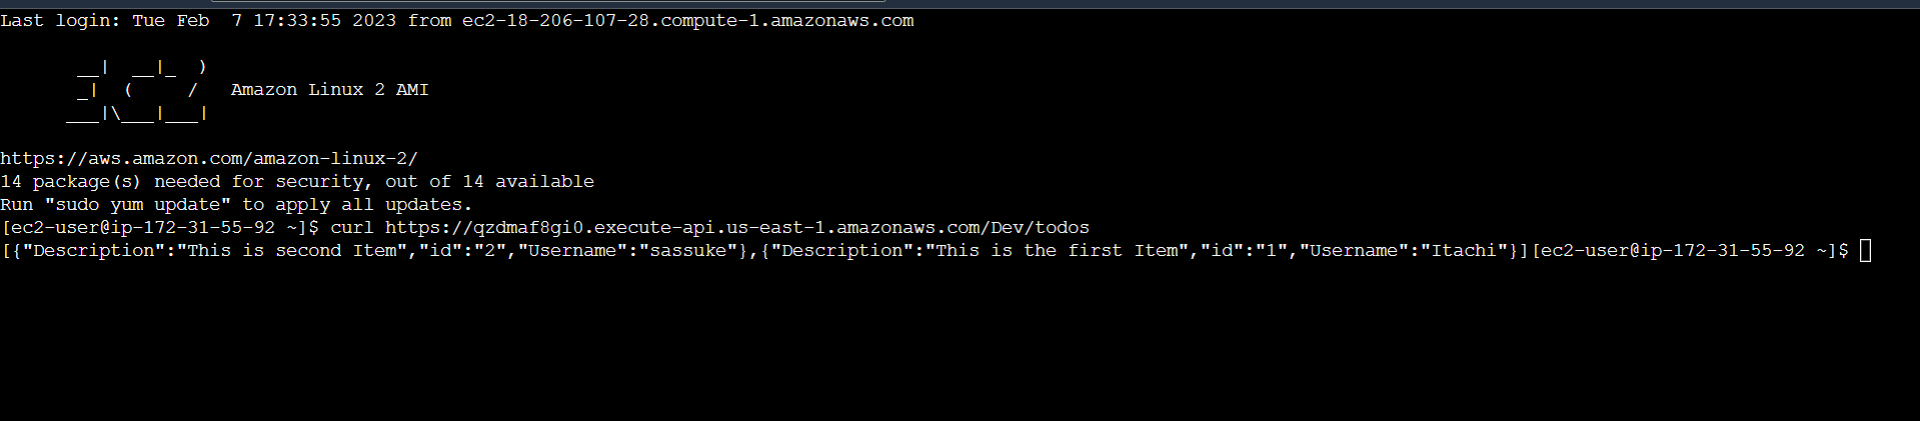
Now create a EC2 instance a t2 micro would also do the job, connect with the instance and now use the URL here using curl command
If we try to connect this from any other system that is not from our VPC it would give an error which can be confirmed from the following image

We can finally conclude that we have successfully built a project that involved building a private rest API using lambda functions and an Amazon API Gateway following a serverless approach that would take into account various factors such as reliability, scalability, and security.


